Friday, April 4, 2014

FFwD - Visitandine


Today´s recipe for the French Fridays with Dorie group is ”Visitandine” – a simple white cake with a small-grained crumb.


The recipe for this French Visitandine is very similar to the recipes for Coconut Friands that we baked back in April 2012 and Financiers that we baked back in April 2013. These are all my favorite kinds of cakes. Simple, yet elegant. Not cloyingly sweet and very versatile.


You can use all kinds of fancy and pretty baking pans for these cakes. There are the madeleine molds, financier or tartlet pans or even muffin pans but then there are also pie plates or springform pans. I decided to divide the batter in two and used heart-shaped pans.


Dorie mentions in her recipe that the her friend Claudine Martina , the author of this recipe, likes to use a “plat à tarte” because using it, the cake bakes into "a nice flat galette”. That is exactly what I wanted my cakes to look like, nice flat and elegant.


The recipe is fairly simple, all you require is egg whites, plain flour, fine sugar, a pinch of sea salt and melted unsalted butter – as usual, I substituted the vanilla extract with pure vanilla sugar. Other than that, no changes to the recipe.


The name of the cake goes back to the “Visitandine” or “Visitation Order” (in German “Orden von der Heimsuchung Mariens”) formally the Congregation of the Visitation of Holy Mary, a Roman Catholic order of nuns founded by St. Francis de Sales and St. Jane Frances de Chantal at Annecy, France, in 1610. The order was originally destined for charitable work, visiting and caring for the sick and poor in their homes, as well as for prayer. To this day, many Visitandines are devoted to education.

Apparently the nuns baked these simple cakes to sustain them during times of famine – the egg whites in the batter were considered to be a good source of protein.


Since I was quite taken by the elegant look of these cakes, I did not really want to serve them with whipped cream or turn them into strawberry shortcakes – I chose to dust them liberally with confectioners´ sugar to showcase the simplicity and elegance of these cakes. And since we are in the midst of rhubarb season around here and since I am a devoted rhubarb addict and love to use this wonderful spring vegetable (not fruit) in my baking (you might want to take a look here or here), I served the Visitandines with a very seasonal rhubarb-strawberry compote and some more fresh strawberries. Perfect!


To see how much the other members of the French Fridays with Dorie group enjoyed today´s recipe, please click here.

If you happen to own Dorie Greenspan´s book “Around my French Table”, you will find the recipe for ”Visitandine" on pages 436-37.


Thursday, April 3, 2014

Easter Yeast Wreath - Oster-Hefekranz


Traditionally, we bake a lot of Braided Easter Yeast Breads around here. For many people Easter celebrations are not the same without a Yeast Braid for Easter breakfast. A freshly baked, homemade pastry like this is also a beautiful and delicious gifts to bring along to an Easter invitation or for Easter Brunch with family or friends.
Traditionell werden hier bei uns in der Osterzeit jede Menge Hefezöpfe gebacken. Ein Hefezopf gehört für viele Menschen zum Osterfrühstück einfach dazu. Schön luftig gebacken ist das Hefegebäck auch ein beliebtes, leckeres Mitbringsel zur Ostereinladung oder zum Osterbrunch bei Familie oder Freunden.  


It seems that Easter is a time for showing off on the home baking front, and who is to argue with that, certainly not me. Therefore, since Easter is only a few weeks away,  I am getting a head-start on my springtime and Easter baking with this lovely Easter Yeast Wreath. However, I am unlikely to be alone in this quest. Across many cultures, people celebrate spring and Easter with rich indulgences whipped up from butter, sugar, fruits, nuts, spices and that essential symbol of new life, eggs, whether they be natural or dyed.
Ostern ist ja bekanntermaßen eine Zeit für ein wenig Stolz auf die eigenen, selbstgemachten Backenwaren. Da möchte ich natürlich auch nicht hinten anstehen und feiere diese Woche schon mal ein wenig die vorösterliche Zeit mit einem wundervollen Hefekranz. Und damit bin ich sicherlich nicht allein. In vielen Kulturen feiert man den Frühling oder Ostern mit besonderen Backwaren, die reich an Butter, Zucker, Früchten, Nüssen, Gewürzen und natürlich Eiern sind. Denn speziell Eier, bunt oder ungefärbt, sind das Symbol neuen Lebens und des Neuanfangs. 


So, I will begin my Easter baking with a Yeast Wreath. The “Hefezopf” (literally "yeast braid") and the “Hefekranz” (literally "yeast wreath") are breads from Switzerland, southern Germany, Austria and South Tyrol. Typically, both Hefezopf and Hefekranz consist of three braided dough-pieces. While the Hefezopf is a loaf only consisting of a braid, the Hefekranz is bent into a wreath. Both are baked until they have a golden color.
Also, dann beginne ich mal meine Osterbäckerei mit einem Hefekranz. Der Zopf oder Hefekranz ist ein besonders geformter Kuchen aus gesüßtem, meist fetthaltigem Hefeteig. Nachdem der Hefeteig für den Zopf schön aufgegangen ist, wird er in drei oder mehr Teile aufgeteilt, die zu Strängen gerollt werden. Aus den Teigsträngen wird ein Zopf geflochten, der auch zu einem Kranz geschlossen werden kann. Anschließend wird der Zopf oder Kranz dann goldgelb gebacken.


As a special ingredient, I baked my Easter pastry with a wonderful spice, the so-called "Hefezopf Gewürz" (meaning "yeast bread spice"), a seasoning mix of cardamom, lemon zest, mace, cinnamon and turmeric. Scandinavian yeast pastries are also known to include quite a bit of cardamom and cinnamon.

 As I was preparing my yeast dough, it already smelled wonderful while I kneaded it. When the wreath was baked, it did not only have a wonderful, slightly yellowish color but it also tasted the way only homemade sweet yeast breads taste, warm and aromatic from the spices and wonderfully buttery too. The quantity of the spice blend that I used was specified on the package as “one heaped teaspoon per 500 grams of flour” - for this recipe with 750 grams of flour I used two level teaspoons, exactly the right dose.

 If you cannot get the spice blend, you can also use one teaspoon ground cardamom or grated lemon zest, some cinnamon, a little freshly grated nutmeg, or 2 teaspoons pure vanilla sugar, depending on your taste, of course. You can also omitted the spices, zest or vanilla altogether – the bread will still be delicious.
Als besondere Zugabe hat mein Ostergebäck heute ein wunderbares Gewürz, das sogenannte „Hefezopf Gewürz“ von der Karl Müller Gewürzmanufaktur in Wiesbaden. Das ist eine Gewürzmischung aus Kardamom, Zitronenschale, Muskatblüte, Zimt und Kurkuma. Von skandinavischen Hefegebäcken kennt man ja die Zugabe von Kardamom und auch Zimt.

Als ich diese Woche die Gewürzmischung ausprobiert habe, hat der Teig schon bei Kneten toll geduftet. Nach dem Backen erhielt der Zopf nicht nur einen wunderbaren, leicht gelblichen Ton, sondern schmeckte auch ausgesprochen gut. Die Mengenangabe für das Gewürz ist ein gehäufter Teelöffel pro 500 Gramm Mehl. Für dieses Rezept mit 750 Gramm Mehl habe ich deshalb zwei gestrichene Teelöffel genommen, genau die richtige Dosierung.

Wenn man die Gewürzmischung nicht bekommt, kann man auch 1 Teelöffel Kardamom oder geriebene Zitronenschale, etwas Zimt, ein wenig frisch geriebene Muskatnuss oder 2 Teelöffel Bourbon-Vanillezucker nehmen, je nach Geschmack eben. Man kann die Gewürze, die Zitronenschale oder den Vanillezucker aber auch ganz weglassen.


The Yeast Wreath or the Yeast Braid gets a shiny finish if you brush the outside with an eggwash and some milk just before baking. If you want, you can sprinkle the yeast braid with some pearl sugar or with sliced almonds or even glaze it after baking with a sugar icing. Often, the yeast braid also contains raisins or chocolate and can be filled with various fillings such as nuts or poppyseeds.

After cooling, the Hefekranz is cut into thick slices, which are often enjoyed with with butter, jam and honey.
Besonders schön glänzend wird der Hefekranz und auch der Hefezopf, wenn man ihn vor dem Backen mit Ei und etwa Milch bestreicht. Wenn man möchte, kann man den Hefezopf auch mit Hagelzucker oder mit gehobelten Mandeln bestreuen oder nach dem Backen mit Zuckerguss glasieren. Oft wird der Hefezopf auch mit Rosinen oder Schokolade verfeinert oder mit verschiedenen Füllungen wie beispielsweise Nüssen oder Mohn gefüllt.

Nach dem Abkühlen wird der Hefekranz in Scheiben geschnitten, die vor dem Verzehr mit Butter, Marmelade und Honig bestrichen werden können.


Easter Yeast Braid

Ingredients for the Yeast Wreath
  • 250 ml milk, lukewarm
  • 40 grams fresh yeast (or 1 tbsp dry yeast)*
  • 750 grams strong flour
  • 2 tsps yeast bread spice mix (optional)**
  • 110 grams superfine sugar
  • 2 eggs, (M), free-range or organic
  • 1 ½ tsps fine sea salt
  • 125 grams unsalted butter, melted
  • some flour for the work surface

Ingredients for the Topping
  • 2 tbsps pearl sugar
  • 1 egg (M)
  • 1 tbsp milk

Additional
  • one round baking pan (33 cm) or a baking sheet
  • some parchment paper
Oster-Hefezopf

Zutaten für den Zopf
  • 250 ml Milch, warm
  • 40 Gramm frische Hefe (oder 1 TL Trockenhefe)
  • 750 Gramm Mehl (Typ 550)
  • 2 TL Hefezopf-Gewürz*
  • 110 Gramm feinster Zucker
  • 2 Eier ( M), Freiland oder Bio
  • 1 1/2 TL feines Meersalz
  • 125 Gramm ungesalzene Butter, geschmolzen
  • Mehl zum Bearbeiten

Zutaten für den Belag
  • 2 EL Hagelzucker
  • 1 Ei (M)
  • 1 EL Milch

Außerdem
  • ein große runde Backform (33 cm) oder ein Backblech 
  • etwas Backpapier


Preparation of the Braid
  1. Heat the milk until lukewarm.
  2. Crumble the yeast cake and mix it with the milk until it has dissolved. NOTE: fresh yeast is available in the US here.
  3. In a large mixing bowl, whisk together the flour, the spice mix (if using), the milk with the dissolved yeast, the sugar, eggs, the salt, and the butter. Using the dough hooks of your electric mixer, mix the dough at slow speed for about 3 minutes, then at high speed another 5 minutes.
  4. Gradually add the butter to the dough. Knead at high speed for another 5 minutes until the dough is shiny.
  5. Cover the mixing bowl with a humid tea towel and let it rest for about an hour in a warm and draft-free place.
  6. On a lightly floured surface knead the dough by hand for a minute or two. Divide the dough into thirds and let them rest, covered, for about 10 minutes.
  7. Roll each dough piece into a 90 cm-long rope and braid.
  8. Transfer the braid onto the prepared baking sheet, shape the braid into a wreath,  cover and let rest for another 45 minutes.
  9. Pre-heat your oven (200 degrees or 180 degrees convection).
  10. In a small bowl, whisk together the egg with the milk.
  11. Brush the wreath with the egg mix, sprinkle with pearl sugar and bake in the pre-heated oven for about 25 minutes. If the wreath is getting too dark, cover it loosely with some aluminum foil.

And should there be any leftovers, you can always warp them in foil – the pastry will stay fresh for a few days. And should the leftovers actually get stale, you can prepare a baked bread puddings or some delicious French toast, filled or plain. 
Zubereitung des Hefezopfs
  1. Milch lauwarm erwärmen. 
  2. Hefe zerbröseln und in der Milch auflösen.
  3. In eine große Schüssel das Mehl geben, das Hefezopf-Gewürz, die Hefemilch, den Zucker, die Eier, das Salz und Butter hinzufügen und mit den Knethaken der Küchenmaschine bei niedriger Geschwindigkeit 3 Minuten kneten. Danach das Tempo erhöhen und weitere 5 Minuten kneten. 
  4. Butter nach und nach unter den Teig kneten. Bei hohem Tempo weitere 5 Minuten zu einem glatten Teig kneten.
  5. Schüssel mit einem feuchten Geschirrtuch abdecken und an einem warmen Ort 1 Stunde gehen lassen.
  6. Den Teig auf einer leicht bemehlten Arbeitsfläche durchkneten. Den Teig dritteln und zugedeckt 10 Minuten ruhen lassen.
  7. 3 Stränge von je 90 cm Länge ausrollen und locker flechten. 
  8. Den Zopf auf ein mit Backpapier ausgelegtes Backblech legen, zu einem Kranz formen und zugedeckt 45 Minuten gehen lassen.
  9. Den Backofen vorheizen (200 Grad Elektro/180 Grad Umluft).
  10. Das Ei mit der Milch verquirlen.
  11. Den Hefekranz mit dem Ei bestreichen. Hagelzucker darüber streuen und im vorgeheizten Backofen bei 200 Grad auf der 2. Schiene von unten 25 Minuten backen. Die letzten 10 Minuten eventuell mit Alufolie abdecken.

Sollte der Hefekranz nicht ganz aufgegessen werden, kann man die Reste in Alufolie wickeln - so bleibt er noch ein paar Tage frisch. Aus altbackenem Hefekranz lassen sich aber auch leckere süße Hauptgerichte zubereiten, wie zum Beispiel Ofenschlupfer oder Arme oder Reiche Ritter.


Stay tuned – there will be more fabulous Easter treats making a delicious appearance on this blog very soon!


Sources:
for the Yeast Bread Spice Mix here
 for the fresh yeast in the US here


Es werden in den nächsten Tagen weitere fantastische Osterspezialitäten vorgestellt, also es lohnt sich öfter mal hier reinzuschauen!


Quelle:
das Hefezopf Gewürz kann man hier bestellen.


Saturday, March 29, 2014

FFwD - Vegetable barley soup with the taste of little India


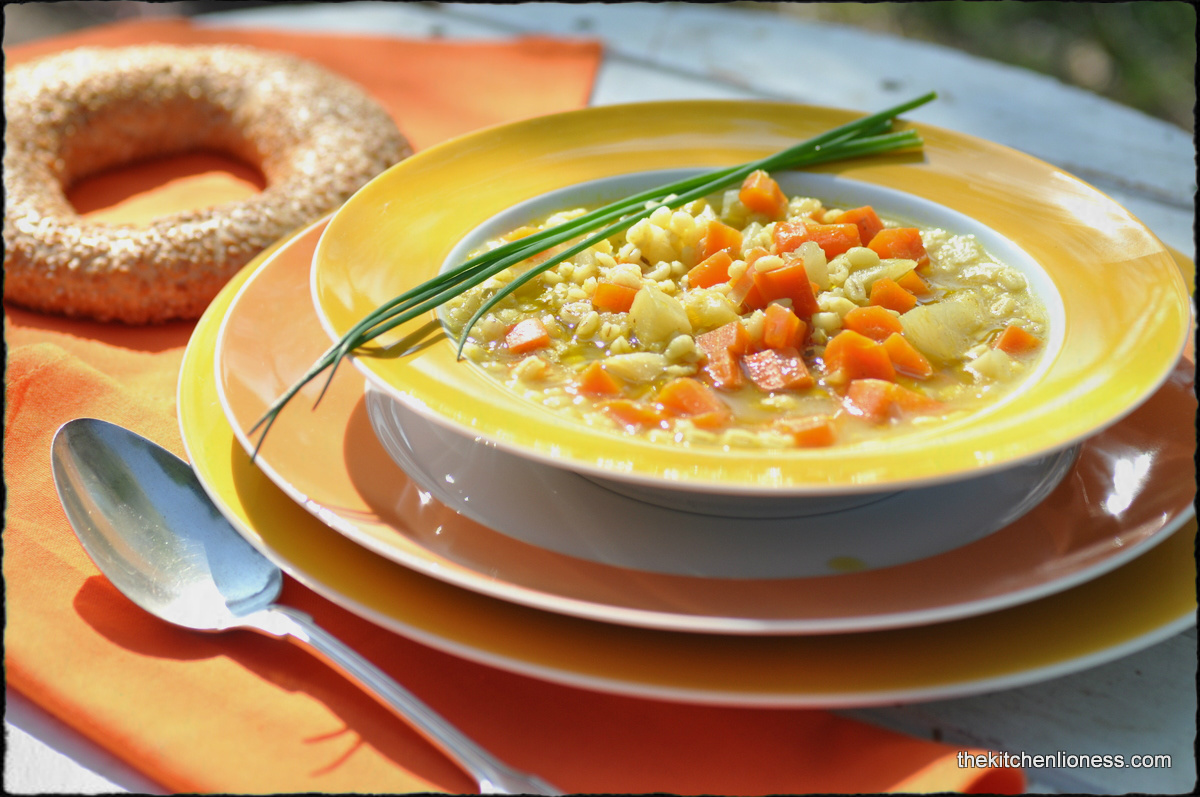
Today´s recipe for the French Fridays with Dorie group is ”Vegetable barley soup with the taste of little India” – a basic root vegetable soup with barley and surprising warm spices.


The soup base is made up of onions, garlic, sweet carrots, and parsnips - since I could not find parsnips at this time of year, I used small white turnips instead. Then there is fresh ginger, freshly grated black pepper, sea salt, turmeric, and garam masala.


Tumeric is a bright yellow spice that comes from the rhizome of a plant in the ginger family. It is sometimes available fresh, but is usually sold dried and ground, in powder form. Turmeric has anti-oxidant properties which is why it has long been an Indian home remedy for many illnesses. Turmeric is often a component of curry powder and it  also gives chutneys and pickles, and this soup,  their distinctive yellow tinge. It has a slight peppery aroma and a musky taste.


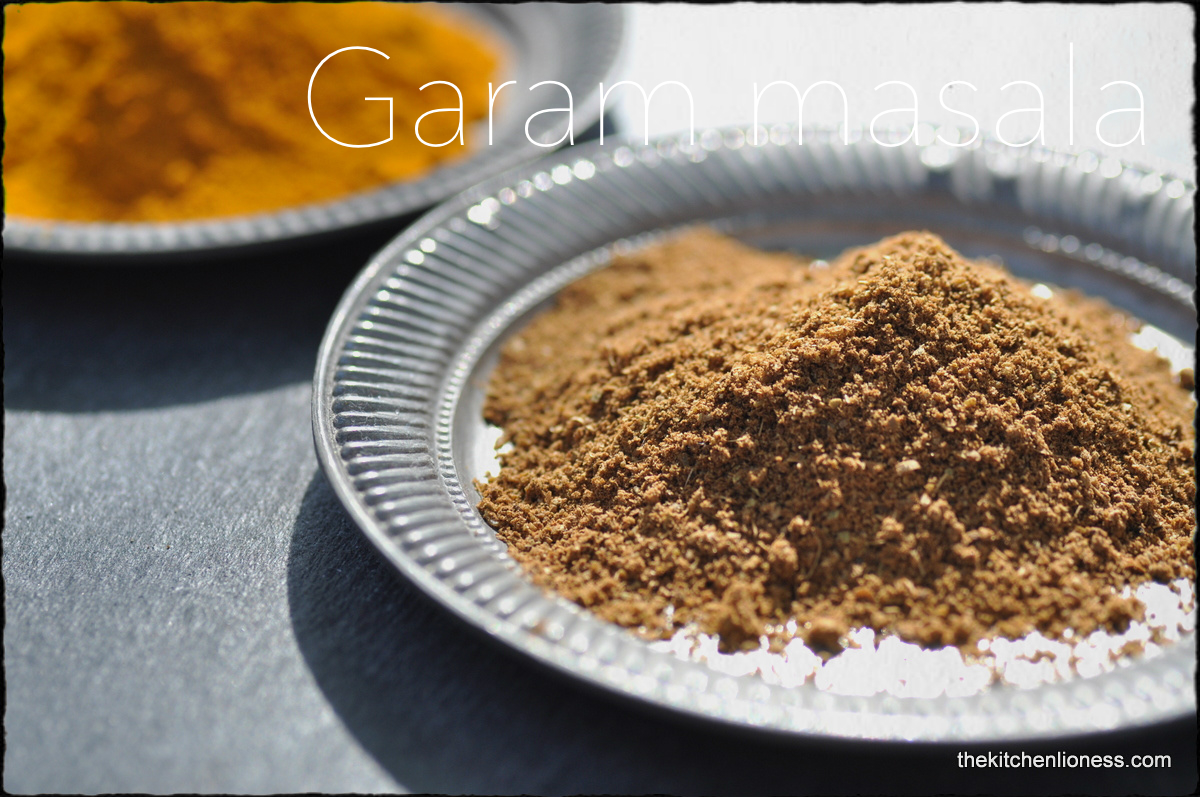
Garam masala is an aromatic mixture of ground spices used as a base in many Indian dishes (“masala”means spice). The proportion of spices changes according to the dish being cooked but typical ingredients are cumin, coriander, cardamom, cinnamon, cloves and black pepper, with substitutions or additions made depending on whether the dish includes meat, vegetables or fish. You can grind your own garam masala according to your tastes, but it can also be bought ready-made.


The spices are sautéed together with the vegetables in some lovely olive oil, that takes about 15 minutes and it takes the raw edge off the spice and makes for a harmonious soup starter. After the veg are softened, all that is left to do is add the homemade chicken broth and the soup barley, Barley is divided into three categories around here, small, medium and large – I used the large one, called soup barley which needs a good 30-minute simmer before being puffed and ready to eat.


I must say that the taste of this soup was surprising, in a nice way, as we are so used to eating barley soup with lots of veg and bacon and sometimes a bit of smoked sausage – well, a very German kind of way – but we liked how the soup smelled while it cooked and how it tasted when we ate it for lunch, on a very bright and sunny day that felt like early summer.Thanks to Dorie, a new taste experience indeed, one that I would not have dared to try before I came across this weeks´ assignment.


To see how much the other members of the French Fridays with Dorie group enjoyed today´s recipe, please click here.

If you happen to own Dorie Greenspan´s book “Around my French Table”, you will find the recipe for ”Vegetable barley soup with the taste of little India" on page 89.


Wednesday, March 26, 2014

"River Cottage Veg Everyday" - Soup, Aubergines, Radishes & A Nomination for a James Beard Award


For today´s recipes in my River Cottage Veg Everyday series, I chose the "Creamy mushroom soup", a rich, earthy flavored soup, “Roasted aubergine boats”, that I served with thick Greek yogurt and a wild garlic pesto, and “Radishes with butter and salt” a colorful, springtime appetizer. All these wonderful dishes are part of my sixteenth post in my series.


Let me take the opportunity to mention that River Cottage Veg Everyday by Hugh Fearnley-Whittingstall has been nominated for a James Beard Award! The awards cover all aspects of the industry and are the highest honor for food and beverage professionals. River Cottage Veg Everyday has been nominated for the Vegetarian category called “Vegetable Focused and Vegetarian”. In 2012, the book was already chosen as winner of Best Cookbook at the Observer Food Monthly Awards.


The awards are presented each spring at the Lincoln Center and past winners of the James Beard Awards include Nigel Slater and Yotam Ottolenghi. Read more about the award and the full shortlist here.


River Cottage Veg Everyday is divided into twelve manageable chapters, with the following short and clear titles: Comfort food & feasts, Hearty salads, Raw assemblies, Hefty soups, Bready things, Store-cupboard suppers, Pasta & rice, Mezze & tapas, Roast, grill & barbecue, Side dishes, Store cupboard, and Veg on the go. The chapters are therefore divided by method of preparation rather than by season, ingredient or, course.


The book includes over 200 recipes, such as Chard and new potato curry, Rocket, fennel and puy lentil salad, Beetroot with walnuts and cumin, Cucumber and lettuce vichyssoise, Magic bread dough, Caponata, and Spiced spinach and potatoes.


All recipes can be easily prepared as the recipes are precise and clear and never longer than a page. For each dish there is a recipe page with a short introduction and then there is always also a picture page.  Personally, I enjoy looking at the picture while reading through the recipe, the pictures are meant as guides and looking at them gives me a better feel for a recipe and thereby speeds up the preparation process as I do not have to figure out how a finished dish might look like.


It is quite possible to use the book as a reference book while putting together a shopping list, I always find a vegetable side dish or main dish that I want to try, as the book is full of new and fresh ideas on how to prepare vegetables in new ways as well as in updated traditional ways.


The ingredients that are required for the various dishes can easily be found at the greengrocers, farmers´ markets and in stores around here. When choosing a recipe, I always make sure to stay true to my personal credo of “cooking as seasonal as possible and with as many regionally available products as possible”, that way, finding the vegetables and herbs that I need for a dish, has always been rather hassle-free.


Let´s not forget that the recipes that I have prepared so far, have all proven to be rather “family-friendly”. If you are a regular reader of my blog, you might have noticed that I do not have a shortage of taste testers at home, the youngest being five years old. While some recipes meet with a bit more enthusiasm than others, they have all been received rather well. I consider this aspect to be another big advantage of this book – the reality of life is that I cook for a family and I am as quite pleased when I have a cookbook such as this one with lots of healthy and delicious recipes that will appeal to adults as well as children.


“Call me power-crazed, but I`m trying to change your life here. The object of the exercise is, unambiguously, to persuade you to eat more vegetables. Many more vegetables. Perhaps even to make veg the mainstay of your daily cooking. And therefore, by implication, to eat less meat, maybe a lot less meat, and maybe a bit less fish too. Why? We need to eat more vegetables and less flesh, because vegetables are the foods that do us the most good, and our planet the least harm.” (Hugh Fearnley Whittingstall)


So, of course, I am keeping my fingers crossed for that well-deserved award but no matter whether this book will win in its category or not, it is one of my personal favorite, everyday, go-to, family-friendly vegetable cookbooks these days. And I will continue my series on the recipes and cook my way through the book. Anyone out there care to join me in my quest – that would be quite nice!

If you own the English edition of this vegetable cookbook by Hugh Fearnley-Whittingstall, called "River Cottage Veg Everyday", you will find the recipe for the “Creamy mushroom soup” on page 152  in the chapter on “Hefty soups”. The recipe for “Roasted aubergine boats” can be found on page 344 in the chapter on "Roast, grill & barbecue" and the recipe for “Radishes with butter and salt” on page 102 in the chapter on “Raw assemblies”.

Friday, March 21, 2014

FFwD - Scallop and onion tartes fines


Today´s recipe for the French Fridays with Dorie group is “Scallop and onion tartes fines” – puff pastry tarts topped with caramely slow-cooked onions and slices of sweet-briny scallops.


Around here scallops are called “Jakobsmuscheln” and the French call them “coquilles saint-jacques” – both names translate to “James mussels”, making reference to the fact that the scallop shell is the traditional emblem of  Saint James, and is popular with pilgrims on the Way of Saint James to the apostle's shrine at Santiago de Compostela in Galicia (Spain). Medieval Christians making the pilgrimage to his shrine often wore a scallop shell symbol on their hat or clothes. What a nice name for such a delicious shellfish.


During our recent trip to Antwerp, Belgium, we visited a beautifully renovated Chapel and marveled at this colorful church window with a picture of Saint James wearing a cloak adorned with two Saint James mussel shells.

Onto today´s interesting recipe, which was inspired by puff pastry tarts served at Yves Camborde´s world-famous Paris bistro "Le Comptoir".


There are a number of different elements to these tarts that are best served while still warm.


To make the base for these tarts, you start off by cutting circles from ready-made puff pastry and baking them in the oven for about 15 minutes with a baking sheet to weigh them down. Dorie´s recipe calls for circles with about six inches in diameter, I went with three inches and served these tarts as appetizers.


For the topping you cook some bacon until it is crisp and then cut it into slices or cubes. Then you caramelize some onions (I used French shallots instead) for about twenty minutes and add the bacon to the onions. You top the puff-pastry rounds with the onion mixture and arrange thinly sliced scallops on top. Add some freshly ground black pepper, sprinkle with some lovely sea salt, and drizzle with some really good-quality olive oil. Leave the tarts for three to four minutes in the oven – just long enough to warm the scallops.


Scallops are an expensive but delicious shellfish with a delicate taste, available in a range of sizes. Scallops have two fan-shaped shells which contain rounds of firm white flesh, sometimes with the edible cream and orange coral (or roe) attached. Scallops can be steamed, fried or grilled but should be cooked gently and only for a very short time or their delicate flavor and texture will be spoiled. Take care not to over-cook them, they should be served as soon as they are firm and opaque. So the short time that these tarts stay in the oven is just perfect, five minutes were just enough to warm the scaollops in the most gentle of ways and bring out their natural salty-sweetness.


We all really liked this recipe – young taste testers included. The combination of the sweet caramelized shallots, the saltiness of the bacon, the crispy puff-pastry base and the tender slices of scallops were absolutely delicious – certainly a recipe worth making again.


To see how much the other members of the French Fridays with Dorie group enjoyed today´s recipe, please click here.

If you happen to own Dorie Greenspan´s book “Around my French Table”, you will find the recipe for “Scallop and onion tartes fines” on pages 168-69.


Thursday, March 20, 2014

Spring Rhubarb Tart - Frühlings-Rhabarbertarte


Today marks the first official day of spring and signals the beginning of nature’s renewal in the Northern Hemisphere. Why not celebrate the turn of the season by baking this lovely Spring Rhubarb Tart.
Heute am 20. März ist kalendarischer Frühlingsanfang, der erste Frühlingstag. Warum also nicht einmal den Beginn dieser schönen Jahreszeit zelebrieren und eine wunderbare Frühlings-Rhabarbertarte backen.


This tart has a puff pastry base and, of course, while homemade tastes best, you can certainly use store-bought puff pastry for this recipe. I do to. After you rolled out the puff pastry, you line it with marzipan and then top the marzipan with the wonderful, pinkish first rhubarb of the season.
Die Tarte hat eine Blätterteig-Basis. Obwohl selbstgemachter Blätterteig am besten schmeckt, kann man selbstverständlich gekauften Blätterteig in diesem Rezept verwenden. Das mache ich auch. Der Blätterteig wird nach dem Ausrollen erst mit Marzipan, dann mit dem ersten, herrlich rosa Rhabarber der Saison belegt.


Sometimes we do not realize that rhubarb is not a fruit at all but rather a vegetable, the stem of a perennial plant.

Rhubarb is packed with juice, which it releases readily when cooked or baked. And it is very acidic, of course, and needs sweetening. It is wonderful partnered with assertive flavors such as orange zest, vanilla, rosewater, lavender, ginger, honey, even hard, winter-proof herbs such as thyme or rosemary.
Manchmal vergessen wir, dass Rhabarber keine Frucht sondern ein Gemüse ist, eine Nutzpflanze aus der Familie der Knöterichgewächse.

Gekochter oder gebackener Rhabarber gibt jede Menge Saft bei der Verarbeitung ab. Er ist recht säuerlich und braucht somit immer etwas Süße. Glücklicher Weise finden wir jede Menge Aromen, die mit dem Rhabarber ganz wunderbar harmonieren, wie Vanille, Rosenwasser, Lavendel, Ingwer, Orangenschale, Honig und sogar Kräuter, z. B. Thymian oder Rosmarin.


When buying rhubarb, choose pert looking stems and avoid any limp ones. Wash and trim the rhubarb stems before use. Discard the leaves as they are poisonous. If using outdoor-grown rhubarb, remove any stringy outer layers. And always cut into equal-sized pieces to ensure even cooking or baking.

Rhubarb tastes absolutely fabulous in pies, cakes, fools, jellies and ice cream. Rhubarb also makes a good jam with strawberries, and tastes delicious made into a cordial flavored with rosewater.
Beim Kauf von Rhabarber sollte man darauf achten feste Stangen auszuwählen. Von eher müde wirkenden Stangen sollte man die Finger lassen. Vor der Weiterverarbeitung sollten die Stangen gewaschen und von Blättern und Wurzelresten befreit werden. Die unverträglichen Blätter muss man auf jeden Fall wegwerfen. Wenn man Freilandrhabarber verwendet, sollte man auch die äußeren Fäden entfernen. Wichtig ist, den Rhabarber immer in gleich große Stücke schneiden, damit er gleichmäßig gart oder backt.

Rhabarber schmeckt nicht nur unvergleichlich gut in Torten, Kuchen, Puddings, Gelees und Eis, man kann mit Rhabarber auch eine leckere Marmelade machen, zum Beispiel mit Erdbeeren. Rhabarber schmeckt auch köstlich wenn man ihn mit Rosenwasser zu einem Getränkesirup verarbeitet.


Spring Rhubarb Tart

Ingredients for the Tart
  • 1 vanilla pod
  • 50 grams superfine sugar
  • ½ tsp ground “Ceylon” cinnamon
  • a pinch of fine sea salt
  • 1 sheet puff pastry (homemade or store-bought)
  • some flour (for the work surface)
  • 6 to 8 stalks of rhubarb
  • 200 grams marzipan
  • 2 tbsps unsalted butter

Ingredients for the Glaze
  • 2 tbsps red currant jelly
  • 2 tbsps chopped natural pistachios

Additional
  • one baking sheet
  • parchment paper
Frühlings-Rhabarbertarte

Zutaten für die Tarte
  • 1 Vanilleschote
  • 50 Gramm feinster Zucker
  • ½ TL  "Ceylon" Zimt
  • eine Prise feines Meersalz
  • 1 Rolle Blätterteig (selbstgemacht oder gekauft)
  • etwas Mehl (für die Arbeitsfläche)
  • 6 bis 8 Stangen Rhabarber
  • 200 Gramm Backmarzipan
  • 2 EL Butter

Zutaten für die Glasur
  • 2 TL roter Johannisbeergelee
  • 2 TL gehackte Pistazien (ungesalzen)

Außerdem
  • ein Backblech
  • Backpapier


Preparation of the Tart and Glaze
  1. Preheat oven to 190 degrees Celsius.
  2. Line your baking sheet with parchment paper.
  3. Scrape out the vanilla seeds and mix with the sugar. Add the cinnamon and the pinch of salt. Reserve the vanilla pod.
  4. On a lightly floured work surface, roll out the puff pastry sheet to a rectangle (the size of your baking sheet). Trim the edges with a pizza cutter or sharp paring knife. Transfer to a baking sheet.
  5. Remove the stringy outer layer of the rhubarb and cut into equal sizes.
  6. Toss the rhubarb in a large bowl with the vanilla-sugar.
  7. Use a sharp paring knife to score a border around the pastry (do not cut all the way through).
  8. On the work surface, roll out the marzipan to a rectangle (the size of puff pastry sheet). Trim the edges and transfer on top of the puff pastry, making sure to stay within the border of the pastry.
  9. Place the rhubarb pieces on top of the marzipan, and dot with butter.
  10. Bake until pastry is golden and rhubarb is tender, 30 to 35 minutes.
  11. Remove from the oven.
  12. In the microwave or a small saucepan, heat jelly until melted. Brush rhubarb with glaze. Sprinkle with chopped pistachios.
  13. Serve tart warm or at room temperature, cutting into pieces with a serrated knife.
Zubereitung der Tarte und der Glasur
  1. Den Ofen auf 200 Grad (Elektro) oder 180 Grad (Umluft) Grad vorheizen.
  2. Das Backblech mit dem Pergamentpapier auslegen.
  3. Vanilleschote längs einschneiden, das Mark herauskratzen und mit dem Zucker mischen. Den Zimt und die Prise Salz hinzufügen. Die Vanilleschote verwahren (für eine spätere Verwendung).
  4. Auf der leicht bemehlten Arbeitsfläche den Blätterteig zu einem Rechteck ausrollen. Der Teig sollte die gleiche Größe wie das Backblech haben. Die Ränder mit einem Pizzaschneider oder einem scharfen Küchenmesser begradigen. Den Teig auf das Backblech legen.
  5. Wenn nötig, den Rhabarber schälen. In gleich große Stücke schneiden.
  6. Den Rhabarber in einer großen Schüssel mit dem Vanille-Zucker mischen und etwas marinieren lassen.
  7. Mit einem scharfes Messer einen Rand in dem Blätterteig markieren, dabei aufpassen, dass der Teig nicht eingeschnitten wird.
  8. Das Marzipan auf der Arbeitsfläche  zu einem Rechteck ausrollen (fast so groß wie der Blätterteig). Die Kanten des Marzipans ebenfalls begradigen und auf den Blätterteig legen. Dabei darauf achten, dass das Marzipan etwas kleiner als der Blätterteig ausgerollt wird.
  9. Die Rhabarber-Stücke auf das Marzipan legen und mit Butterflocken belegen.
  10. Die Tarte backen bis der Blätterteig goldbraun und der Rhabarber gar ist, zirka 30 bis 35 Minuten.
  11. Aus dem Ofen nehmen.
  12. In der Mikrowelle oder in einem kleinen Topf das Gelee erhitzen und damit die Tarte einpinseln. Mit gehackten Pistazien bestreuen.
  13. Die Tarte entweder warm oder bei Zimmertemperatur servieren. Am besten mit einem gezackten Messer in Stücke schneiden.


This is a fabulous tart, my absolute favorite springtime tart. I am always anxious for the first rhubarb of the season to make an appearance at the farmers´ market. This week I was quite delighted when I came across the first pink stalks of the season.
Dies ist eine fabelhafte Tarte, meine absolute Lieblings-Frühlingstarte. Ich freue mich jeden Frühling auf den ersten Rhabarber der Saison. Und ich war ganz begeistert,als ich die ersten Stangen Rhabarber diese Woche auf dem Markt entdeckt habe.


The tartness of the rhubarb is wonderfully balanced by the sweetness of the marzipan. And the red currant glaze with the chopped natural pistachios is not only a nice visual touch but it also adds another very harmonious layer of flavor to this dessert tart.

Although this springtime tart is wonderful on its own, I sometimes serve some vanilla ice cream or homemade vanilla custard sauce with it. Both of these are very nice and a delicious accompaniment to this tart.

It is hard to think of a more appropriate way to welcome spring than by baking this Springtime Rhubarb Tart and setting the table with pretty springtime flowers.


Source:

  • pink cake server from Laguiole, France can be found here
Das Säure des Rhabarbers wird wunderbar durch die Süße des Marzipans ausgeglichen. Und die rote Johannisbeergelee-Glasur mit den gehackten Pistazien sieht nicht nur hübsch aus, sondern ist auch geschmacklich ein leckere zusätzliche Komponente.

Obwohl diese Frühlingstarte wunderbar "einfach nur so" schmeckt, serviere ich sie manchmal zusammen mit einem guten Vanilleeis oder einer lauwarmen, selbstgemachten Vanillesauce. Beides schmeckt hervorragend zu der Tarte.

Ich wünsche allen einen schönen Frühlingsanfang – umso schöner, wenn man ihn mit einem Stück Frühlings-Rhabarbertarte genießen kann und vielleicht den Tisch dann auch noch mit schönen Frühlingsblumen deckt.


Quelle:

  • rosa Tortenheber von Laguiole, Frankreich kann man hier finden