Sunday, May 29, 2016

Pottery Love, a handcrafted Bowl and Yotam Ottolenghi & Sami Tamimi's Basic Hummus


These days I am constantly on the lookout for beautiful, hand-crafted plates and bowls, the ones that make you stop in your tracks, the ones that are unique, in beautiful, elegant hues and that are worth photographing without any food. Unlike shopping in potteries in Denmark and the UK, around here, it is not one of the easiest of tasks finding unique dinnerware. And until I have convinced a nearby pottery to start producing these beauties, I shall buy the ones from Copenhagen, like this amazing, greyish-glazed small bowl from Danish pottery artist Christian Bitz that I found at one of my very favorite stores in Cologne yesterday.


I took one look at the breathtaking display of Bitz´s wares and knew that I would be making Yotam Ottolenghi & Sami Tamimi's Basic Hummus from their Jerusalem: A Cookbook today and serve it in one of these bowls. It is fascinating how one can look at bowls and plates and handcrafted dinnerware and, at the same time, know which food they would be the perfect vessels for. I find myself totally smitten with this style of pottery.

It is like an hommage to hummus that Yotam Ottolenghi and Sami Tamimi would devote more pages (eight in total) to its preparation than anything else. One of the most beloved dishes in Jerusalem, hummus is a must-cook recipe from this book. This version is too enticing to pass up. This is hands-down the best hummus I have ever prepared and tasted. Topped with just a few extra chickpeas, served with Jerusalem (!) artichoke chips fried in a bit of mild olive oil, finished with Maldon sea salt, then drizzled with my favorite olive oil, this was a dish we just could not stop eating. We were in hummus bliss.

It is noteworthy that most from-scratch hummus recipes involve simmering the chickpeas for a good 1 ½ to 2 hours. Ottolenghi and Tamimi's are done in just 20 to 40 minutes. Simply by carefully following the easy recipe, make sure to briefly cook the soaked chickpeas directly with baking soda which will scruff up the skins and allow them to cook much faster and purée smoother.


Basic Hummus
(makes 6 servings - recipe adapted slightly from Jerusalem (page 114)

Ingredients
  • 250g (1 ¼ cups) dried chickpeas (I used the one´s from this company)
  • 1 tsp bicarbonate of soda (baking soda)
  • 6 ½ cups water
  • 270g (1 cup plus 2 tbsp) light tahini paste
  • 4 tbsp freshly squeezed lemon juice
  • 4 garlic cloves, crushed
  • 100ml (6 ½ tbsp) ice cold water
  • fine sea salt
  • high quality olive oil, to serve (optional)


Preparation
  1. The night before, put the chickpeas in a large bowl and cover them with cold water at least twice their volume.
  2. Leave to soak overnight.
  3. The next day, drain the chickpeas.
  4. Place a medium saucepan over high heat and add the drained chickpeas and baking soda.
  5. Cook for about three minutes, stirring constantly.
  6. Add the water and bring to a boil. Cook, skimming off any foam and any skins that float to the surface. The chickpeas will need to cook for 20 to 40 minutes, depending on the type and freshness, sometimes even longer.
  7. Drain the chickpeas. You should have roughly 3 2/3 cups now.
  8. Place the chickpeas in a food processor and process until you get a stiff paste.
  9. Then, with the machine sill running, add the tahini paste, lemon juice, garlic, and 1 1/2 teaspoons salt.
  10. Finally, slowly drizzle in the ice water and allow it to mix for about five minutes, until you get a very smooth and creamy paste.
  11. Transfer the hummus to a bowl, cover the surface with plastic wrap, and let it rest for at least 30 minutes.
  12.  If not using straightaway, refrigerate until needed. Make sure to take it out of the fridge at least 30 minutes before serving.
  13. Optionally, to serve, top with a layer of good quality olive oil.


This Basic Hummus recipe is super-smooth and rich in tahini, and can be kept in the fridge for up to three days and used simply spread over a plate, drizzled with olive oil and eaten with fesh pita or bread. According to Yotam Ottolenghi and Sami Tamimi, it can also be varied by folding in cooked and crushed chickpeas thus adding texture, adding some ground cumin and adjusting the amount of lemon juice and tahini to suit you.


For more Hummus recipes:
  • Hummus with Broad Bean & Garden Herb Topping (Hummus mit dicken Bohnen & Gartenkräutern) (HERE)
  • River Cottage Veg Everyday: Cannellini Bean Hummus (Cannellini-Bohnen Hummus) (HERE)
  • Red Beet Hummus & Comfort Food (Rote Beete Hummus & Wohlfühlessen) (HERE)
  • A Seasonal Delight: Wild Garlic Spring Hummus (Hummus mit Bärlauch) (HERE)
  • Seasonal Cooking: Hummus with Rhubarb Topping & Homemade Tortillas (Saisonale Küche: Hummus mit Rhabarber-Topping & selbstgemachten Tortillas) (HERE)


Saturday, May 28, 2016

The Cottage Cooking Club & Food Revolution 2016


It is a wrap. We finished cooking our merry way through Hugh Fearnley Whittingstall´sRiver Cottage Everyday Veg“ last month. Together we made about two hundred and twenty recipes . Quite the task and I am proud of having cooked all those months alongside all those talented fellow food bloggers. Now has come the time to venture further and look for new challenges on the horizon.

As a Food Revolution Ambassador for Germany for the Jamie Oliver Food Foundation (for moe info, please go here) one of my tasks is to share and teach cooking skills to youngsters and all those that would like to broaden their cooking skills and "to improve the health and happiness of future generations, through the food they eat".


I always believed that when it comes to teaching cooking and baking skills to our children, you should not restrict your time in the kitchen to decorating muffins, cookies and cakes. Get kids learning the key skills of cooking and making dinner, lunch and snacks at the same time with healthy and child-friendly recipes.

I was fortunate to have been able to spend Food Revolution Day on May 20th in Amsterdam at Jamie Oliver´s Fifteen Restaurant where some of my fellow Food Ambassadors had organized a pop-up cookery school.

About a month ago, I asked my fellow members of The Cottage Cooking Club to choose from one (1) to ten (10) recipes from Hugh Fearnley-Whittingstall`s River Cottage Everyday Veg that they believe is(are) „must-know“ recipe(s) from the book. I asked members to cook as little or as many recipe(s) from Hugh's book and share the technique and cooking skill(s) they learned from making their chosen recipe(s).


For my part, I decided to feature one „key“ recipe form every chapter in the book. Let´s get started with „Comfort Food & Feasts“. The Cauliflower and chickpea curry (page 27) ranks as one of my personal favorites for no-fuss healthy cooking. Fresh cauliflower is widely available and popular with kids, canned chickpeas and plum tomatoes are a staple in just about every cupboard I have had the pleasure of peeking into and the combination of those veg with the spices, alongside some rice makes for a wonderful, popular and doable dinner.


Recipe number two is from the chapter „Hearty Salads“ – the New potato, tomato and boiled egg salad (page 76) is so easy, basic, yet so delicious. Really a crowd pleaser that any aspiring homecook can and should manage. Got new potatoes, fresh eggs (maybe from the farmers´ market), cherry or other heirloom tomatoes (that are everywhere these days), a few herbs, and the standars like black pepper, salt, oil and vingar, and you are all set. It is always a good idea to start planting loads of herbs in spring – got a balcony, a garden, a kitchen…what are you waiting for?! Plant those herbs and harvest them all year round. And always make sure to stock up on condiments, always. And oil, good oil, one for dressing salads and one with a high smoking point should be in your cupboards.


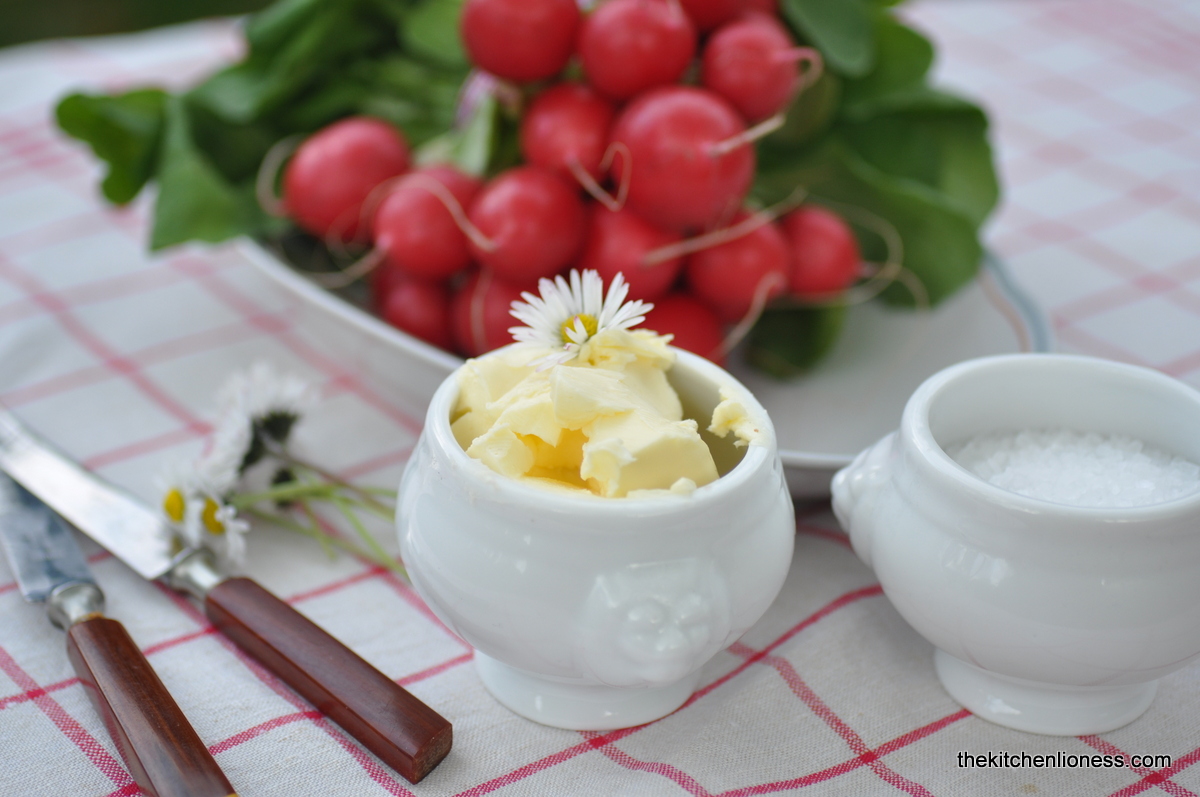
The third recipe hails from the chapter „Raw assemblies“ and this one proved to be an easy choice – „Radishes with butter and sea salt“ that basically can be put together in minutes and are always a huge hit with grown ups and kids alike around here.


A fun appetizet to put together. And if you feel like splurging a bit, go for that farm fresh butter and that English Maldon sea salt (which is a dream) but if not, good butter and sea salt from the supermarket will do nicely – as long as you got fresh radishes. Go ahead and try different varieties of radishes, the round cherry ones, the long white and red ones, go visit a farmers´market and indulge in seasonal veggies. And bring a basket for shopping...


-
The fourth recipe is a rather obvious choice. Absolutely everybody should know how to prepare stocks. Vegetable stock, mushrooms stocks, whatever stocks… do learn them all! The basic skills from page 130 in the chapter „Hefty Soups“ are a great way to get started! And once you have got the stocks, you can graduate to more elaborate soups like cream of everything…or go for the River Cottage summer garden soup (page 132).


Onto recipe number five from the chapter „Bready Things“. Another easy choice. Everybody should also learn how to make a basic bread dough. For pizza, flatbreads, pittas, breadsticks etc. The recipe that Hugh has put together on pages 172 to 174 will be a great starting point. And then you should move on to ALL the bruschetta recipes that you can get your hands on. Pile those veggies high on toasted, roasted or grilled bread, drizzle your favorite high quality olive oil over the whole lot and season to taste with sea salt and freshly ground black pepper. You could not ask for a more satisfying, easy, delicious and crowd-pleasing recipe than bruschetta and while you are at it, why not try Hugh´s Celery and blue cheese (feta) bruschetta on page 199.


The next recipe is from the extremely helpful chapter called „Store-cupboard suppers“. The obvious choice here would be the Tomato, thyme ´and goat´s cheese tart or the Basil and mozzarella tart (page 216), Blue cheese and chives tart (page 216) or Rosemary and pecorino tart (all on page 216).

Take some high-quality puff pastry, fresh summer tomatoes, cheese and herbs – then some olive oil, pepper and salt and you are all set! One basic recipe with many variations that I have prepared countless times with and without the help of my aspiring sous chefs.


The chapter on Pasta & Rice is another very good one to know. There I would pick a classic, the „Pasta with raw tomato“ (page 254) is a great way to get started on making your own pasta dishes. With a  no-cook pasta sauce that is fresh and bright with just the right amount of acidity, you are well on your way and you will be encouraged to go the pasta route with different veg during the different seasons.


The chapter of „Mezze & Tapas“ will open up a whole world of possibilities to you. Once you have tasted your way through a few of these recipes, you will never go for store-bought antipasti again.

There is nothing like performing a mircacle with those bumper-crop zucchinis or aubergines or tomatoes, go ahead and indulge but do get started with something more simple like the Oven-dried tomatoes (page 304). This method of roasting tomatoes will turn even the out-of-season ones into flavor wonders.


The next recipe is another basic one you cannot live without. Once you have tried your hand at roasting, grilling and bbqing your way through all those veggies that will come your way, go for those that are less present in peolple´s minds like those lovely Brussels sprouts. Roasting those together with lemon and shallots will turn even those last doubters into fall veggie lovers. Follow the rcipe on page 352 and you will be in for an unexpected treat.


Let´s turn to the „Side dishes“ of this book. Potato rösti (page 391) are everyones favorite simple side dish from this chapter. Got a frying pan, a sharp grater, oil, potatoes and salt – you will be able to make one of the most sought-after side dishes of all times. Crispy, salty, satisfying, and affordable. What more could you ask for.


At the end of our journey as The Cottage Cooking Club we had the privilege to celebrate Food Revolution 2016 together! I owe a BIG THANKS to all those members that stuck it out `till the very end with me! We will see each other soon!


Monday, May 23, 2016

Sablés Bretons - French Butter Cookies


Brittany is a charming region in the north of France. It is very close to the UK, with which it shares some traditions and cultural aspects. The region is also famous for two great local products, amazing butter and addictive sea salt.  No wonder, then, that the recipe for Sablés Bretons, also known as a French Butter Cookies or Breton Biscuits, a classic French cookie and a specialty of the region, is characterized by a remarkable amount of high quality butter and a perfectly balanced salty aftertaste.

The name „Sablés“ is French for "sandy", which refers to the sandy texture of this delicate and crumbly cookies. The traditional shape is round with or without fluted edges and the tops of the cookies are usually brushed with an egg wash to give them a shiny appearance. The finishing touch, the criss-cross pattern gives the cookies their signature look. There are many different recipes of this cookie, but usually consisting of several simple ingredients: butter, sugar, wheat flour, and fresh eggs.


Other famous Breton pastries include the much-beloved „Kouign Amann“ a Breton cake made with bread dough and high quantities of butter and sugar. Or the „Far Breton“ ("far" from the Latin "farina", meaning flour) a custardy pudding cake, similar to a clafouti but with a dense, smooth, flan-like texture that was originally eaten by agricultural workers who took it into the fields for their lunch. It is a kind of baked custard made more special with rum soaked prunes and is common in bakeries and homes in Brittany.


Sablés Bretons can be eaten as simple cookies or biscuits, but also used as tart crusts, with their very rich taste and crumbly texture, making it an exceptional choice for a summer fruit tart. To take a look at Sablé Breton Galettes with Lemon Curd and Berries, please refer to this previous post of mine right here.


The flavor of these Sablés Bretons is dependent on the quality of your ingredients, especially the butter. High-quality fresh, salted butter is what gives these cookies their wonderful flavor so use the very best you can afford. There are many excellent French salted butters on the market today that have an excellent flavor, so make sure to use a good brand as the delicate flavor will be noticeable here.

The dough for these buttery treats is quite sticky and I like to roll it out between two sheets of parchment paper. If the dough gets too warm and soft, you can place the rolled dough in the refrigerator or freezer for a few minutes until it firms up enough to cut.


Sablés Bretons - French Butter Cookies
(about 30 cookies – recipe adapted from Little Flower Baking by Christine Moore)

Ingredients
  • 2/3 cup (5.2 ounces, 150g) best-quality salted butter, at room temperature
  • 2 teaspoons flaky sea salt, such as Guerande 'Fleur De Sel' Sea Saltleur de sel (for more info, look here) OR Maldon Sea Salt (for more info, look here)
  • 4 egg yolks, (L), free-range or organic
  • 1 cup (200g) superfine baking (caster) sugar
  • 1 3/4 cups (210g) AP (plain) flour
  • 4 tsps aluminum-free baking powder NOTE: it is important that you use aluminum-free baking powder as this recipe calls for quite a bit of baking powder and regular baking powder tends to have a tinny taste, which you want to avoid that in these cookies at all costs. I used so-called "Weinstein" baking powder from the health food store
  • 1 egg (L); free range or organic
  • 1 tsp of water


Preparation
  1. In the bowl of a stand mixer fitted with the paddle attachment, or by hand in a bowl, cream the butter and salt together on low speed until smooth, about 30 seconds.
  2. In a separate bowl, whisk the egg yolks, gradually adding the sugar while whisking, until the yolks are light and fluffy – about a minute. With the mixer on low, add the egg yolks to the butter, stopping the mixer to scrape down any butter clinging to the sides so it all gets incorporated.
  3. Sift together the flour and baking powder in a small bowl, then stir that into the creamed butter mixture until it’s completely incorporated. (Taking care not to overmix the dough).
  4. Pat the dough into a rectangle about 1-inch (3cm) thick, wrap in plastic, and chill for one hour. (The dough can be made up to five days in advance, and stored in the refrigerator.)
  5. Line two baking sheets with baking parchment. Have a pastry scrape or thin metal spatula handy.
  6. Cut the rectangle of dough in half and place one piece between two large sheets of parchment paper. Roll the dough until it is between 1/3- to 1/2-inch (1,25cm) thick. Peel off the top piece of parchment paper and, using a 2-inch (5cm) round cookie cutter, cut out circles of dough, place them on the prepared baking sheet at least 1/2-inch (2cm) apart. You may need to coax them off the parchment with the pastry scraper or spatula.
  7. Roll the second piece of dough, cut out circles, and put them on the other baking sheet. (Scraps can be gathered up and rerolled to make additional cookies.) Chill the baking sheets of cookies in the refrigerator or freezer until firm.
  8. To bake the cookies, preheat the oven to 350ºF (180ºC). Adjust the oven rack to the middle of the oven.
  9. Beat the egg in a small bowl with the teaspoon of water. Remove one sheet of cookies from the refrigerator or freezer. Brush the tops of the cookies with the egg wash then use a fork to cross hatch a pattern on the tops of the cookies. Bake the cookies until the tops are golden brown, about 15 minutes, rotating the baking sheet in the oven midway during baking.
  10. Remove the cookies from the oven and let cool on a wire rack. Brush the second baking sheet of cookies with the egg wash, rake a pattern across the tops with the tines of a fork, and bake them. NOTE: the cookies will keep for up to four days in an airtight container but I doubt that they will last that long.


In my humble opinion, absolutely everybody needs a cookie tin bursting with these buttery homemade Sablés Bretons - French Butter Cookies treats- ready for visitors or a quiet moment with a cup of your favorite tea or coffee for dunking.


Friday, May 13, 2016

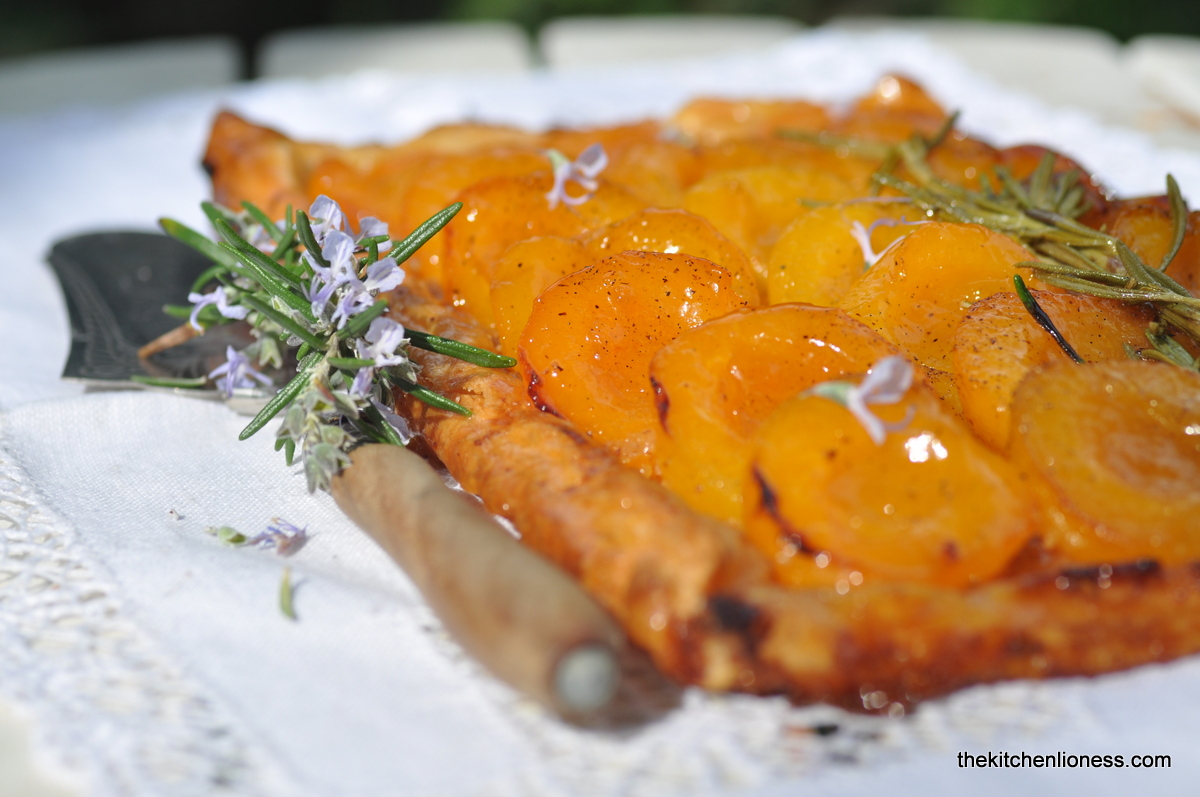
Yotam Ottolenghi´s Apricot & Rosemary Galettes


We are in the middle of May and fresh apricots are at their best only in July. When ripe, their flesh is sweet, soft and juicy.  There rank among some of my favorite stone fruits and I am always on the lookout for recipes to use them. But with this lovely recipe, there really is no reason to wait until they are in season, as it calls for the unsweetened canned variety, believe it or not. And it is so worth giving it a try, especially in May. - „Apricots are just about the only fruit I use from a tin – they’re consistently good in cakes and tarts.“ Yotam Ottolenghi


Galettes are very thin discs or sheets of flaky pastry that give a light, very crisp background to all kinds of toppings, both savory and sweet. There is really no limit to what you can put on top of them and you can serve them for a light lunch, as a first course, on a picnic, for a dessert, or with afternoon tea or coffee - by the way a nice slice of these Apricot Galettes is absolutely perfect with morning coffee, believe me, I have tried it.


Apricots can vary greatly in quality. If they taste woolly and bland when eaten fresh, cook them into a dish and they will become luscious and flavorsome. Apricots make excellent jam if cooked with sugar and lemon juice. Apricot jam is often used as a glaze on pastries and to stick cake layers together. The pronounced sweet-sour taste of apricots makes them a much-loved choice in desserts and sauces. Vanilla tastes particularly good with them. Canned (tinned) apricots are really great for this tart when they are out of season but I am sure that when you have some wonderful, ripe apricots, this tart is just as amazing with fresh apricots, in which case you will need the same quantity of small apricots, halved and stoned.


This recipe calls for a flavor combination that is very dear to my heart, I love the way rosemary and apricots harmonize and these tarts or galettes makes the most of both of them. Although I must admit that basil and apricots are also a rather intriguing taste combination. In my humble opinion, fruits and herbs are a match made in heaven.


Apricot & Rosemary Galettes
(inspired by a Yotam Ottolenghi recipe, from Easy Ottolenghi. "It's NOT an oxymoron folks.")

Ingredients
  • 375g high quality, all-butter puff pastry, pre-rolled, or rolled out into a 25cm x 38cm rectangle
  • 80g ground almonds (grind yourself or use almond meal)
  • 70g demerara sugar, plus 15g extra for sprinkling on the pastry
  • finely grated zest of 1 lemon (untreated/organic)
  • 1 tsp finely chopped rosemary, plus 2 sprigs extra to garnish
  • 3 cans apricot halves (720g drained weight)
  • 1 egg, whisked (organic or free range)
  • 50g unsalted butter, melted
  • ¼ tsp natural almond essence
  • 50g smooth apricot jam (use high quality or homemade)


Preparation
  1. Cut the pastry in half widthways, so you have two 19cm x 25cm rectangles.
  2. In a small bowl, combine the almonds, sugar, lemon and chopped rosemary, then sprinkle this mix over the two sheets, leaving a 3cm empty border all the way around the edges.
  3. Arrange the apricots cut side up on top of the almond mix, all overlapping and sitting together snugly.
  4. Lay a sprig of rosemary on top of each tart, then brush the empty pastry border with egg wash.
  5. Pull in the four sides of the tarts a little, crimping them to create an edge, then brush all around with more egg wash.
  6. Mix the melted butter with the almond essence, and brush generously over the apricots and rosemary. (I added the scraped seeds of half a vanilla bean here).
  7. Sprinkle the remaining 15g sugar over the galettes, then put in the fridge for 20 minutes.
  8. Pre-heat the oven to 190° C (375° F).
  9. Bake for about 30 to 40 minutes, or until the pastry is golden brown, then leave to cool.
  10. In a small saucepan on a high heat, melt the apricot jam with a tablespoon of water until combined and just starting to bubble.
  11. Brush this all over the galettes and serve.


This is truly a heavenly dessert. It is an easy treat that combines flaky, buttery puff pastry, sweet almonds, the summery taste of apricots and the delightfully woodsy flavor of rosemary.


The Galettes can be made a day ahead or if you have any leftovers you can serve them the following day without any loss of taste or lusciousness.- "Don’t feel that you have to eat these galettes on the day they’re made, because they’re still damned good the day after.“ Yotam Ottolenghi