Thursday, July 28, 2016

Coconut Yogurt Bundt Cake with Redcurrants


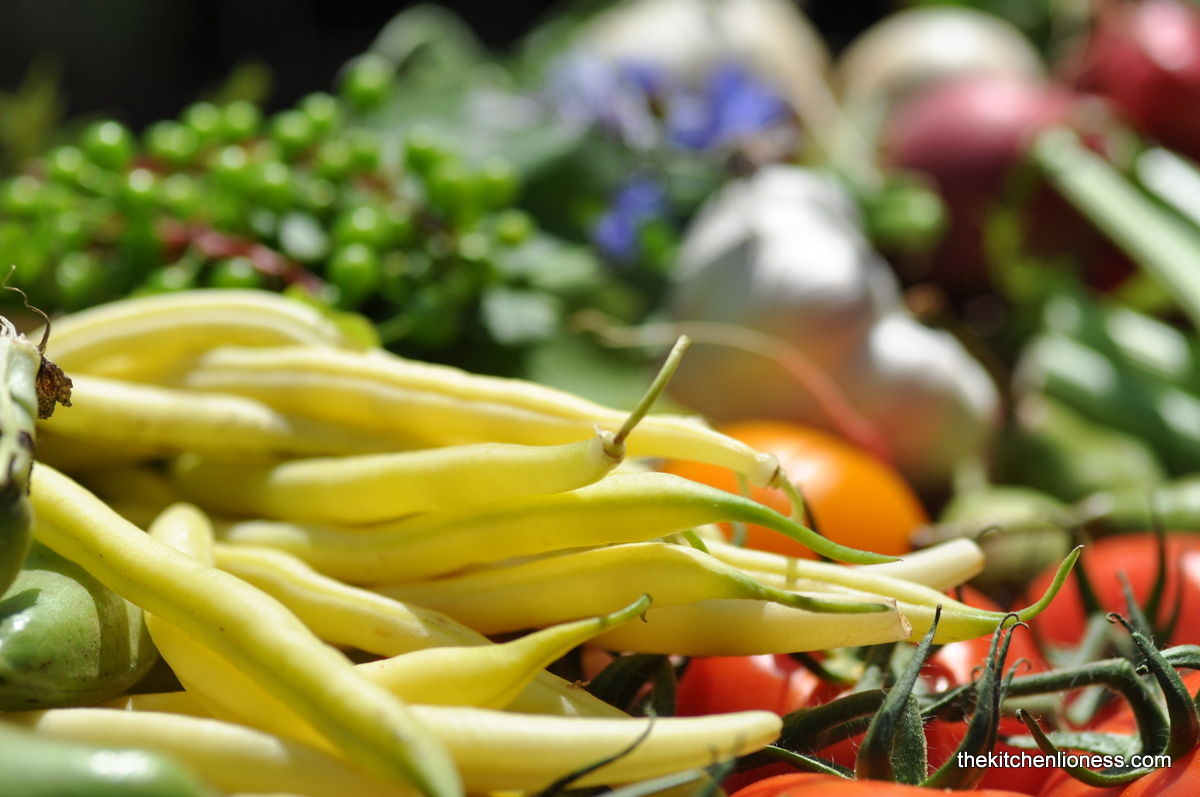
At the end of July, summer farmers market season is in full swing and this week I was overjoyed to find loads of redcurrants there. I saw them and made them mine immediately. These are berries of which I have very fond memories. In my grandma´s garden in the Northern part of Germany, where I spent all my summer vacations, there were a lot of redcurrant bushes. And year after year, they provided a magnificent yield of delightfully tart, intensely flavored and gloriously colored redcurrants. Back then, there never seemed to be any question about us not being able to eat as many as we could manage.


The usual answer when I come across an abundance of redcurrants, is to get them home, give them a thorough rinse under cold water and then munch away. And there is simply nothing better than being able to stash away a few jars of homemade redcurrant jelly for when the weather gets colder and we yearn for those tastes of summer. And I love to serve them alongside my deep dark chocolate cookies or my Dutch Boeterkoek (here), their tartness offsets beautifully the indulgent sweet, buttery goodness of that traditional Dutch teatime treat.


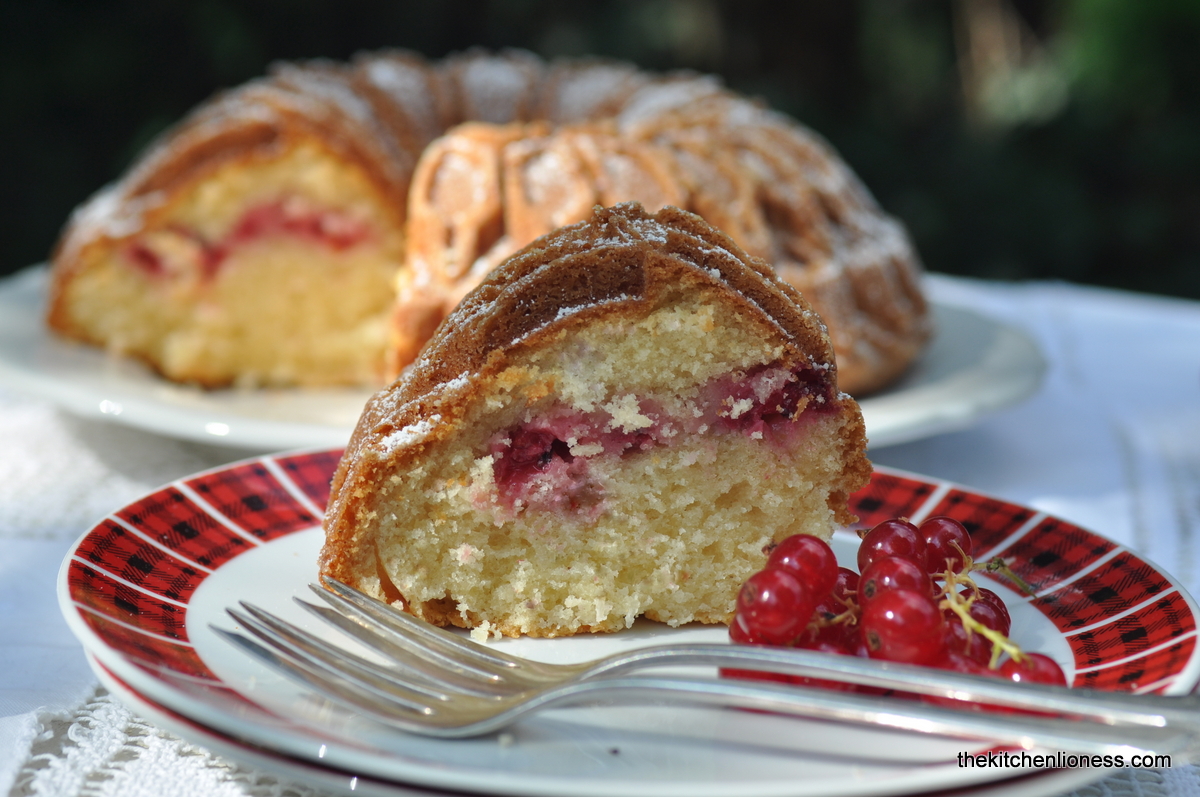
But this time, something else was called for. What about something everyone likes, a slighty tangy, coconutty bundt cake with added redcurrants. The great thing about a bundt is that you don’t have to put in much work to end up with a fabulous looking (and tasting) cake. Just pull out one of your favorite bundt pans (or any other gugelhupf pan you might have – just beware of the capacity) prepare an easy cake batter, toss in some lovely seasonal berries or fruit of your choice, and you will end up with a wonderful teatime treat.

Redcurrants work well here in my recipe as they not only taste great when baked but also look attractive when presented on a cake plate. However, equally delicious results will no doubt be achieved with blueberries, strawberries or gooseberries when they are in season. 


In my version, as redcurrant flavor is a little tart, I didn’t go with an all natural jogurt but chose a lightly sweetened coconut yogurt instead. I added unsweetened shredded coconut to the batter but if you feel that your redcurrants are extra tart, feel free to sub sweetened shredded coconut to your cake batter. The result was pretty delicious. The coconut yogurt added just enough sweetness here so the bundt does not become sweet, but keeps a little kick of tartness from the redcurrants, which is something that I very much like when eating this sort of cake. Then there is a little added vanilla but you can also sub organic lemon, lime, or orange zest here which also pairs beautifully with coconut. Overall, this recipe is a wonderful combinaton of color, fragrance, flavors and lightness. Fitting for afternoon tea, picnic or even breakfast.


Coconut Yogurt Bundt with Redcurrants
(Author: TheKitchenLioness)

Ingredients
(my recipe is for a 2.1 liter or 9-cup capacity bundt pan)
  • 180g unsalted butter, softened
  • 270g superfine (caster) baking sugar
  • 3 eggs (L), free-range or organic 
  • the scraped seeds of ½ vanilla bean OR use 1 ½ tsps pure vanilla sugar
  • 270g all purpose (plain) flour, sifted, plus some for the pan
  • 50g unsweetened, shredded coconut, organic if possible (while the organic coconut it is a bit more pricey, it is far superior in taste)
  • 1 ½ tsp baking powder
  • a generous pinch of fine sea salt
  • 150g natural coconut yogurt (use whichever is your favorite)
  • about 50g redcurrants, washed, dried well and taken off their stalks
  • icing sugar, optional (for dusting the cake)


Preparation
  1. Grease and flour a 2.1 liter (9 cup) fluted bundt or gugelhupf pan.
  2. Preheat your oven to 180° C (160°C fan-assisted) / 356° F.
  3. Put the butter and sugar into a bowl and beat well using an electric mixer until the mixture is very light and fluffy. 
  4. Add the eggs a little at a time, beating well between each addition. 
  5. Add a little flour if the mixture starts to separate. 
  6. Add the scraped vanilla seeds. Mix.
  7. Whisk together the flour, baking powder, shredded coconut, and salt and stir half into the butter mixture together with half the coconut yogurt. Mix well.
  8. Add the remaining flour and yogurt and mix well. 
  9. Spoon a third of the batter into the prepared pan.
  10. Add the prepared redcurrants, then top with the remaining two thirds of the batter. Level the batter.
  11. Bake in the oven for 55 to 65 minutes or until golden brown and a wooden skewer instered in the middle of the cake comes out with only dry crumbs attached and the cake starts to pull away from the side of the baking pan.
  12. When cooked remove the cake from the oven and leave to cool in the bundt pan for 5 to 10 minutes.
  13. Turn the cake out onto a wire rack over a tray (that will help lessen any mess from the final dusting of icing sugar once the cake is completely cooled).
  14. Leave until completely cold before serving.
  15. Dust with icing sugar and serve additional redcurrants alongside. NOTE: To prepare redcurrants, wash, dry on paper towels or kitchen towels, then, holding the stalk over a bowl, grip it at one end and sweep a fork down its length, making sure that the stalk runs between the fork's tines - all the berries should pop off. If you like, you can also remove the little brown tip at the base of each berry (just pinch it off between thumb and forefinger) but I never do because flavor-wise it does not really make any difference.


The bundt pan I used for my recipe is a Nordic Ware Stained Glass Bundt Pan that you can easily find online. It has a 9 Cup capacity – therefore my recipe is designed for a 9-cup capacity bundt pan but feel free to halve it and use a smaller bundt pan.

This is a really great and really easy cake. Quick to make, and easy to play around with the type of fruit or berries you use to suit what you like. Surely worth trying.


Monday, July 25, 2016

Fregola Sarda with Broad Beans, Caramelized Fennel and flatleaf Parsley - A Lunch in July


Who is not fond of and enjoys those tiny pasta shapes such as Orzo, the small, grain shaped pasta that is truly wonderful in a Mushroom risoniotto (here),  or the Acini di Pepe, perfect to use in soup recipes, the Ditalini (“Little Thimbles”) or the star-like Stelline or Pastine, a super tiny pasta that is perfect for children. Their utter cuteness and versatility are the reason why the small, pearl-shaped Fregola caught my attention at my favorite Italian market the other day. That and, of course, the wonderful packaging.


Fregola also called Fregola Sarda (meaning "from Sardinia") are made in the same way as couscous, the wheat (Semola di grano duro) dough is rubbed until it forms tiny beads. The Italian name Fregola comes from „fricare“, the Latin for „to rub“ – this is also where the English word „friction“ comes from. Fregola possess a texture somewhere between the fine, sandy grains of Couscous and Mograbia. As far as the flavor is concerned, there is a distinct toasty note to some brands, like the one I used, as the pasta beads have been lightly toasted (fregola tostata) as they dry.


Generally, you cook this Sardinian specialty pasta in deep, boiling water. Steaming it as you might its finer cousin would most definitely result in a rather stodgy mass. Cooked in water, sometimes stock, the Fregola will be chewily ready in 10 to 12 minutes – the point at which to add it to your veggies. The pasta beads will soak up the notes of garlic and they will plump up with a succulence unavailable in fine couscous. Alternatively, you can also opt to cook the pasta in a tomato sauce until done. But no tomatoes in sight today.


I opted for fresh broad beans (also referred to as fava beans in the US). These are sweet and delicious pod beans with a smooth creamy texture. They are at their best from the end of May through to mid-July, when the pods are pale green and soft and the beans are still small. So get them while you can and make this dish.

Sweet broad beans, double-podded, of course, caramelized fennel, spring onions, young garlic, loads of herbs and fregola are heaven on a plate.


Fregola Sarda with Caramelized Fennel, Broad Beans and flatleaf Parsley
(Author: TheKitchenLioness)


Ingredients
  • 250 grams fregola
  • 1 kg broad beans in their pods  – you will end up with about only 250 grams with their skins and pods removed
  • 2 fennel bulbs (about medium sized), trimmed, though outer leaf removed and sliced thinly - keep the fennel fronds for garnish
  • 2 whole spring onions, trimmed and sliced
  • 2 garlic cloves, peeled and sliced thinly
  • Italian (flatleaf) parsley, a whole bunch, washed, dried and stems removed, chopped coarsely
  • freshly ground black pepper and sea salt
  • a good quality mild olive oil
  • Pecorino Roman (optional)


Preparation
  1. Prepare the fregola: put a large pot of deep water to a boil. Salt it generously, as you do for pasta. Always salt the water and let it come back to the boil again before adding your pasta. Add the fregola to the boiling water and simmer for about 10 minutes, testing regularly for doneness,  until it is tender. Though it is up to you how much bite you like, I like mine to retain some bite – depending on the variety of fregola used, it can take a few minutes more to cook them to your liking. Drain thoroughly, tip into a bowl then drizzle a few drops of olive oil over it and toss to coat evenly. This will stop the beads sticking together as they cool.
  2. Prepare the broad beans: after you have removed the pods, blanch the broad beans in boiling, salted water for a couple of minutes and then drain. Cool. Remove the tough skins. Set aside.
  3. Prepare the fennel: heat the oil in a shallow pan over medium-high heat. Add the sliced fennel and salt well. Fry until caramelized and browned in spots. Then transfer the fennel to a paper-lined plate to drain off some of the oil.
  4. Prepare the spring onions and garlic: warm some more of the oil in the same shallow pan, add the sliced spring onions and garlic and fry them gently until fragrant, about 1 to 2 minutes.
  5. Now add the drained fregola to the pan, together with the caramelized fennel and drained broad beans, continue to fry gently until warmed through. Turn off the heat, add half of the parsley to the pan, season with salt and black pepper to taste, then stir briefly to let the parsley wilt ever so slightly.
  6. To serve, stir the other half of the parsley through the fregola, ladle the fregola into individual bowls or one large bowl and then scatter over some fennel fronds.
  7. Optional: if you feel the need to dress this dish with cheese, may I suggest a good Italian Pecorino Romano which will add some sharpness and saltiness to the dish.


While we are still in the midst of summer and enjoying the warm temperatures, I must admit that I am already looking forward to cooler weather when fregola will add substance to a bowl of soup. But for now, this recipe has become a foodie obsession of mine and the Fregola Sarda is my prime candidate for tossing with oven-roasted cherry tomatoes or roasted beetroot and a balsamic-type dressing. I believe I will use it for bolstering a summer garden with grilled courgettes and summer squash. Or cook it with a cornucopia of seafood in a rich sauce. It is so verstaile and can also be cooked like a risotto or simmered in stock. It is hearty, and it gets better as it sits by absorbing the liquid that you cook it in.


For a different staple on your plate try this amazing Sardinian pasta made from semolina (Semola di grano Duro). It pairs so very well with other Mediterranean flavors like the caramelized fennel and the broad beans in my recipe.


But I will tell you that you will probaly need to go to an Italian deli or specialist food outlet for Fregola Sarda, also referred to as "the sun-dried and toasted Sardinian couscous". Or you can easily order it online. While you can substitute other tiny pasta here, I wouldn’t substitute regular couscous for the Fregola, which is rather more like dense pasta peas than semolina grains, but you could use the larger Midde-Eastern or Israeli couscous instead, also called giant couscous. But it is definitely worth seeking out Fregola Sarda at least once. It might take a bit of an extra effort but it will be worth it and for me finding a treasured ingredient is part of the fun of cooking new dishes.


Tuesday, July 19, 2016

A basic Vegetable Salad Vinaigrette for a hot Summer´s Day


It is high summer and that means that there is a need for dishes that are better eaten warm than hot, for desserts that can be prepared the day before and enjoyed the next day, for refreshing drinks that will replenish and refresh you, all using the summer’s best ingredients.


So here we have it, a summer lunch just as good whether it is eaten warm or cool. Just a recipe suggestion for an easy and basic salad vinaigrette to which you can add different vinegars, use local honey and a mild mustard instead of the Bavarian sweet mustard that I used together with the Dijon mustard. Or add different kinds of herbs from your garden, think parsley, tarragon, basil…go where your mood takes you.


A fresh summer salad and a tangy vinaigrette go hand in hand, as you can hardly enjoy one without the other. Vinaigrettes should lightly coat a salad without overwhelming it. But a good vinaigrette can do so much more. It can enhance the flavors of the ingredients or add another dimension altogether. It can bring together different elements as well as provide much-needed moisture to drier ingredients.


It is easy and fast to make your own from scratch, and a homemade vinaigrette tastes so much better than store-bought. Plus, by mixing your own, you take control of the flavor balance - think acidity, sweetness, and seasoning - as well as what goes into it, so you can avoid undesired ingredients.


A summery salad topped with a zingy vinaigrette, a lovely local cheese and toasted bread slices make for a wonderful lunch when the weather heats up.

Here, I just added the vinaigrette to my yellow and green French beans to serve alongside some boiled new Baby potatoes (leave that skin on when boiling), French sea salt, Gorgonzola dolce, local bread, and some raspberries that we picked that day...


When dressing beans with a vinaigrette, make sure that they are dry and cooled before you add the vinaigrette. If you prefer a more tangy bean salad with a more acid overtone, dress the beans with the vinaigrette sans the oils while they are still warm and THEN add the oils to the cooled beans – you will end up with a vinaigrette that has a more pronounced vinegar flavor and that will not look quite as emulsified but that´s is definitely just as delicious.


Basic Vegetable Salad Vinaigrette

Ingredients
  • 2 tbsp white wine vinegar
  • 2 tsp Dijon mustard
  • 1tsp Bavarian sweet mustard (if you cannot find it at your supermarket, deli, or online, you can sub a mild grainy mustard and then add a tsp of mild runny honey)
  • 3½ tbsp sunflower oil
  • 3½ tbsp mild olive oil
  • fine sea salt and freshly ground black pepper
  • freshly cut chives OR other soft herbs such as Italian (flat leaf) parsley, tarragon or basil

Preparation
  1. Whisk together the white wine vinegar and mustards in a bowl until smooth and well combined.
  2. Gradually whisk in the sunflower oil and olive oil until the mixture has thickened and is glossy.
  3. Season, to taste, with salt and freshly ground black pepper.
  4. To serve, drizzle the vinaigrette over the summer salad/cooked vegetables and mix well to coat the vegetables.
  5. Divide equally among serving plates.


Feel free to dress your potatoes, tomatoes, fennel, salad greens, asparagus, peas, or radishes - a summery vegetable salad is meant to be easy, good-natured food for the dog days of summer.

When preparing this just remember to use the best of summer-season vegetables, fruits and herbs and enjoy what nature has to offer us these days. And do not forget about that favorite cheese of yours, maybe from a local producer, and your favorite bread from the bakery in your neighbourhood.


Friday, July 15, 2016

The Joy of visiting a Ceramics Market & using Pottery for the Presentation of your Everyday Food


The popular belief that dictates the use of matching plates, when presenting food should, in my humble opinion, be considered somewhat outdated. When you look at the food photography in the social media or browse through the photographs in cookery books or the food pages in magazines, it is rather obvious that the chef and the publisher have gone to great lengths when choosing the dishes on which the food is to be presented. When the photograph shows a selection of dishes to accompany the recipes, it is rare to see them displayed on matching pieces, but the colors and materials of the dishes always harmonize


When putting food together for either an fun family-style lunch, a formal dinner menu or for a buffet, while the foods selected will complement each other, they will each require a different style of dish from which to be served. That is where the fun comes in. Choosing vessels that best present the individual portions of a meal can also mean using very different pots and plates, bowls and boards, made of different materials like clay, wood, pewter or porcelain.


We all need to eat so why not enjoy it to the fullest. Eating from a paper plate at the seaside or the state fair is a pleasure we take from childhood into adulthood and there is nothing wrong with that. On the contrary. However,when it comes to sharing our table with family and friends, a lot more effort goes into it. So why do so many of us not give the same attention to the presentation.


Probably because finding beautiful pots and plates to serve and eat from are not always readily available, so we end up using the same ones over and over again. But our choice of dishes and the way we cook them are as personal and individual as we are. So why not take it that one step further and put our own stamp on our table and presentation.


I am continuously on the look-out for pretty and unique plates and serving dishes. Sometimes I visit fleemarkets, garage sales and goodwill stores, at other times I visit as many arts and craft shows and pottery markets as I possibly can. These days my attention is focused on natural looking plates with a special touch, those that complement the food that is presented in and on them. While I will most definitely try to go for a few matching plates, I do not mind if they are all unique.


The other day, when visiting a Craft Fair, I came across a beautiful bowl by German pottery artist Alina Penniger and I fell in love with one of her many designs. Her bowls and plates that I like the most look like they were „stamped“ with a lace design. Very unique. And a beuatiful way to present just about any food.


So I asked her to craft some plates specially for me. Luckily, she immediately agreed to do so and and brought them to the next pottery market she attended. I am now the happy and rather grateful owner of a small, albeit growing, collection of her work. I brought my loot home safely and on the same day I happily displayed four of her plates and bowls - plus a tiny vase – on our table in the garden – just for us to enjoy. While these plates and bowl have a matching design, they are all still different an dunique and will harmonize with many other dishes that I own.

Following are a few impression of the beautiful wares that were on display and for sale at the Pottery Market in the pretty town of Siegburg (Germany). Here are spome more of the amazing pottery that was crafted by Alina Penninger.


I might chose these plates next time and  go for this design of hers. The colors used and the design will match my food creations perfectly, I am sure.


Cherrries look even prettier when displayed this way. I enjoyed the way the artists arranged their wares in different ways - colorful flowers complemented their unique pottery in the most delightful of ways.


These jugs from a different artist were so pretty - the different shades of turquoise and greens were real eye-catchers, to say the least. I liked the shiny glaze and the look that is reminiscent of Greek designs.


One potter displayed bright orange and yellow nasturtium in a specially crafted vase that looked like a natural rock.


Beautiful colors – I could imagine that the morning cereal or café au lait tastes even better when served out of these amazing creations.


More of these wonderful jugs and vases and plates and tea pots. And more lovely flowers on display to complement the pottery.


Budding artists - like our youngest crafting her own little bowl - this picture is for my friend Mary - the Aspen cap she send came in very handy again on this sunny day in July...


Loved these tiny bricks.


Beautiful dark and bright colors make for very pretty glazes for these bowls.


Very unique pieces on display at this stall.


More tiny bricks to play with - these are perfect for children as they inspire youngsters to get creative. These came in different colors and the ones in the picture had soaked up all that warmth from the sun that day - the kids adored them.


Unique contemporary ceramic art.


Pottery cames in many shapes and sizes - it can be as unique as the artist her- or himself. It can be a piece of art to be displayed in a showcase but it can also be used in everyday life, to complement the food we so lovingly prepare for our families and friends. You can buy a whole set that matches or you can chose one or more unique pieces to complement your other dishes.


Should you get the chance, make sure to visit a local pottery market or ceramics fair. It is fun to take a look at a diverse range of original ceramics for sale from lamps, tableware, and vases to sculptures and unique pieces. And then, if possible, support the wonderful artists that create those amazing everyday wares and unique pieces of art.

For more information on ceramic artist Alina Penninger  and her handmade stone dinner ware and garden ceramics, you can go here.


Monday, July 11, 2016

Summertime Cookie Heaven & A Recipe for Tahini and Halva Cookies with White Chocolate


Summer holidays are here to stay for the next six weeks. That means a lot of fun activities, visits to markets and fair grounds, excursions and day trips to nearby Belgium and the Netherland. It means family movies and visits to the museum, swimming pools and suntan lotion, garden parties and BBQ´s, good books and great stories, and arts and crafts. It also means baking, despite the warm and summery temperatures in my tiny kitchen. I just cannot NOT bake. There is always something wonderful about baking. Combining different tastes and textures, putting the doughs and batters in the oven, and waiting for that moment when the scent of cookies, quiches and cakes whafts through the house and draws you into the kitchen.


These days, fresh cookies are a real must. I love to bake cookies and have done so extensively in the last couple of months. Some of the recipe have been blogged about, like the buttery French Sablés Breton (you can consult the recipe here), some have not, at least not yet.

I am also a strong believer of pairing fruits and sweets and I just know that soft and fudgy cookies are delicious paired with a handful of summer fruit. Come summertime, I will serve my Deep Dark Chocolate Cookies with tangy, juicy red currants or sweet cherries. And I adore serving my Biscoff Oatmeal Cookies (picture below) with sweet flat peaches, apricots and nectarines.


But these days I also love to experiment with different flours. I will bake my Peanut Butter and Dark Chocolate Cookies only with spelt flour, and I love to bake these Tahini and Halva Cookies with rice flour. Different flours and different and unusual ingredients is what grabs my attention these days.

The recipe that I am featuring today features not only rice flour but also Tahini as well as Halva. As most of you know, Tahini is one of the most popular spreads in Israel. People will eat it with just about everything, inside their pitta bread, as a simple sauce for vegetable salad, the love for this spread is intense. And Halva (pictured below), is a sesame confection made from Tahini sweetened with a simple syrup made with sugar or honey and fragrant orange blossom or rose water, sometimes both. It can be “plain” in flavor, strewn with pistachios or even swirled with chocolate. The mixture is molded and pressed into containers or molded into different shapes. It is a wonderful confection on its own and I love to bake with it. I have baked Ottolenghi´s Halve and Walnut Cake (you can look here) and I most certainly love to bake these Tahini and Halva Cookies with White Chocolate.


Tahini Halva Cookies with White Chocolate
(recipe inspired by my favorite hippest London baker Claire Ptak - for another recipe from Claire, please consult my blog here)

Ingredients
  • 100g tahini paste*
  • 125g unsalted butter, softened
  • 125g golden caster sugar (I like to use Tate&Lyle „Light Soft Brown Sugar“)
  • ½ tsp fine sea salt
  • 1 tbsp pure vanilla (I like to use 2 tsps homemade vanilla sugar)
  • 1 egg (M), free-range or organic
  • 250g rice flour (easily available at your favorite health food store, I like to use the one from Müllers Mühle)
  • ¾ tsp baking powder
  • ¼ tsp baking soda
  • ½ tsp ground Ceylon cinnamon or opt for cardamom instead
  • 200g plain halva, broken into pieces**
  • 150g white chocolate, broken into pieces (use the very best quality you can afford, I like to use the one from Coppeneur)
  • 2 tbsp sesame seeds, for topping (I like to use organic sesame seeds from my favorite health food store)


Preparation
  1. Preheat the oven to 180°C (350°F).
  2. Line two baking sheets with baking parchment or silpat non-stick baking mats
  3. In a large mixing bowl, cream together the tahini, butter and sugar until fluffy.***
  4. Add the salt and vanilla, then beat in the egg.
  5. Add the rice flour, baking powder, baking soda and cinnamon.
  6. Add the halva and white chocolate pieces, and carefully mix these through the dough.
  7. Scoop portions on to your prepared baking sheets and sprinkle with sesame seeds.
  8. Bake in the oven for 15to 18 minutes or until light golden brown.
  9. Let rest a few minutes on the baking sheets until cool.
  10. Serve straight away (which is what I do) or store in a cool place in airtight container/cookie tin between layers of parchment paper for up to three days.

*NOTE: for tahini check out markets in your community that specialize in Middle Eastern foods  or try a natural foods store – to find a brand that you like.
**NOTE: for those of you unfamiliar with halva, as this is a Middle Eastern confection typically made from tahini paste, nut butters and sugar, you may have to go to a specific shop to find it but generally, it is available at larger grocery stores and at Middle Eastern markets. While there are many different varieties of halva available, such as the chocolate-marbled one, you should try to use plain or vanilla Arab-style sesame halva for this recipe. Arab-style halva is said to be the best tasting.
***NOTE: if you don’t have a mixer with the paddle attachment, you can make the dough by hand, with the help of a pastry blender.


The sweet vanilla scented white chocolate pairs extremly well with the salty, melt-in-the-mouth Halva and sesame Tahini paste. As I said before, feel free to experiment with these lovely and a bit unusual ingredients and make sure to stock up on one or more tubs and jars if you enjoy their distinct nutty, sesame-infused taste. 


As much as I adore the combination of salty-sweet in my chocolate, I love it even more in cookies such as these Tahini and Halva Cookies with White Chocolate. Summertime Cookie Heaven.