
Grissini are semi or fully crisp breadsticks, originally from the region of Piedmont (Piemonte), the City of Turin (Torino) in Northern Italy, to be exact. They are said to have been invented by the Italian baker Antonio Brunero for Vittòrio Amedèo II di Savoia, the Count of Savoy (1666-1732).
Grissini come in a variety of sizes, from pencil-thin grissini to baguettes or Stirato (the Italian version of the French Baguette). Grissini make a simple, tasty snack and are often served as an easy appetizer with pre-dinner drinks or as part of a wonderful antipasti spread. They are wonderful when served with an assortment of olives, Prosciutto di Parma, Italian salami, summer tomatoes and melons (like a melone di pane).
Grissini are one of my favorite savory things to bake and I enjoy experimenting with different flavors and textures, this time I decided to make them part of my Leaf-to-Root Eating series and add dried and ground up red onion skins to the dough, the same way I added them to my Quiche Crust recipe HERE.


Typical ingredients include wheat flour (so-called 'strong baking flour' or Italian '00' works best) but you can also bake them with whole wheat or rye flour, then water, salt, either olive oil or other fat and yeast or another raising agents - remember that if you chose to use whole wheat flour, you might need to add more liquid to your dough.
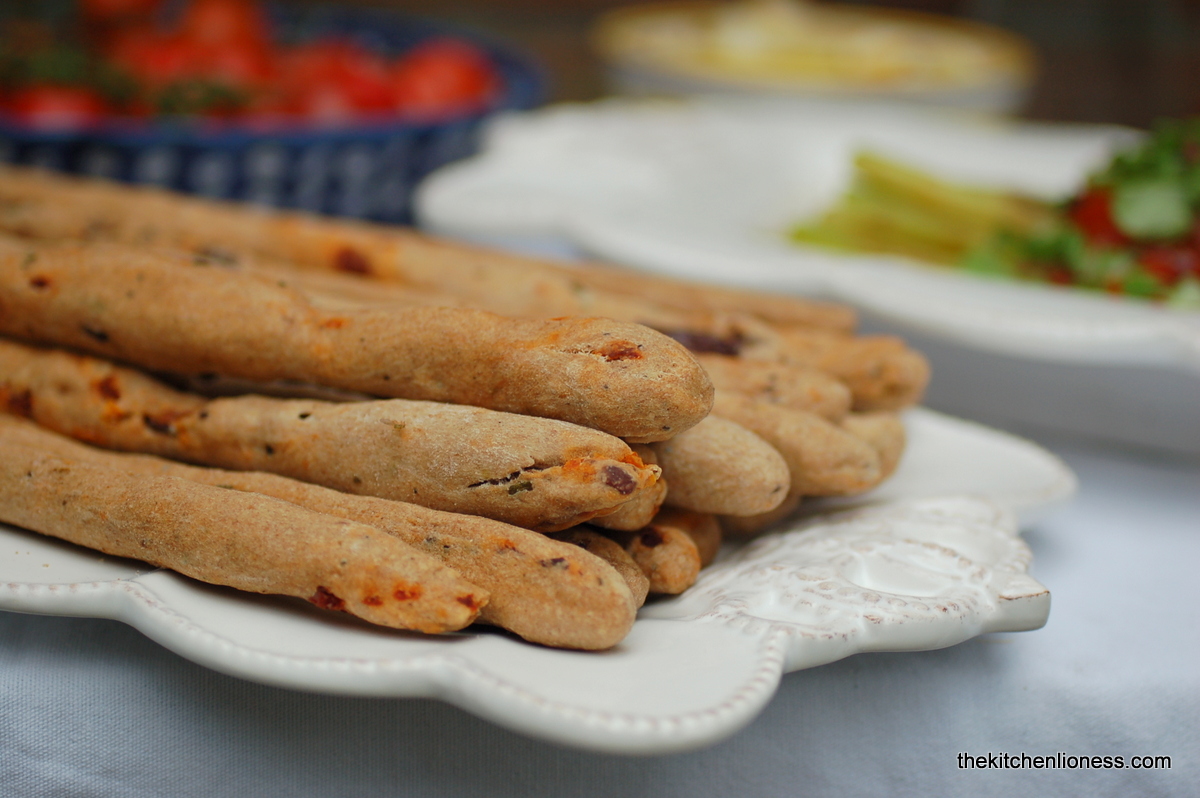
You can enjoy Grissini plain, with coarse sea salt, or add a few pulverized red onion skins to them which will add a nice oniony flavor and pretty flecks of color. But there are really no limits to what you can add to them, use flavorings such grated Grana Padano or Parmesan, finely chopped herbs such as rosemary or thyme, or add chopped green and black olives to the dough, or sprinkle them with black and white sesame seeds, poppy seeds, or black onion seeds (nigella seeds) just before baking. You can also add some Italian tomato paste to the dough, which will not only add color but also tomato flavor. Whichever way you make them, in general, Grissini will keep well if kept in an airtight container and they can be crisped in the oven for a couple of minutes if they become a little soft.


"You can never have too many grissini in life." Dan Lepard, The Guardian (18.06.2010)

Grissini with Red Onion Skins
Ingredients
- 10g fresh yeast (alternatively use 1 tbsp dried yeast)
- 125ml tepid water
- 250g strong white bread flour (I used Italian flour marked 00), plus extra for dusting
- a handful of red onions skins, washed, dried and ground up* (from organic onions, if possible)
- ½ tsp fine sea salt
- 1 tbsp mild olive oil (suitable for baking)
- a bit of fresh water (for brushing)
- coarse sea salt (for sprinkling)
- In a small bowl combine the yeast with the tepid water and set aside until foamy.
- In another bowl whisk together the flour with the ground onion skins and the salt, then add the olive oil and the yeast-water mixture. Knead with the dough hook or your hands until the dough comes together and is smooth and elastic (this will take close to 5 minutes).
- Cover and set aside for 30 minutes.
- Line two baking sheets with baking parchment and pre-heat the oven to 350°F (180°C).
- Dust the work surface with flour and roll the dough out to a rectangular shape.
- Cut the dough into 25 to 30 strips. Use your hands to roll each strip into a thin log (each roughly 25cm long), starting at the center and moving outwards, stretching the dough slightly as you roll. Press each end lightly with your thumb, to make an 'ear' shape or, alternatively, you can twist the dough logs for a bit of different look.
- Place on the prepared baking sheets, brush with a bit of water, sprinkle with some coarse sea salt and bake for about 10 to 15 minutes until crisp and golden.
- Transfer to wire racks to cool. They will keep for about a week in an airtight container.

Grissini mit roten Zwiebelschalen
Zutaten
- 10g frische Hefe
- 125ml lauwarmes Wasser
- 250g Mehl (entweder italienisches Mehl '00' ODER Type 550)
- einige rote Zwiebelschalen (gewaschen, getrocknet und gemahlen) - Bio-Qualität wenn möglich
- ½ TL feines Meersalz
- 1 EL mildes Olivenöl (zum Backen geeignet)
- etwas frisches Wasser (zum Bestreichen)
- grobes Meersalz (zum Bestreuen)
- Die Hefe mit 125ml lauwarmen Wasser verrühren.
- Das Mehl in einer Schüssel mit den Zwiebelschalen und dem Salz mischen, Olivenöl und Hefewasser dazugeben und alles von Hand oder mit dem Knethaken verkneten, bis der Teig geschmeidig ist (das dauert zirka 5 Minuten). Den Teig zu einer Kugel formen, abdecken und zirka 30 Minuten an einem warmen Ort gehen lassen.
- Den Backofen auf 180°C vorheizen, zwei Backblecke mit Backpapier auslegen. Teig rechteckig ausrollen (1/2 cm dick) und mit einem Messer zu dünnen Streifen schneiden und diese jeweils zu dünnen Strängen rollen.
- Die Teigstränge auf das Backblech legen, mit ein wenig Wasser bepinseln und etwas grobem Meersalz bestreuen.
- In der Mitte des Ofens etwa 10 bis 15 Minuten backen, am Rande dürfen die Grissini etwas Farbe annehmen, ansonsten sollten sie relativ hell sein. Herausnehmen und auf einem Gitter auskühlen lassen. Gut verpackt sind die Grissini ein paar Tage haltbar.
For more Leaf-to-Root Eating inspiration, have a look at my recipes for:
- Wild Garlic Quiche with Onion Skins in the Crust (HERE)
- Red Beet Top & Goat’s Cheese Bruschetta (HERE)

For more Grissini inspiration on my blog, have a look at:
- Grissini with Garden Herbs, Parmesan & Tomato (Grissinis mit Rosmarin, Parmesan & Tomatenpüree) (HERE)

Andrea, you just reminded me so much of my childhood...we used to much on grissini all the time as a snack...I love how you have them twisted...and so interesting adding dry red onion skin...genious!
ReplyDeleteHave a great and safe week ahead!
Dear Juliana, yes, when I made these Grissini with red onion skins, I felt they needed an additional 'twist', but, of course, you can make them straigt, with more of a 'cut or stretched look' ;) But no matter which way they look or how long or short they end up being, they will always rank as one of my favorite savory snacks. And the red onion skins are as delicious in these Grissini as they are in my Quiche Crust recipe that I posted as part of my 'Leaf-to-Root' recipe series.
DeleteTake good care, my friend!
Me llamo la atención lo de la piel de la cebolla :-)))
ReplyDeleteQue crujientitos :-))))
1 saludito
Dear Mijù, so glad you like my crispy, crunchy Grissini with red onion skins!
DeleteThank you very much for stopping for to comment!
Andrea
I love that you made these - I bet they were way more tasty than the bought ones.
ReplyDeleteDear Gaye, homemade Grissini are, no doubt, more tasty than the storebought, dry kind - and you can add just about anything savory to them that you like. These days, I am particularly fond of this version which allows me use some of my organic red onion skins. These Grissini taste wonderful and are certainly worth the time it takes to make them!
DeleteI just got some beautiful red onions from the market - I think I will make these over the weekend for our nightly snack mid morning or before dinner. They are beautiful, Andrea. I hope every thing is good for you and your family. We remain very isolated and are staying safe! Ganz liebe Grüße, David
ReplyDeleteDear David, all is well around here - Thomas keeps working (never stopped) at the school, the kids are continuing a mix of 'real school' and home-schooling and one of them just sucessfully finished school and got her Abitur. On Monday, most travel restrictions for EU will end...We are very, very fortunate in these parts but we still remain very vigilant, of course.
DeleteIf you do get a chance to make these, let me know how they turned out!
Liebe Grüße aus dem (zum Glück) regnerischen Bonn,
Andrea
These are amazing! I love the idea of using dried red onion skins -- so neat and pretty!
ReplyDeleteDear Amy, I do like the 'look' that red onion skins lend to baked goods - I like them in my quiche crust and here too and they lend a subtle oniony taste to the foods which we really enjoy.
DeleteThanks for stopping by!
Andrea