Friday, July 12, 2013

FFwD: Whole-Cherry Clafoutis - Clafoutis aux Cerises


Today´s recipe for the French Fridays with Dorie group is a Whole-Cherry Clafoutis or Clafoutis aux Cerises..The French are partial to Clafoutis - a rich, baked batter, typically studded with cherries.


A Clafoutis is like a batter pudding, where fruit is suspended in a flour and egg batter. Some recipes are soft, like a deflated soufflé, others, like this recipe, firmer and more custard like. A Clafoutis of Cherries is probably the best known, though all stone fruits such as peaches and apricots and other fruits such as pears are used sometimes, too. Apart from the cherries (and yes, I pitted them – even Gaston Lenôtre´s recipe calls for pitted cherries) you will need fresh eggs, sugar, salt, vanilla (I scraped the seeds from a vanilla bean), flour, milk and cream. For baking the Clafoutis you will need a shallow china dish or a few mini oven-proof dishes like the ones that I used.


One of the delights of the summer, cherries are much loved for their succulent texture, flavor and gorgeous good looks. The juicy flesh can be sweet or sour, depending on which of the hundreds of varieties they are. Since cherries are at their peak in mid-July, what better time to make the most of these summer fruits. You should make sure to buy plump, shiny cherries that have their stalks attached and you should always look for fruit that is dark red, firm but not hard. Generally, pale cherries are sweet and dark cherries more acidic. It is always a good idea to try before you buy to get the flavor that you prefer. Remove stalks and use a cherry stoner to pit the cherries. You can keep unwashed cherries in the fridge for 3-4 days and wash them just before serving. Cherries also freeze well. Sweet cherries are suitable for eating, sour cherries are great in tarts, pies, crumbles and sauces.


There is only one sort of drawback to cherries, if you are not lucky enough to have a cherry tree in your garden, they tend to be rather expensive, so you never get to eat enough of them. But at this time of year, when the crop is ripe and the harvest is going full tilt you should binge on cherries. Compared to most other fruits, cherries are low in sugar, so the dusting of the top of the Clafoutis with icing sugar is not a conceit, that extra hit of sweetness seems necessary.


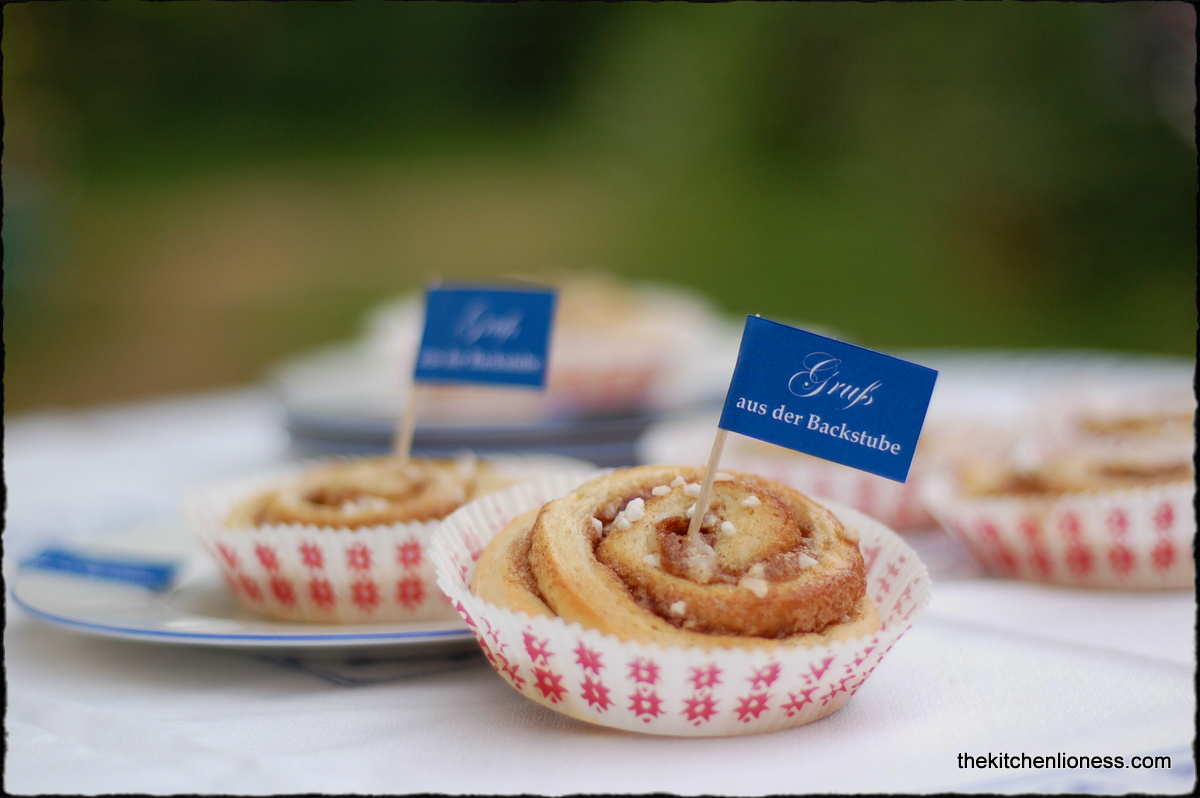
It was time to take our dessert on a picnic again, seeing that the weather has not been the friendliest all summer long, it was so nice to take advantage of a nice and sunny day and visit a wonderful castle about a half-hour drive from where we live.


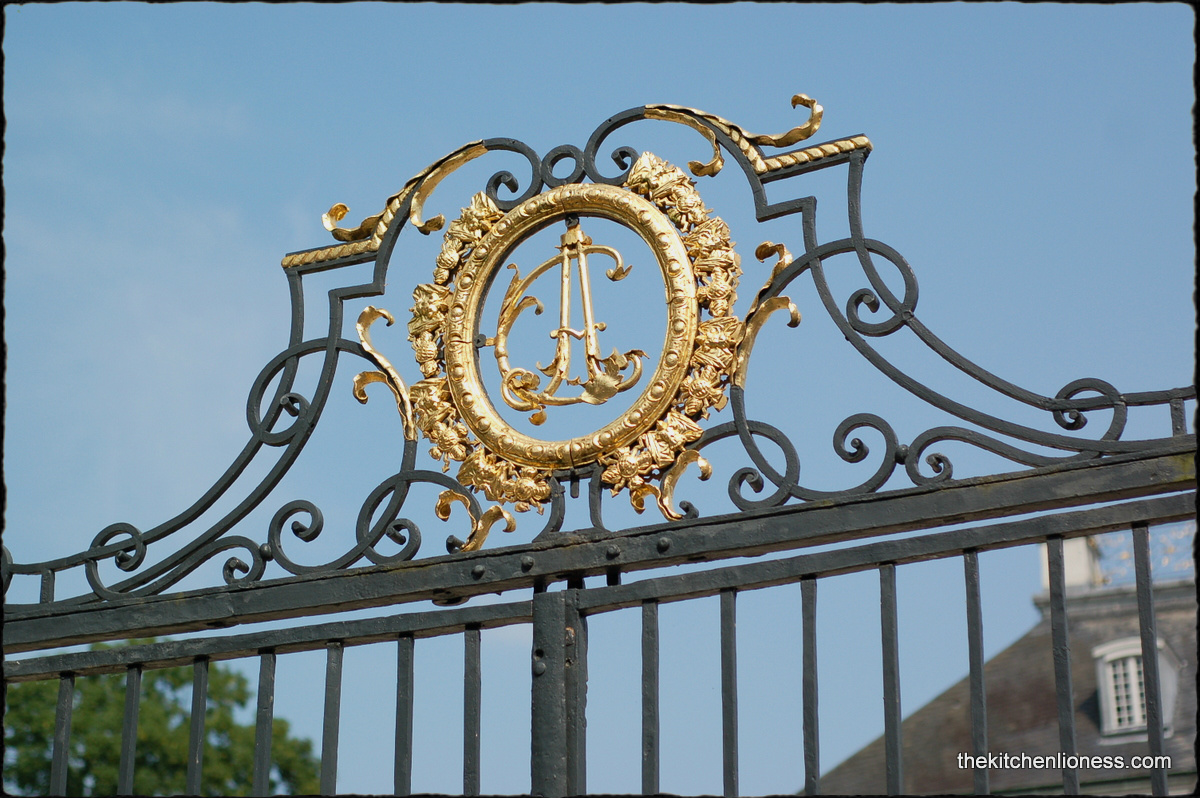
The Augustusburg and Falkenlust palaces in Bruehl, North Rhine-Westphalia, Germany have been listed as a UNESCO cultural World Heritage Site since 1984 as examples of beautifully preserved rococo architecture. They are connected by the spacious gardens and trees of the castle grounds (Schlosspark).


The palaces were built at the beginning of the 18th century by the arch-bishop of Cologne, Clemens August of Bavaria (1700-1761) of the Wittelsbach family. The architects were Johann Conrad Schlaun and François de Cuvilliés.


The gardens were designed by Dominique Girard. An elaborate flower garden for an area south of the palaces was also designed, but it was restructured by Peter Joseph Lenné in the 1800s and turned into a landscape garden.


In the hunting lodge called “Falkenlust”, Clemens August could pursue his favorite hobby falconry and entertain guests.


Schloss Falkenlust (Falkenlust Castle) was built from 1729 to 1740, in the style of the Amalienburg hunting lodge in the park of Nymphenburg Palace by François de Cuvilliés. It is within walking distance of the Augustusburg palace. It is open to the public and inside you can see the fantastic decorated interior and furnishings. Outside are fabulous gardens, with fields, ponds, and wooded areas.


Nearby is a chapel which is built to represent a secluded grotto.


The inside and the outside of the tiny chapel were decorated with glass stones in different colors (blue, green and turquoise) and sea shells - quite different and very pretty.


I have made many Clafoutis before and I have even blogged about a Percoche Clafoutis (which is a stone fruit as well and a cross between a peach and an apricot). Clafoutis is a wonderful easy and versatile dessert that everyone enjoys whether you prepare it in one large dish or use individual serving dishes.

To see whether the other members of the French Fridays with Dorie group enjoyed this recipe as well, you can click here.


“La pâtisserie, vous savez, on ne la fait pas pour nourrir les gens mais pour leur offrir de la douceur à partager.” (GL)


******************************


Monday, July 8, 2013

Boterkoek (Dutch Butter Cake) - Holländischer Butterkuchen


Today I am featuring Dutch boterkoek, which can roughly be translated as “butter cake”. It can be described as a dense, rich, buttery bar cookie, baked in a round tin, and cut into wedges after baking. 
Heute gibt es einen holländischen Boterkoek oder auch Butterkuchen. Man kann ihn als wundervoll buttrig und reichhaltig beschreiben, ein Kuchen, der in einer runden Backform gebacken wird und nach dem Backen in dreieckige Stücke geschnitten wird.


Boterkoek is a traditional Dutch recipe, somewhat of a cross between a tart and shortbread. Since there is quite a bit of butter in the boterkoek and given just how key butter is to the flavor of this recipe, you should really try to use the best-quality and freshest butter you can find. This makes a wonderful afternoon or even mid-morning treat with a cup of your favorite tea or coffee (or hot chocolate) and it is also simple to make, making it the perfect recipe to prepare at the last minute if you have unexpected guests for example.
Boterkoek ist ein traditionelles holländisches Rezept, ein Gebäck, das eine Mischung ist zwischen einer Tarte und Shortbread. Da der Boterkoek eine gute Menge Butter enthält und sich in dem Rezept eben alles um den Geschmack von Butter dreht, sollte man Wert darauf legen, eine wirklich gute und wohlschmeckende Butter zu benutzen. Den Boterkoek kann man selbstverständlich nicht nur zum Nachmittagstee oder Kaffee oder mit einer Tasse heißem Kakao geniessen, er schmeckt auch einfach wundervoll mal eben so zwischendurch. Da der Boterkoek so einfach und schnell zu backen ist, lässt er sich auch  schnell und ohne große Vorbereitungen herstellen, auch wenn unerwartet Gäste kommen.


The boterkoek is usually made in a special round boterkoek pan. The butter cake is then cut into wedges, leaving it somewhere between a cake and shortbread. But, because you are probably not likely to find one of these specialty baking pans at your kitchenware store, you can bake them in a regular round baking pan or springform pan and once the boterkoek has cooled, you can cut into it into wedges or small slices. 
Der Boterkoek wird normalerweise in einer speziellen Boterkoek Backform gebacken. Nach dem Backen wird der Kuchen in Stücke geschnitten, wobei die Konsistenz an Shortbread erinneren. Falls Sie, was wahrscheinlich ist, keine solche Backform haben, backen Sie den Boterkoek einfach in einer normalen Springform oder in einer anderen runden Backform. Eine Pie-Form tut es natürlich auch. Nachdem der Boterkoek ausgekühlt ist, kann man ihn in gleichmäßige Stücke schneiden.


Dutch Butter Cake (Boterkoek)

Ingredients for the Cake
  • 150 grams good quality unsalted butter (I like to use farm fresh butter)
  • 200 grams super fine (caster) baking sugar
  • 1/8 tsp fine sea salt
  • a bit of finely grated lemon zest (I always use organic lemon)
  • 1 ½ tsp pure vanilla extract (you can also use some almond flavor)
  • 1 egg (L), beaten (try to use free range or organic if possible)
  • 200 grams white spelt flour (feel free to use regular AP (plain) or cake flour – most recipes for boterkoek call for AP flour)
  • ½ tsp baking powder
  • 20 grams flaked almonds


Equipment needed
  • round baking pan or springform pan (26 cm) unless you happen to own a specialty round boterkoek pan
  • pastry brush
  • parchment paper


Holländischer Butterkuchen (Boterkoek)

Zutaten für den Kuchen
  • 150 Gramm gute ungesalzene Butter (falls möglich frische Butter vom Bauern)
  • 200 Gramm feinster Zucker
  • 1/8 TL feines Meersalz
  • ein wenig geriebene Zitronenschale (von einer unbehandelten bzw. Bio-Zitrone)
  • 1 1/2 TL natürliches Vanillearoma
  • 1 Ei (L), verquirlt (wenn möglich Bio)
  • 200 Gramm Dinkelmehl Type 630 (man kann natürlich auch normales Weizenmehl nehmen – in den meisten Rezepten wird Weizenmehl Type 405 verwendet)
  • ½ TL Backpulver 
  • 20 Gramm Mandelblättchen


Zusätzlich
  • eine runde Backform oder Springform (26 cm) – wenn Sie eine spezielle Boterkoek Backfrom besitzen, nehmen Sie natürlich diese für´s Backen des Boterkoek.
  • ein Backpinsel
  • etwas Backpapier


Preparartion of the Boterkoek
  1. Preheat the oven to 175 degrees Celsius.
  2. Line a 26 cm boterkoek specialty pan or other round cake pan with greaseproof paper.
  3. In a medium bowl, cream the butter, sugar, salt, lemon zest and vanilla extract until light and fluffy.
  4. Remove one teaspoon of the beaten egg and set aside in a small bowl.
  5. Pour the rest of the egg into the butter mixture, and stir well. 
  6. Whisk together the flour and baking powder.
  7. Add the flour and baking powder, and mix until you have a smooth dough.
  8. Transfer the mixture to your baking pan and press the dough with the palms of your hands into the pan until you have a reasonably smooth top. If you feel that the dough is very sticky, use a piece of saran wrap (cling film) and place it on the dough and then smooth the surface with the back of a cup measure or a large spoon.
  9. If you would like to have a distinct pattern on your boterkoek , then mark the dough with the tines of a fork at this stage.
  10. Mix the teaspoon of egg with a teaspoon of water, and brush on top of the boterkoek. 
  11. Sprinkle with the flaked almonds, and bake for about 25 to 30 minutes until just golden and firm to the touch.
  12. Transfer to a cooling rack and let cool for about 15 minutes before unmolding (or the boterkoek will break).
  13. Let the boterkoek cool completely before cutting it into wedges (or slices if you prefer).


Boterkoek is a really simple recipe with surprisingly good results for something so easy – so go ahead and try this wonderful Dutch treat.

Eet smakelijk!

Herstellung des Boterkoek
  1. Heizen Sie Ihren Ofen auf 175 Grad Celsius vor.
  2. Die runde Backform fetten (26 cm) und mit Backpapier auslegen.
  3. In einer mittelgroßen Schüssel die Butter, den Zucker, das Salz, die geriebene Zitronenschale und das Vanillearoma miteinander verrühren.
  4. Etwa einen Teelöffel von dem verquirlten Ei in eine kleine Schüssel geben.
  5. Den Rest vom Ei zum Teig geben und mischen.
  6. Das Mehl und Backpulver mischen und gut unterrühren.
  7. Den Teig in die Backform geben und mit den Händen andrücken – falls der Teig zu sehr klebt, kann man auch ein Stück Frischhaltefolie auf den Teig legen und ihn dann mit Hilfe eines breiten Löffels oder mit einem Glasboden glatt streichen oder drücken.
  8. Wenn Sie ein Muster auf ihrem Boterkoek haben möchten, dann sollten Sie jetzt eine Gabel mehrmals über den Teig ziehen, so dass ein Gittermuster entsteht.
  9. Den Rest vom verquirlten Ei mit einem Tl Wasser mischen und mit einem Backpinsel den Teig damit bestreichen.
  10. Mit den Mandelblättchen bestreuen und ungefähr 25 bis 30 Minuten backen oder solange, bis der Boterkoek eine schöne goldene Farbe hat.
  11. Den Boterkoek auf ein Kuchengitter stellen und mindestens 15 Minuten auskühlen lassen, bevor Sie ihn aus der Form nehmen (sonst bricht der Kuchen).
  12. Ganz auskühlen lassen und dann entweder in breite Streifen oder in keilförmige Stücke schneiden.


Boterkoek ist wahrlich einfach und relativ schnell in der Herstellung und es lohnt sich wirklich, diesen einmal auszuprobieren.

Eet smakelijk!


Friday, July 5, 2013

FFwD: Wheat Berry Salad with Vegetables and Purslane


Today´s recipe for the French Fridays with Dorie group is a deliciously healthy Wheat Berry Salad.


Wheat berries are a true whole grain. You may not recognize the name, but without these kernels, there would be no flour. Wheat berries are loaded with nutrients and are as easy as rice to prepare, perfect for a meal any time of year. Wheat berries are whole wheat kernels. Since the wheat kernel is left intact, virtually none of the nutrients are stripped away. They look like thick, short grains quite similar to brown rice.


When boiled, cooked wheat berries have a chewy bite and subtle nutty, earthy flavor. They are sturdy enough to handle salad dressings and still delicate enough to taste delicious with some milk, honey and cinnamon. And if you like sprouts on salads and sandwiches, add a little water to wheat berries and you can grow your own tasty wheat sprouts.


Apart from the cup of wheat berries (which I doubled) Dorie´s recipe for the dressing calls for Dijon mustard, olive oil, sea salt, freshly ground black pepper and a pinch of red pepper flakes. I used Moutarde de Montjoie from my favorite artisanal mustard mill ("Senfmühle Monschau") and added some fresh lemon juice to the salad dressing.


For the vegetables, Dorie chose celery, onion, a bell pepper and as the fruit she used an apple – I grilled some thin slices of white and green zucchini instead, cut them into half-moon shapes and added them to the salad together with chopped Kalamata olives, salt brined capers and yellow, green and red grape tomatoes. As herbs I also added a whole bunch of chopped Italian parsley, chives and basil.


As a sort of topping for the wheat berry salad, Dorie used canned tuna, mixed salad greens, tomatoes, an avocado and hard-boiled eggs. I skipped the tuna, but crumbles some feta, sliced some avocado, soft-boiled some small farm fresh eggs and added my favorite hearty salad green just before serving. Purslane or “Portulak” (Portulaca oleracea) as it is called around here is not your typical salad green that you will find in your favorite supermarket – so I was thrilled when I found a bunch of this somewhat “forgotten” salad green. With its pretty somewhat shiny and “sturdy” green leaves and pronounced tart flavor, purslane is the perfect match for the other vegetables and the wheat berries.


Wheat berries have a definite nutty flavor so they are great with a lot of different fresh vegetables, especially when they are grilled, tons of fresh herbs such as basil, chives and parsley and also cheeses such as mozzarella or feta. Wheat berries are deliciously healthy, fusing perfectly with the other flavors in this easy dish, perfect for a weeknight meal or for a summertime picnic. This recipe was very enthusiastically received at our house. It is a definite keeper - I will add different grilled vegetables, herbs, cheese and salad greens to this (next time it will be ruccola).

Look for wheat berries at a health food store or in the natural foods section of your local supermarket.If you cannot find wheat berries, you can easily substitute pearl barley.

To see how the other members of the French Fridays with Dorie group prepared this Wheat Berry Salad click here.


Tuesday, July 2, 2013

TwD: Baked Yogurt Tart with Red Currants and Wild Blueberries


Today we are making a Baked Yogurt Tart for the Tuesdays with Dorie group. The contributing baker for this recipe is Leslie Mackie.


The recipe for this wonderful simple tart is a two step process. You begin with preparing a Flaky Pie Dough, using all purpose flour (I used spelt flour), salt, cold unsalted butter, vegetable shortening  and ice water. After you prepare the pie dough, it needs a two hour rest in the fridge. Then you roll it out, fit it into your springfrom pan (I used a French tart pan with high sides and a removable bottom), chill the dough some more, and blind bake for a good 25 minutes or until the crust is lightly golden and set.


While the pre-baked pie shell cools on a rack, you can prepare the lovely filling using three eggs (I used organic), sugar, yogurt, flour, and vanilla extract (I used homemade vanilla sugar instead) and, of course, lovely berries or fruit – depending on the season.


Yogurt is packed with calcium, protein and B vitamins. It is made by adding a number of types of harmless bacteria to milk, causing it to ferment. This thickens it and gives it its characteristically tangy flavor. Cow's milk is the most common type used, but goat's, ewe's, sheep or buffalo's milk are also suitable. Most yogurt sold around here are “live”, which means that the yogurt still contains live bacteria. There are a number of different types to choose from. I chose whole milk organic yogurt, it is made from whole organic milk, it is a live yogurt that has been fermented with live culture bacteria and it has a smooth, creamy texture and a fresh, slightly tangy flavor. And organic yogurt has had additional “friendly” bacteria added to it and it has the mildest flavor and a particularly creamy texture, therefore making it the perfect choice for this Baked Yogurt Tart.


For the fruits I chose my favorite berries, red currants and wild blueberries. Red currants add a lovely splash of color to this tart. They are pretty, bright red, juicy berries with a tart, sparkling flavor. Fresh red currants are essential in summer pudding, but also marry beautifully with wild blueberries for this simply elegant tart.

In German-speaking areas, red currants are called “Johannisbeeren” because the red currants ("John's berry" in German) are said to ripen first on St. John's Day, also known as Midsummer Day, June 24. So we are just at the start of the red currant season right now and I had a bit of a hard time finding some because the weather has been rather cool around here.


Once the baked tart shell had cooled sufficiently, I mixed up the ingredients for the yogurt filling, added the
fruit and baked the tart for about 50 minutes. Instead of chopped almonds, I used chopped bright green pistachios to sprinkle around the edge of the tart.

We liked this tart quite a bit, it tasted a bit like a vanilla custard/cheesecake tart – what a nice and pretty dessert and quite different from the yogurt cakes that I usually bake, yogurt for the filling itself was "a first" for me and we liked it in this tart.

To see what the other members of the Tuesdays with Dorie group thought of this Baked Yogurt Tart, please click here.


Friday, June 28, 2013

FFwD: Socca from Vieux Nice / Kichererbsenmehl Pfannkuchen


Today´s recipe for the French Fridays with Dorie group is Socca, a chickpea flour pancake that is a specialty of Nice. It is also known as Farinata in Liguria, Italy. It is essentially a large pancake made from but a few ingredients such as chickpea flour, water, olive oil, a bit of salt and a healthy dose of freshly ground black pepper and sometimes, as is the case with a lot of Italian recipes and Dorie´s recipe, chopped rosemary.
Die French Fridays with Dorie-Gruppe bereitet heute Socca zu, eine Pfannkuchen Spezialität mit Kichererbsenmehl aus Nizza. In Ligurien kennt man Socca auch als Farinata. Socca ist ein Pfannkuchen mit nur einigen wenigen Zutaten wie Kichererbsenmehl, Wasser, Olivenöl, ein wenig Salz und etwas frisch gemahlenen Pfeffer und etwas frischem Rosmarin  - eine Zutat sowohl in Dorie´s als auch in vielen italienischen Rezepten..


The batter for the Socca is as quick and easy to put together as a pancake. The batter for the Socca should rest for about two hours or even overnight and it is baked in the oven, finished in a broiler and done in about 20 minutes. It can be served hot or warm, with toppings such as caramelized onions and oven roasted tomatoes or just a light drizzle of olive oil and some more freshly ground black pepper.

Around here chickpea flour is sold in Middle Eastern and natural foods markets. So I bought two bags of chickpea flour and made two different large Soccas. The first one I made with the roasted chickpea flour from my favorite natural food store. When I prepared the batter, it thickened so quickly that I had to add more water to get the consistency right. The baked Socca had a real rustic appeal and a nice nutty taste.

Der Teig für den Socca ist einfach und genauso schnell gemacht wie jeder Pfannekuchenteig. Der Teig für den Socca sollte wenigstens zwei Stunden bei Zimmertemperatur stehen – er kann allerdings auch über Nacht ruhen. Der Socca wird erst im Ofen gebacken und dann für einige Minuten mit Oberhitze gebräunt und anschließend heiß oder warm serviert. Vor dem Servieren kann man den Socca mit ein wenig gutem Olivenöl beträufeln und mit frisch gemahlenem schwarzen Pfeffer verfeinern. Man kann ihn mit karamelisierten Zwiebeln oder im Ofen gerösteten Tomaten servieren.

Kichererbsenmehl findet man in asiatischen Läden oder in Bio-Geschäften. Ich habe geröstetes Kichererbsenmehl im Bio Laden besorgt. Mit diesem Mehl brauchte ich mehr als eine Tasse Wasser, um die richtige Konsistenz für den Socca zu bekommen. Der gebackenen Socca sieht sehr schön rustikal aus und schmeckt wunderbar nussig.


The second Socca contained the regular chickpea flour from a Middle Eastern market, the batter was considerably less thick than the first, the color was lighter, it baked more like a pancake and tasted less nutty than the first.
Einen zweiten Socca habe ich mit dem Kichererbsenmehl aus dem Asiatischen Laden zubereitet. Der Teig war wesentlich heller und deutlich flüssiger und der fertige Socca hatte eher die Konsistenz eines Pfannekuchens und war weniger nussig als der erste Socca.


Preparing the Soccas was new to me and it was fun to learn a few things about chickpea flour and what it is used for, particularly since I had never used this type of flour before.

Recipe for the Socca (Farinata) 

Ingredients
  • 1 cup chickpea flour 
  • 1 cup cool water
  • 3 ½ tsp olive oil
  • some salt 
  • 2 tsp finely chopped fresh rosemary leaves
  • some freshly ground black pepper

Preparation
  1. Sift chickpea flour into a bowl, then add 1 cup water, whisking to eliminate lumps. Stir in 1 ½ tablespoons olive oil, salt and chopped rosemary.
  2. Cover, and let rest for about two hours, or as long as overnight . Batter should be about the consistency of heavy cream.
  3. Pre-heat oven to 500 degrees Fahrenheit. Put a well-seasoned or nonstick 12-inch pizza pan or cast-iron skillet in oven. 
  4. Pour 2 tablespoons oil into heated pan, and swirl to cover pan evenly. 
  5. Pour in batter, and bake for about 5 to 10 minutes, or until pancake is firm and edges set. 
  6. Heat broiler and place Socca a few inches away from broiler for a few minutes, just long enough to brown it spottily. 
  7. Cut it into wedges, and serve hot, or at room temperature.

To see more Soccas from the French Fridays with Dorie group, please click here.

Socca zuzubereiten war interessant – ich habe das erste Mal Kichererbsenmehl verwendet und war angenehm überrascht.

Rezept für Kichererbsenmehl Pfannkuchen (Farinata)

Zutaten
  • 1 Tasse Kichererbsenmehl
  • 1 Tasse kaltes Wasser
  • 3 ½ EL Olivenöl
  • etwas Salz
  • 2 TL fein gehacktes Rosmarin
  • etwas frisch gemahlenen schwarzen Pfeffer

Zubereitung
  1. Das Kichererbsenmehl mit dem Wasser verrühren. Dann 1 ½ El. Olivenöl, Salz und gehackten Rosmarin zugeben. 
  2. Abdecken, zirka zwei Stunden oder über Nacht ruhen lassen. Der Teig sollte ungefähr die Konsistenz von Sahne haben.
  3. Den Ofen auf 260 Grad Celsius vorheizen. Ein rundes Pizzablech oder eine Eisenpfanne in den Ofen stellen und ebenfalls vorheizen.
  4. Dann 2 El. Olivenöl in die heiße Form geben – das Öl sollte den gesamten Boden bedecken.
  5. Den Teig so einfüllen, dass der Boden bedeckt ist – dabei die Form so wenden, dass der Teig den gesamten Formboden bedeckt. Den Socca 5 bis 10 Minuten backen, der Teig sollte dabei fest werden.
  6. Oberhitze einschalten und den Socca einige Minuten unter die Heizschlange in den Ofen stellen – bis der Socca eine schöne Farbe hat, einige Stellen dürfen dabei ruhig dunkler werden.
  7. Den fertigen Socca in Stücke schneiden oder reißen und noch heiß oder lauwarm servieren – dabei mit ordentlich frisch gemahlenem Pfeffer genießen.

Um die anderen Soccas der French Fridays with Dorie Gruppe anzuschauen, bitte hier klicken.


Saturday, June 22, 2013

FFwD: Sablé Breton Galette with Berries


Today´s recipe for the French Fridays with Dorie group, is a French specialty from Brittany, namely Sablé Breton Galette with Berries.


This shortbread like butter cookie base has so few ingredients that you cannot get away with cutting corners, good quality butter and flour are essential, and plenty of them. Other than flour and butter, you will need some baking powder, fleur de sel and one large egg.  I made an effort to get farm fresh butter for these and substituted the regular white all purpose flour with artisanal spelt flour and I did add some homemade vanilla sugar to the dough as well.


Do make sure to treat the dough gently, chill it for a good three hours and bake the cookies for a good thirty minutes (since I used mini heart shaped fluted tart pans with removeable bottoms instead one large tart pan – these were done in less time than provided for in the recipe).


While the dough for the cookies is chilling, you can prepare the lovely lemon curd. Again, with plenty of quality ingredients such as farm fresh eggs, sugar, organic lemon juice, a bit of light corn syrup (I used maple syrup – no corn syrup to be found anywhere around here and I much prefer maple syrup anyways) and good fresh butter. You can speed up the chilling time by preparing an ice bath for the curd, that way, the curd will have settled and cooled by the time the cookie hearts bake and have had time to cool completely as well. Of course, you are free to make the lemon curd a day in advance, put it in a jar and place it in the fridge overnight. Spread some curd on the cooled cookie base and top the cookie hearts with seasonal fruits of your choice. Homemade lemon curd is quick and easy and so much more mouthwatering than the store bought variety. In addition to spreading the lemon curd on these delicious and buttery French treats, you will certainly find endless other fabulous uses for the curd, such as serving it with vanilla ice cream.


To keep up the French theme (and colors) of this wonderful recipe, I used blueberries and big fat blackberries – while the blackberry bushes in the garden do not bear ripe fruits yet, I did find some nice ones at the store – the tiny wood (wild) strawberries, however, are from our garden, they must be my favorite berries of all times. Whatever berries you use, try to use a medley of blue and red berries to make these Sablés stand out – blueberries, strawberries and blackberries or raspberries all work well.


This rich home baked treat was a real crowd pleaser and the shortbread like cookie hearts filled the kitchen with a wonderful buttery freshly baked smell. The cookie hearts taste dense and rich since they are made with such a generous amount of butter, that does not really come as a surprise. The butter also gives these cookies their melt-in-the-mouth texture. The cookies are pale golden brown in color and taste a bit nutty from the spelt flour (my latest food obsession) that I used. The lemon curd cuts nicely through the richness of the buttery dough and the fruits are just an utter summery delight as a topping.


If you are interested to take a look at how the other members of the French Fridays with Dorie Group interpreted this recipe, click here.


Tuesday, June 18, 2013

Sustainability and Swedish Cinnamon Buns (Kanelbullar)


During the week of June 15th to 21st, 2013, the German Council for Sustainable Development  invites everyone to participate in the German Sustainability Action Week and to make a contribution towards sustainability. The objective of sustainability is to find a fair and even balance between the needs of the present-day generation and the prospects of future generations. The contributions that can be made are as varied as the participants and they take place all over the country.
Diese Woche (vom 15. Bis zum 21. Juni 2013) hat der Deutsche Rat für Nachhaltige Entwicklung dazu aufgerufen, bei der „Aktionswoche zur Nachhaltigkeit“ mitzumachen.
Das Ziel der Nachhaltigkeit ist eine ausgewogene und gerechte Balance zwischen den Bedürfnissen der heutigen Generation und den Lebensperspektiven künftiger Generationen zu finden. Jeder kann mitmachen und die Aktionen die im ganzen Land stattfinden, sind genauso vielfältig wie die Teilnehmer selbst.


Schools and Universities might have a “green menu” this week at their cafeterias, there will be workshops, demonstrations, exhibitions and guided tours with respect to farming and healthy eating. There will be special cooking classes and presentations of how to re-use food stuffs and package materials and much more.
Einige Schulen und Universitäten haben diese Woche eine „grüne Menükarte“, es wird Workshops, Vorführungen, Ausstellungen und geführte Touren geben, bei denen über Landwirtschaft und gesundes Essen informiert wird. Es werden auch Kochkurse gegeben und andere Kurse, die über das Verwenden von verschieden Essensvorräten im Haushalt informieren. Und das sind nur einige wenige Beispiele der Aktionen in dieser Aktionswoche stattfinden werden.


Since this is a topic that concerns all of us, why not take out that wicker shopping basket or grab those cotton grocery bags and try to find a new local source of food this week, one that you have not tried before or make an extra effort to just shop locally this week for regional and seasonal produce. And why not prepare something wonderful for yourself, your family and friends using these local ingredients such as vegetables (there is still quite a bit of local rhubarb and asparagus available), fruits (local strawberries are abundant right now), honey (local spring harvest honey is available) and do not forget the eggs from a local chicken farm or wonderful flour from a local flour mill. It might only seem like a small contribution but it is certainly important.
Da Nachhaltigkeit uns alle angeht, warum schnappen Sie sich nicht den Einkaufskorb (aus Korb) oder Einkaufstaschen (aus Baumwolle) und versuchen, ein paar neue regionale Produkte ausfindig zu machen. Und warum nicht etwas Leckeres mit diesen regionalen Produkten für sich selbst, die Familie oder liebe Freunde kochen? Zur Zeit gibt es noch jede Menge regionalen Rhabarber oder Spargel, es gibt auch schon Erdbeeren vom Hof oder vom Feld. Auch vom Imker gibt es Honig und im Hofladen in ihrer Nähe Eier, Butter, Käse und Milch. Und dann nichts wie ran ans Backen oder Kochen mit den leckeren Produkten von hier! Das mag nichts besonders erscheinen, aber es ist ein wichtiger und gar nicht so kleiner Schritt auf dem Weg zu mehr Nachhaltigkeit.


These delicious and easy Swedish Cinnamon Buns will delight your family – I used artisanal flour from a local flour mill for these treats. I found the mill a few months ago and I adore the different kinds of flour they carry and love to use them in my baking, especially for my yeast doughs. The egg in the dough as well as the butter and the milk are from a farm that we visit once a week.
Diese leckeren und einfachen Schwedischen Zimtschnecken werden großen Anklang finden. Das Mehl für den Teig habe ich direkt in der Broicher Mühle in Wachtberg-Villip gekauft, Milch, Butter und das Ei kommen von einem Hofladen, den wir einmal die Woche besuchen. Vor allem beim Verarbeiten des Mehls merkt man (neben dem eigenen guten Gewissen) auch einen samtweichen Griff, hervorragende Eigenschaften beim Aufgehen und schließlich einen wunderbaren Geschmack.


Swedish Cinnamon Buns (Kanelbullar) - Schwedische Zimtschnecken

Ingredients for the Yeast Dough
  • 2 tsp instant yeast (I used "Seitenbacher" instant dry yeast)
  • 50 grams fine (caster) sugar
  • 60 grams unsalted butter (farm fresh if possible)
  • 150 ml milk, scalded and cooled (farm fresh if possible)
  • 1 egg (L) free range or organic
  • ½ tsp fine sea salt
  • 1 tsp freshly ground cardamom (I prefer to start with whole cardamom seeds and grind them using my mortar and pestle - the cardamom will be more flavorful that way - I used "Sonnentor", whole cardamom)
  • 325 grams strong white flour (I used a “type 1050” from my local flour mill)

Zutaten für den Hefeteig

  • 2 TL Hefe (Seitenbacher Trockenhefe)
  • 50 Gramm feinster Zucker
  • 60 Gramm Butter (vom Hof)
  • 150 ml Milch, aufgekocht und abgekühlt (vom Hof)
  • 1 Ei (L), Bio oder Freilandhaltung 
  • ½ TL feines Meersalz
  • 1 TL frisch gemörserter Kardamom (Sonnentor, Kardamom, ganz)
  • 325 Gramm Mehl für Hefeteige („Type 1050“ von der Broicher Mühle)


Ingredients for the Filling

  • 60 grams unsalted butter, room temperature (farm fresh if possible)
  • 60 grams fine (caster) sugar
  • 3 tsp ground cinnamon (I used "Sonnentor", organic mild cinnamon, type "Ceylon")


Ingredients for the Garnish
  • one portion of the whisked egg
  • some pearl sugar


Special Euipment needed
  • paper bun cases (these are wider than regular muffin cases)


Preparation of the Yeast Dough and the Filling
  1. Whisk the egg and divide in two. You need half for the dough, and half for the egg wash before baking. Set half the egg aside.
  2. Put the flour and butter into a bowl, and rub with your fingers until the butter has been incorporated. 
  3. Mix in the salt, sugar, cardamom and yeast. 
  4. In a separate bowl, combine the milk and the one portion of the whisked egg, then pour into the dry ingredients. 
  5. Stir with a spoon, then work with your hands until you have a smooth, stretchy, silky dough (at least 5 minutes). 
  6. Butter a bowl and place the dough inside, cover with a slightly dampened tea towel.
  7. Leave the dough in a warm draft free area for about an hour or until the dough has doubled in size.
  8. Knock back and knead again for 2 to 3 minutes.
  9. Turn the dough onto a floured surface. Roll into a large rectangle until the dough is about 1/2 cm thick. 
  10. Mix all the ingredients for the filling in a bowl until smooth.
  11. Spread the filling onto the rolled out dough, then roll up into a sausage. 
  12. Use a sharp knife to cut into about 16 slices.
  13. Lay each slice, cut face up, on a paper bun case.
  14. Cover with a slightly dampened tea towel and leave to rise for at least an hour or until doubled in size.
  15. Preheat your oven to 210 degrees Celsius.
  16. Take the remaining portion of the whisked egg and mix with a tablespoon of water. 
  17. Brush the buns with the egg wash and sprinkle with pearl sugar. 
  18. Bake the buns for about 10 minutes until golden.


Zutaten für die Füllung

  • 60 Gramm Butter (vom Hof)
  • 60 Gramm feinster Zucker
  • 3 TL gemahlener Zimt (Sonnentor Zimt, mild, Sorte Ceylon, Bio)


Zutaten für den Belag

  • ein wenig Ei
  • etwas Hagelzucker


Außerdem

  • Papierförmchen für Zimtschnecken (sind breiter als Muffin Papierbackförmchen)

Zubereitung des Hefeteigs und der Füllung

  1. Das Ei verquirlen und teilen. Eine Hälfte braucht man für den Teig, die andere Hälfte fürs Bestreichen der Schnecken.
  2. Das Mehl zusammen mit der Butter in eine Schüssel geben und mit den Fingern kneten.
  3. Das Salz, den Zucker, Kardamom und Hefe hineingeben.
  4. In einer anderen Schüssel die Milch mit dem restlichen Ei verquirlen und zu der Mehlmischung geben.
  5. Erst mit einem Holzlöffel, dann mit den Händen so lange rühren und kneten bis ein weicher, homogener Teig entsteht. Das dauert ungefähr fünf Minuten.
  6. Eine Schüssel mit Butter einreiben und den Hefeteig hinein geben. Mit einem feuchten Küchentuch abdecken.
  7. Den Teig zugedeckt an einem warmen Ort ca. 1 Stunde gehen lassen (bis der Teig sich verdoppelt hat).
  8. Den Teig mit den Händen kurz durchkneten (ungefähr 2 bis 3 Minuten).
  9. Dann den Teig auf einer bemehlten Arbeitsfläche ausrollen (soll zirka ½ cm dick sein).
  10. Die Zutaten für die Füllung zusammen mischen.
  11. Die Füllung gleichmäßig auf den Teig streichen und den Teig von der Längsseite aufrollen .
  12. Mit einem scharfen Messer in 16 Scheiben schneiden.
  13. Schnecken auf Backförmchen legen, Teigenden festdrücken und nochmals etwas flach drücken.
  14. Mit einem feuchten Küchentuch bedecken und nochmals gehen lassen bis sich die Schnecken verdoppelt haben (das dauert ungefähr eine Stunde).
  15. Den Ofen auf 210 Grad Celsius vorheizen.
  16. Das restliche Ei mit einem Esslöffel Wasser mischen.
  17. Die gegangenen Schnecken damit einstreichen und mit ein wenig Hagelzucker bestreuen.
  18. Die Zimtschnecken für zirka 10 Minuten backen. Lauwarm servieren.


This is a  recipe for a classic Swedish pastry, with a hint of cardamom and lots of cinnamon but you could also leave out the cardamom in the yeast dough and replace it with pure vanilla sugar. Or you could replace the cinnamon sugar mixture in the filling with cardamom.

These buns are simply fabulous and are always a huge success with everyone. They are particularly delicious while still warm and even more delightful with a cup of tea, coffee or hot chocolate.

What a better way to participate in the Sustainability Action Week this week than to bake up some of these Swedish Cinnamon Buns using some ingredients from local sources. It is a good start to think and act with sustainability in mind!


For more information about the German Council on Sustainability and the Action Week, you can consult their website http://www.nachhaltigkeitsrat.de/en/home/

Broicher mill in Wachtberg-Villip: http://www.muehle-bedorf.de/muehle/index.html

Dies ist ein Rezept für ein klassisches schwedisches Gebäck mit ein wenig Kardamom und viel Zimt. Aber das Rezept kann variiert werden, z. B. kann das Kardamom im Hefeteig durch Vanillezucker (am besten selbst gemacht) ersetzt oder der Zimtzucker in der Füllung wiederum durch etwas Kardamom ersetzt werden. Wie auch immer Sie diese Zimtschnecken an Ihren Geschmack anpassen, oder einfach da Rezept so backen wie es ist, sie kommen immer gut an und schmecken besonders gut mit einer Tasse Tee, Kaffee oder heißer Schokolade.

Warum also nicht mit regionalen Produkten backen oder kochen – das ist natürlich nur ein Weg sich an der Aktionswoche für Nachhaltigkeit zu beteiligen.


Deutscher Nachhaltigkeitsrats: http://www.nachhaltigkeitsrat.de/en/home/

Broicher Mühle in Wachtberg-Villip: http://www.muehle-bedorf.de/muehle/index.html