Wednesday, March 9, 2016

"Easy as Pie!" - Ham, Leek and Herb Pie for British Pie Week 2016


As my second pie for Bristish Pie Week 2016, I am featuring a wonderful "Ham, Leek and Herb Pie". Love serving individual servings instead of one large pie with this uncomplicated recipe.


Ham, Leek and Herb Pie

Ingredients
  • 50 grams unsalted butter
  • 3 medium leeks, thickly sliced
  • 1 tsp English mustard powder (available online or at your favorite British shop)
  • 2 tbsp plain (AP) flour
  • 300 ml high-quality chicken stock (best to use homemade, if possible)
  • sea salt and freshly ground black pepper
  • 150 grams cream cheese (you can also work with soft goat cheese here)
  • 2 tbsp fresh chopped mixed herbs (go with what you like with a mix of thyme, parsley, marjoram, tarragon, and/or sage)
  • grated peel fo 1/2 organic lemon
  • 350 grams cooked ham, cut into bite size pieces
  • one package of high-quality butter puff pastry (about 500 grams) OR make your own flaky rough puff pastry
  • 1 egg (M), free range or organic, beaten with a fork


Preparation
  1. For the filling, melt the butter in a large pan and cook the sliced leeks for about 5 minutes, until softened. Using a slotted spoon transfer the leeks to a plate and set aside.
  2. Stir in the mustard and flour into the pan juices and cook for 2 minutes, stirring occasionally. Remove the pan from the heat and gradually blend in the stock and cream cheese. 
  3. Return to the heat and bring to the boil, stirring until thickened. 
  4. Remove from the heat and season to taste. 
  5. Stir in the herbs, grated lemon peel and leeks, cover with food wrap and allow to cool. 
  6. Stir in the ham, before spooning into 4 x 300 milliliters individual pie dishes.
  7. Divide the puff pastry into four and roll each out on a lightly floured work surface 2 centimetres larger than each pie. 
  8. Brush the edges of the pie dishes with water. 
  9. Cut a strip of pastry from each pastry circle and lay on the edge of the dish. Brush with water and top each dish with a circle of pastry pressing the pastry together to seal and trim. 
  10. Using a sharp knife cut a steam hole in the centre of the pies. 
  11. Cover and chill for about 1 hour.
  12. Meanwhile preheat your oven to 190°Celsius (375°Fahrenheit).
  13. Brush the pastry with beaten egg and bake for 25 to 30 minutes, until well risen and golden.


This pie is all about a flaky crust and the soft vegetables, creamy sauce, ham and fresh herbs underneath. It is all about the contrast of textures that make just about everything good taste even better.

There is really nothing more delightful than to shatter the crust of a well-baked puff-pastry shell and to dig into the softness of its filling - the crisp and the soft, the rough and the smooth.


This creamy Ham, Leek and Herb Pie is just about as close to perfect comfort food as you can get.
If you have leftovers, do not immediately reach for your sandwich bread but try a homely pie instead - adapt it to whatever meat or veg you have leftover. Once it is perfect baked with a glistening, deep golden crust, do not hold back any longer and just dig in!

And remember that "just about everything tastes better when it's covered with a pastry lid".


Tuesday, March 8, 2016

"Oh my, what a pie!" - English Cottage Pie for British Pie Week 2016


In honor of British Pie Week from Monday, March 7, until Sunday, March 13, I will be featuring a few savory and sweet pies this week. And I am starting my personal pie week off with a lovely Perfect Cottage Pie.

Proper English Cottage Pie, a popular British pub-food staple, is a delicious, very traditional mince pie made with ground beef and topped with leftover mashed potatoes to form the top crust. For this version, to make the mashed topping you will use baking potatoes that have been pierced with a fork, put on a bed of a bit of rock salt and baked for about an hour, keeping the flesh nice and dry. When the potatoes are cool enough to handle, scoop them out and pass them through a ricer.


Perfect Cottage Pie
(inspired by James Martin, from James Martin: Home Comforts)

Ingredients
  • 8 baking potatoes, medium-sized
  • 1 tbsp vegetable oil
  • 600 grams (1lb 5oz) beef mince (lean ground beef)
  • 2 onions, finely chopped
  • 3 garlic cloves, finely chopped
  • 4 sprigs thyme, leaves picked and finely chopped
  • 1 celery stick, finely diced
  • 2 tbsp tomato purée
  • a dash Worcestershire sauce, to taste
  • 1 carrot, trimmed and finely chopped
  • 100 ml (3½fl oz) red wine
  • 500 ml (18fl oz) beef stock
  • a few peas (frozen are fine)
  • a bit of chopped Italian parsley and minced chives
  • 50 grams (1¾ oz) caster sugar
  • 125 grams (4½ oz) butter
  • 150 ml (5fl oz) milk
  • fine sea salt and freshly ground black pepper


Preparation
  1. Preheat the oven to 190° Celsius (170° Celsius, fan-assisted or 375° Fahrenheit).
  2. Prick the potatoes all over with a fork, then rub with a little oil and bake for 1 to 1½ hours, or until tender.
  3. Heat a large pan until hot, add the vegetable oil and fry the beef in batches until just browned. 
  4. Add the onions, garlic, thyme and celery and fry for a couple of minutes until softened.
  5. Add the tomato purée and cook for 1 to 2 minutes then add the Worcestershire sauce and the finely chopped carrot. 
  6. Add the red wine and cook until reduced in volume by a third.
  7. Then add the beef stock and bring to a simmer, stirring occasionally. Simmer for 30 minutes until the beef is tender and the sauce has thickened. 
  8. Add some peas and chopped parsley and chives at this time.
  9. Once cooked, tip the beef mixture into a bowl. Season to taste with salt and black pepper and as much Worcestershire sauce as you like. Set aside to cool while you make the topping.
  10. When the potatoes are cooked, take them out of the oven to cool. 
  11. Turn the oven up to 220° Celsius (200° Celsius, fan-assited or 430° Fahrenheit).
  12. When the potatoes are just cool enough to handle, slice them in half, scoop out the flesh and pass through a potato ricer into a bowl, or mash them with a fork.
  13. Add half the remaining butter to the potatoes and warm the milk in a saucepan until just simmering. Pour onto the potatoes and beat until the mashed potatoes are smooth and creamy. 
  14. Season to taste with salt and black pepper.
  15. Pour the cooled beef mixture into a baking dish and spoon the hot mashed potatoes over the top, fluffing it with a fork. Scatter a few dots of butter over the top then place in the oven for 10 to 15 minutes until golden brown and piping hot through.
  16. Serve with some cooked carrots.


James Martin's Perfect Cottage Pie has lots of lovely rich flavor with red wine, a homemade beef stock and a bit of Worcestershire sauce, for some spice. This Cottage pie is the ultimate comfort food, the perfect dish to warm you up on a cold day. And a great way to celebrate British Pie Week!


Saturday, March 5, 2016

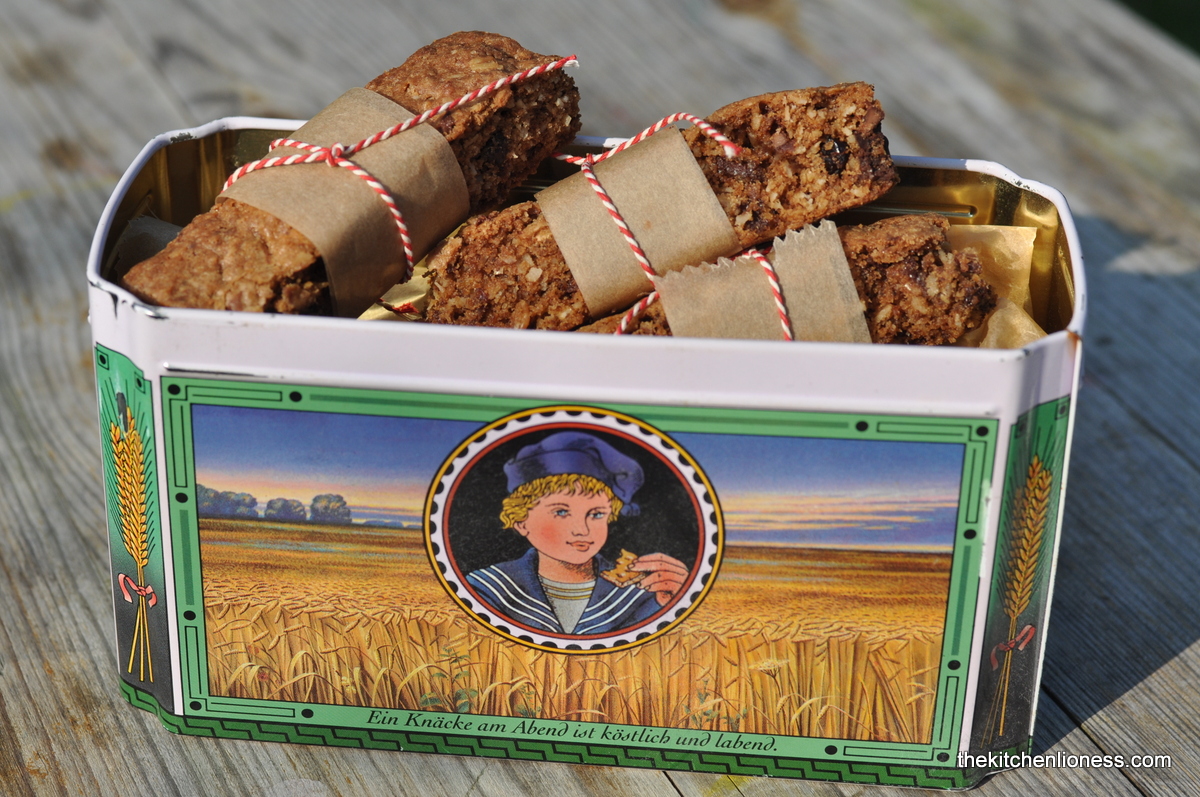
Dreary March Weather & Delightful Chewy Chocolate Chip Cookie Bars


Last week, frustrated by the continually wet weather,  I found myself in need of a little sweetness in my life. I decided that now is the perfect time of year to pull out some the recipes that have recently made it onto my „MUST BAKE“ list. It seems to many people, including myself, that baking is just the perfect comfort-style activity for a soggy day in early March.


So to combat my dreary weather blues, I decided to give these Chewy Chocolate Chip Cookie Bars a go. The original recipe hails from the Guittard Chocolate Cookbook by Amy Guittard (here).

We ate these lovely treats mid-afternoon, still a bit warm from the oven, with steaming cups of tea. That explains not only why there were none left the first time I made them, but also why they are not cut into straight, razor-sharp slices but showcase a bit of a wobbly, comforting look. And while I am putting this post together this morning, it is still raining outside – cold and chilly. For sure, the right time to go and get baking some more.


Trust me, while we are still a few weeks away from Easter baking, this time of year is really good for pulling out some of these recipes that you have been wanting to try out for a while now. In this recipe the principal flavors are high-quality milk chocolate and a rich, deeply molasses flavored sugar as well as oats (I have come to greatly appreciate a mix of five wholemeal grains here – milled they way they are, they all do look like coarse oatmeal), coconut and tart cherries or cranberries that offset the sweetness of the chocolate in the most delightful of way. The Ceylon cinnamon and the pure vanilla sugar add more wonderful warm flavors to these chewy bar cookies.


We found these bar cookies to be at their best with high-quality milk chocolate not bittersweet or semisweet chocolate. Just do make sure to use the best dark milk chocolate that you can find, meaning that the cacao solids are more than 30%. And make sure to chop the milk chocolate very coarsely, so there will be big, discernible chunks in the finished cookie bars.


Chewy Chocolate Chip Cookie Bars

Ingredients
  • 1 1/3 cups (160 grams) AP (plain) flour
  • 1/2 tsp baking soda
  • 1/2 tsp ground Ceylon cinnamon
  • 1/4 tsp fine sea salt
  • 8 tbsps (4 ounces, 115 grams) unsalted butter, at room temperature
  • 1 cup (200 grams) packed soft dark brown sugar (I used dark muscovado sugar from Tate & Lyle, nice to use Fairtrade product here)
  • 1 egg, (L), free-range or organic, at room temperature
  • 8 grams pure vanilla sugar
  • 5 tbsps. milk (I used whole milk)
  • 3/4 cup (90 grams dried cranberries or sour cherries
  • 1 cup (90 grams) unsweetened coconut (nice to use organic, coarsely shredded coconut, easily available at the health food store)
  • 3/4 cup (60 grams) rolled oats, not the porridge oats (I went with a mix of five wholemeal organic grains, oats, wheat, rye, barley, and spelt)
  • 1 1/2 cups (255 g) milk chocolate chips or coarsely chopped milk chocolate, preferably with minimum 30% cocoa solids (get the best you can afford)


Preparation
  1. Preheat your oven to 350° F (180º C or 160°C fan-assisted)
  2. Lightly butter a 9 x 13-inch (23 x 33cm) rectangular pan and dust the inside with flour, tapping out any excess.
  3. In a small bowl, whisk together the flour, baking soda, cinnamon and salt.
  4. In the bowl of a stand mixer fitted with the paddle attachment, beat the butter and sugar on high-speed until light and fluffy, about 3 minutes. Beat in the egg, vanilla sugar, and milk until smooth. At this point, the mixture is likely to look rather curdled but do not worry, it will all come together in the end.
  5. Stir in the flour mixture, then stir in the cranberries or sour cherries, coconut, oats (or oat mix), and chocolate chips just until combined. NOTE: The batter will be thick, like cookie dough.
  6. Spread the batter in the baking pan and even it out with your hands. You can use a little bit of water here to keep the dough from sticking to your fingers.
  7. Bake the bars until they feel like they are almost cooked in the middle, but not fully done, about 20 to 25 minutes.
  8. Let cool completely in the pan. When cool, cut into 3-inch (8cm) bars or squares.


Theoretically, these bar cookies are good keepers. Wrapped in foil, they will still be fine for a couple of days. But we found them to be at their best the same day they were made.

As far as the baking time is concerened, the original recipe said the bars will take 35 to 40 minutes to bake. But as with brownies, it is always better to undercook rather than overcook a bar cookie 20 to 25 minutes seems more reasonable, but, as ever, keep an eye on them and trust your own judgment over the clock.


Now, go get some sweet March baking done while the weather out there is still dreary...


Sunday, February 28, 2016

The Cottage Cooking Club - February Recipes


The month of February marks the twenty-second month of our international online cooking group, The Cottage Cooking Club. As a group, recipe by recipe, we are cooking and learning our way through a wonderful vegetable cookbook written in 2011 by Hugh Fearnley-Whittingstall, entitled „River Cottage Everyday Veg".

One of the declared aims of our cooking group is to make a decided effort to use as much regional, organic and seasonal produce as is reasonably possible.

This month I prepared eight of the ten designated recipes. I will write about each dish in the order in which I prepared them.

My first recipe for this February post is the Mushroom ragout with soft polenta (page 57) from the chapter "Comfort Food & Feasts“.


This was a recipe that I had been looking forward to for a long time. Soft, creamy polenta topped with a ragout of earthy musrooms. My kind of food in February. I stayed true to the recipe but as I am not such a huge fan of instant polenta, I used regular polenta that takes a bit longer to cook. The infused milk for the polenta contains a bay leaf and thyme, peppercorns, onion, garlic. Once the polenta has finished cooking, you add butter, chopped rosemary and Parmesan – an irresisitible taste as is.


For the topping you will need mushrooms, garlic, more thyme, red wine, mushroom stock, pepper and salt to make the most flavorful mushroom ragout. Creamy and hearty, polenta makes a great alternative to mashed potatoes or pasta and served topped with this richly flavored ragout it is a vegetarian main dish – then all you need to enjoy this lovely meal is to pick up a pretty spoon, dig in and enjoy!


My second recipe this month was the Lentils with beetroot and feta (page 237) from the chapter „Store-Cupboard Suppers“. An easy, substantial side salad with lentils, wedges of sweet, earthy beets, some cubes of salty feta and a lovely dressing of mild olive oil, balsamic vinegar, salt and pepper.


If you are a lentil lover, and of you appreciate the taste of red beets - this is a great recipe to keep in mind for fall or winter time. You can always stock some lentils (just make sure they are the type that is best used for salads) and feta are readily available in the cold months – I can easily see this salad as part of a buffet spread, in a lunchbox, or as tasty office break fare.

You should keep the beets separate until you are ready to eat, as they do tend to bleed into the salad. Another tip to keep in mind is that if you run out of time you can always use pre-cooked, vacuum-packed beets in this recipe instead of roasting them. You might loose some of the earthy flavors that you get when freshly roasting the beets but there are enough tasty components in this salad to guarantee a delicious outcome.


The third recipe in February was the Apple and blue vinny toastie (page 204) from the chapter of "Bready Things". With grated tart eating apples, Gorgonzola dolce, a bit of mayonnaise, some salt and pepper this is certainly a different kind of topping for some toasted country bread.


This is a toastie that I would definitely only serve to peole that appreciate the distinct taste of blue cheese or Gorgonzola – the combination here works surprinsingly well. Again, just chose your taste testers well.


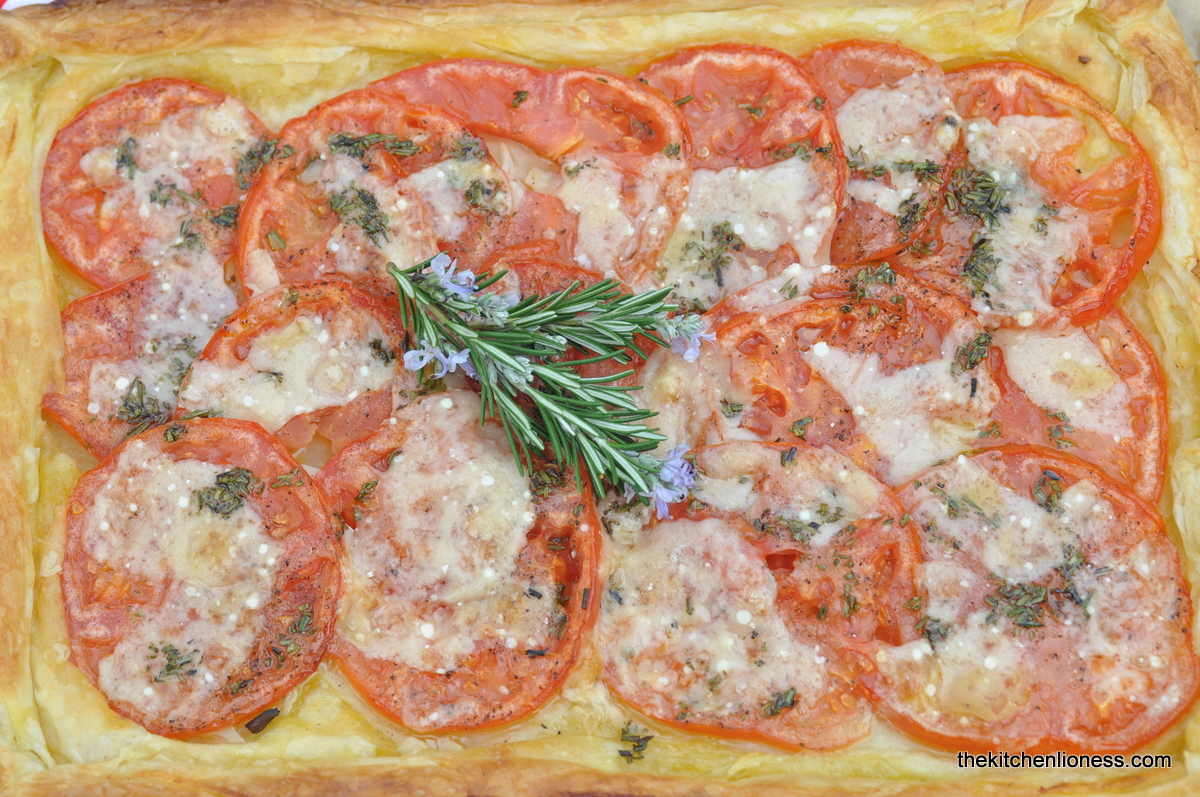
Recipe number four this month felt like an old friend. After having made the Tomato, thyme and goat´s cheese tart in July 2014 (here), the Basil and mozzarella tart in October 2015 (here) or the Blue cheese and chives tart in December 2015 (here), it was time for yet another fabulous variation, the Rosemary and pecorino tart (page 216) from the chapter of „Store-cupboard suppers“.


The main recipe has become a family favorite, my go to recipe for those days when I am looking or a quick, no fuss, savory fare with easy to find ingredients that can be assembled in a flash. So, this recipe is another example of how handy store-bought, good-quality puff pastry can be. Add some thinly sliced tomatoes (even if they are a bit out-of-season these days), some thinly sliced garlic, pepper, salt, a bit of good olive oil and bake. Then add some chopped rosemary and grated some lovely, sharp Pecorino Romano – I opted for shavings of Pecorino instead of grating it. For the looks, of course. Failing Pecorino you can also use Parmigiano Reggiano to great effect here. It tastes just as wonderful in this recipe.


The fifth treat this month was much-anticipated Sweet potato and peanut gratin (page 63) from the chapter „Comfort Food & Feasts“. The kids love sweet potatoes and although they are not grown around here, we can nowadays find them in many grocery stores and at the green grocers. No matter which way I prepare them they always seem to get eaten – this is truly a great veg to serve to the younger crowds even if they do not enjoy vegetables in general.


Sweet potatoes can be cooked in similar ways to the potato but cook much more quickly. You can bake, mash or roast sweet potatoes, or use them in vegetable soups and casseroles. Alternatively, you can add them to risottos, pasta dishes and curries. But Hugh´s recipe is a whole other category it seems. With one kilo of sweet potatoes, a bit of heat from the chilis, garlic, double cream, crunchy peanut butter, lime zest and juice, salt and pepper – this is really reminiscent of the sauce I serve alongside my chicken satays. Rich, creamy and addictive! We loved this gratin!


Not your every day type of side dish but the kids got their fill of sweet potatoes and I got to show off my lovely vintage gratin dishes that I found at a wonderful flea market the other day. The old lady that sold them to me for a song, just shrugged her shoulders and said that she did not have a clue what to do with them! And the moment I saw them I was thinking of this sweet potato gratin that I was planning on making as small individual gratins and serve them in exactly these dishes. Sometimes things just seem to fall into place...


The next recipe on my list was the White bean salad with tomatoes and red onions (page 240) from the chapter „Store-Cupboard Suppers“.


A fresh, wintry salad with white beans (soaked overnight or the canned variety), red onions, tomatoes and a dressing of olive oil, lemon juice, Dijon mustard, salt and pepper – to which I added a mixed salad of baby spinach and Swiss chard. The greens stood up well to those other hearty ingredients - they were really nice in combination with red onions, beans and tomatoes.


To cut the sharpness from the raw onion, I soaked the thinly sliced red onion in ice cold water for a few minutes before I drained the slices well and added them to the salad. A nice substantial bistro kind of salad that had a lot of flavor. It can easily be served for lunch or as dinner with just a nice hunk of country bread alongside.


Recipe number seven was the lovely and easy Potatoes and „deconstructed pesto“ (page 222) from the chapter „Store-Cupboard Suppers“.


A truly nice combination of cooked fingerling potatoes, loads of fresh basil, freshly squeezed lemon juice and plenty of shredded Parmesan. What on earth is not to like about this dish. There is the ease of preparation, the short list of ingredients, the extremly simple recipe and the immense „waftability factor“ that you get while preparing this. Not to mention the fabulous taste. We loved it. A keeper.


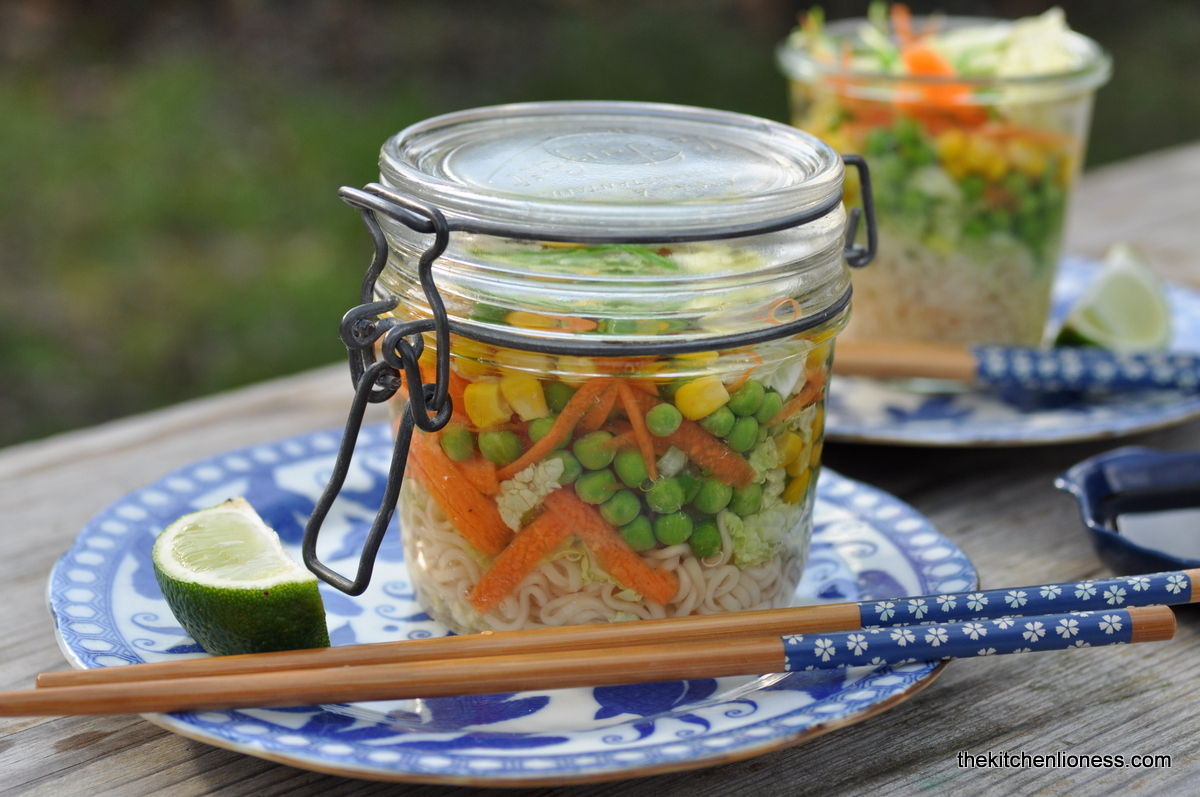
The last recipe I tackled this month was the one that the kids kept begging for all the time. The older girls desperately wanted to bring the DIY „pot“ noodles (page 248) from the chapter „Store-Cupboard Suppers“ to school – so I took a few liberties with the veg but I most certainly kept with the theme when I made these.


I used soba noodles here that I pre-cooked, drained and added to the jars first. Then it was peas, carrots, corn, napa cabbage and chives - for the flavor I opted out of the boillon cubes and added sliced spring onions, slices of fresh ginger, crushed chili flakes, lime juice, low-sodium soy sauce, pepper, sea salt, and a few drops of toasted sesame oil.


When I prepared these for the lond day at school, I packed some spare lime wedges and a bit of soy sauce alonside a flask with hot water and some cute, girlish chopsticks - the girls loved, loved this recipe and are asking for seconds and thirds...and we loved eating the "left-overs" at home. Fun. Delicious. Versatile. Healthy. And a genius idea to start with.


In summary, we loved each and every dish this month - the kids went crazy for the potato gratin and the noodle pots, we enjoyed the salads and the tart a tad more...all were really happy in the end.


Please note, that for copyright reasons, we do NOT publish the recipes. If you enjoy the recipes in our series, hopefully, the wonderfully talented and enthusiastic members of The Cottage Cooking Club and their wonderful posts can convince you to get a copy of this lovely book. Better yet, do make sure to join us in this cooking adventure.

To see how wonderful all the dishes from my fellow Cottage Cooking Club members turned out this month, please make sure to take a look at their personal links and to do so, just visit here.


Tuesday, February 23, 2016

Brussels Sprouts Tarte Tatin

In most home kitchens there are the staple ingredients. The fail safes we can turn to for last minute lunch plans, or dinner get-togethers.. For me good-quality, buttery, puff pastry is one of them, it often makes its way into my recipes in some form or another, sweet or savory. One of my favorite ways to use puff pastry is for baking a Tarte Tatin.


And as we all know, a Tarte Tatin doesn't have to be sweet, as show in some delicious savory vegetable versions that I made in the past. There was the Baby Beet Tarte Tatin (which you can find here), or the Upside-down Onion Tarts (here) that I made to rave reviews following recipes from Hugh Fearnley-Whittingstall for The Cottage Cooking Club. These savory versions of the classic Tarte Tatin, as well as my version with the Brussels sprouts, still have the classic caramel and rich puff pastry. Today´s recipe would work equally well with other vegetables such as red onions and butternut squash but it is particularly pretty, and delicious, of course, with the Brussels sprouts.


Unfortunately, Brussels sprouts, or „Rosenkohl“ as we call them around here (which literally translates to „rose cabbage“) have a dreadful reputation. Like miniature versions of the common cabbage, they grow on large stalks and have a sweet, nutty flavor, which some people do not appreciate. But, treated with a touch of love and care, these little buds can become one of your favorite winter vegetable.


Brussels Sprouts Tarte Tatin

Ingredients
  • 500 grams of puff pastry (all butter, best quality you can afford)
  • 750 grams of fresh Brussels sprouts (depending on the size of your tarte tatin mold or oven-proof pan), washed, outer leaves removed and with dry ends of stalks cut off
  • 50 grams of butter, unsalted
  • 1 tbsp of runny honey (preferably a mild, regional variety, from your favorite beekeeper)
  • 2 tbsps balsamic vinegar (Aceto balsamico)
  • 3 sprigs of fresh thyme, leaves removed
  • a good pinch of fine sea salt
  • freshly ground black pepper
  • some plain flour, for dusting your work surface


Preparation
  1. Place the prepared Brussels sprouts in a large pan and add enough water to cover, season with salt and bring to the boil. Allow to simmer for 3 to 4 minutes, then quickly drain the veg and refresh in a bowl of iced water (this halts the cooking process and helps to retain their color).
  2. Drain the cooled sprouts and leave to dry on some kitchen towel.
  3. Preheat the oven to 200°C (180° convection).
  4. Roll out the puff pastry on a lightly floured surface. Using an ovenproof frying pan (approx. 25cm) as your guide, trim the pastry to a circle that is slightly bigger than the pan. Transfer to a baking tray lined with baking parchment and chill in the refrigerator.
  5. Place the frying pan on a medium-high heat and add the butter, honey, and vinegar stirring until melted together. 
  6. Reduce the heat slightly, and add the picked thyme leaves, shaking the pan gently to combine.
  7. Remove the pan from the heat and allow to cool for 5 minutes
  8. Place the par-boiled Brussels sprouts in a decorative pattern across the base of the pan, arranged like circles. Make sure all the spuds are coated in the butter glaze.
  9. Remove the pastry circle form the fridge and place on top of the vegetables in the pan. Gently tuck the edges in around the vegetables
  10. Transfer the pan to the oven and bake for 20 minutes, then check the tarte to see if there is any excess butter or liquid bubbling up around the sides – if so, gently pour this away (you may need to use kitchen towel or a cloth to hold the tarte in place)
  11. Reduce the oven to 180°C (160° convection) and return the tarte to the oven for a further 15 to 20 minutes, until the pastry has risen and is golden brown.
  12. Leave to cool for 10 minutes (the pastry will deflate slightly in this time), then place a plate over the top of the pan and carefully flip the pan over, so the Tarte Tatin turns out on to the plate. Serve the tarte warm, perhaps with a fresh salad.


If you have not tried Brussels sprouts, this recipe is a great way to get started. Just remember that when shopping for this vegetable, Brussels sprouts should have tight compact heads and no sign of wilting and the stalks should look moist and freshly cut.

Contrary to popular opinion,when you want to cook or blanch them in salted boiling watre, Brussels sprouts do not benefit from having a cross cut into the bottom of them. Instead of helping them to cook evenly, the cross can make the sprouts waterlogged.

In this recipe, the Brussels sprouts are first blanched and then are covered with buttery pastry and cooked in the oven until they are caramelized and the pastry is crispy and golden brown. The flakiness and butteriness of the pastry compliments the sweetness of the caramelized sprouts very nicely.This Tarte Tatin is gorgeous served with just a little seasonal salat or just as is.


Friday, February 19, 2016

Blueberry Yogurt Pound Cake


This lovely, lemony blueberry cake is the perfect sweet treat to serve to your loved ones any day of the week. The cake is studded with fresh blueberries and it tastes like a lighter version of a pound cake.


Instead of being made with the traditional one-to-one ratio of butter, all-purpose flour and sugar, my version is made with natural yogurt as well as healthy almond oil. The almond oil that I use hails from my favorite local oil mill (here) – it has a very light color and a mild, very pleasant taste of almonds that harmonizes perfectly with the remaining ingredients of the cake. If you prefer to use another oil, feel free to substitute the almond oil in this recipe with sunflower oil or use a light tasting, fruity, good-quality olive oil.


Full-fat natural yogurt is a surprisingly great substitute for butter when baking bread and cakes. Not only is it lower in fat, it adds a delightful tangy flavor and creates a very tender crumb.


This is one of my favorite cakes for weekdays, when there is not really much time for creaming butter and sugar, and fussing with a long recipe. The method for making this lovely Blueberry yogurt pound cake is as basic as they come. You only stir the ingredients together, spoon the batter into the prepared cake pan and, just under an hour later, remove the light, blueberry-studded cake from the oven. Let the cake cool, dust with some powdered sugar and you will be in for a real "any-day-of-the-week" kind of treat.


Blueberry Yogurt Pound Cake

Ingredients
  • 75 ml almond oil (preferably from your favorite oil mill or manufacturer)
  • 125 grams full-fat natural yogurt, Greek yogurt also works in this recipe
  • 150 grams superfine baking sugar, also called caster sugar or sucré semoule (NOTE: if you are unable to find this fine sugar, feel free to grind regular sugar in your food processor for a few seconds)
  • 2 eggs (L), organic or free range
  • 1 ½ tsps pure vanilla sugar (best homemade)
  • zest of 1 lemon (organic or untreated)
  • 210 grams AP (wheat) flour, plus some for dusting the cake pan
  • 1½ tsp baking powder
  • a good pinch of fine sea salt
  • 150 grams fresh blueberries, plus some for serving alongside


Preparation
  1. Preheat your oven to 180° C (350° F).
  2. Butter and flour a 900 gram cake pan (about 20 cm/8 inches long).
  3. In a large bowl, whisk together the oil, yogurt, sugar, eggs, vanilla sugar and lemon zest.
  4. In a separate bowl, stir together the flour, baking powder and salt.
  5. Pour the dry ingredients into the yogurt mixture along with the blueberries and fold very gently together, taking care not to mix the batter any more than is necessary as overzealous stirring at this stage could result in a tough cake later.
  6. Pour the batter into the prepared cake pan and bake for 50 to 55 minutes, or until a small knife inserted into the middle comes out clean.
  7. Leave to cool on a wire rack before dusting with powdered sugar and cutting into slices to serve with some more fresh blueberries.


So, what are you waiting for - Have your cake and eat it too!


Saturday, February 13, 2016

Valentine´s Day Wishes - Valentinstagsgrüße


To all my friends and readers of my blog: wishing you a Happy Valentine´s Day!

Ich wünsche allen meinen Freunden und Lesern einen schönen Valentinstag!