Tuesday, June 23, 2020

St John Cakelettes for St John's Day - Johannisküchlein zum Johannistag


When the sun sets on 23 June, it's St John’s Eve also known as St John’s Night (Johannisnacht) and thus the eve of celebration before the Feast Day of St John the Baptist (Sankt Johannes der Täufer). In medieval times the feast of St John was one of the most important festivals of the year. Midsummer celebrations pre-dated Christianity all over Europe, it’s the time when the day is longest and night is shortest. And to this day, there are elements of pre-Christian nature worship, of the midsummer festival, and of summer solstice celebrations (Sommersonnenwende) interwoven with the festivities around St John.


In Germany, too, the summer solstice is celebrated. As in the Scandinavian countries, huge bonfires are lit on St John’s Eve (Johannesfeuer), around which people dance, often going along with a ritual, that young people had to jump over the fire. The custom dates back to the 12th century. It was thought that the summer solstice was a time when spirits roamed freely, so bonfires were lit to ward off and protect from the evil spirits that cause illness and harm livestock, and to avert bad weather.

In some areas straw dolls are thrown into the fire and certain regions still uphold the custom of a woven wreath or crown of twigs and leaves decorated with flowers and ribbons (Johanniskrone). In earlier times, the wreath was hung up on the village green and danced around every night until the greenery died. The circular shape of the wreaths suggested both the sun and the cyclical nature of the seasons, again going back to old Pagan beliefs.


Always celebrated on June 24th, St John's Day celebrates the birthday of St John the Baptist. Usually, a saint's feast day is celebrated on the day that the saint died. St John along with the Virgin Mary are the only two saints whose birthdays are celebrated. According to St Luke’s Gospel, John was six months older than Jesus, this allowed the church year to assimilate the far older customs associated with the summer solstice on 21 June and the winter solstice on 25 December. It is still celebrated as a religious feast day in several countries, such as Denmark, Norway, Sweden, Finland, Estonia, Latvia and Lithuania and Germany and it is also celebrated in Québec as the Fête Nationale du Québec.

To farmers, this is also a turning of the growing season tide. After the solstice, the days will gradually become shorter. Therefore, some farmers would spread the ashes from the fires over the fields in hopes of more bountiful crops.

And around here, St John's Day marks the end of the asparagus and rhubarb season as well as the beginning of the sweet cherry season.


Collecting medicinal herbs or plants held to have magical properties was also customary on St Johns Eve. The flowers represented the fertility of the earth, just as the fires stood for the sun. The flowers associated with the feast of St John include fennel (Fenchel), rue (Weinraute), rosemary (Rosmarin), lemon verbena (Zitronenverbene), mallows (Malven), laburnum (Goldregen), foxgloves (Fingerhüte) and elder flowers (Holunder). It was especially important to gather the perennial herb St John’s Wort (Johanniskraut) - named after the saint - with those small, star-shaped yellow flowers. Since medieval times, this herb has been hung over doors, windows and icons to keep witches and evil spirits away, and was once known as ‘chase-devil’.

Yarrow (gemeine Schafgarbe) has been used since ancient times for healing wounds, and its essential oil has anti-inflammatory properties, it was also used as a ward against evil, and traditionally it was burned on the eve of St John’s Day. Bracken (Adlerfarne) was also collected as its minute spores were reputed to confer invisibility on their possessor if gathered at the only time when they were said to be visible, i.e., on St John’s Eve at the precise moment at which the saint was born.


This day is representative of so many things that most people can find a reason to partake in the local traditions. As far as the Christian faith is concerned, John the Baptist is described in the Gospel of Luke as a relative of Jesus who led a movement of baptism at the Jordan River. Most scholars agree that John baptized Jesus by wading into the water with Jesus from the eastern bank of the river. John is probably best known for foretelling of the Messiah, which in the New Testament predicted the coming of Jesus.

According to the Gospel of Mark, John is imprisoned by Herod for denouncing Herod's incestuous marriage. John condemned Herod for marrying Herodias (his niece) in violation of Old Testament Law. After Herodias's daughter Salome has danced before Herod, he grants her a favor. Herodias tells her to ask for the head of John the Baptist, which is delivered to her on a plate.


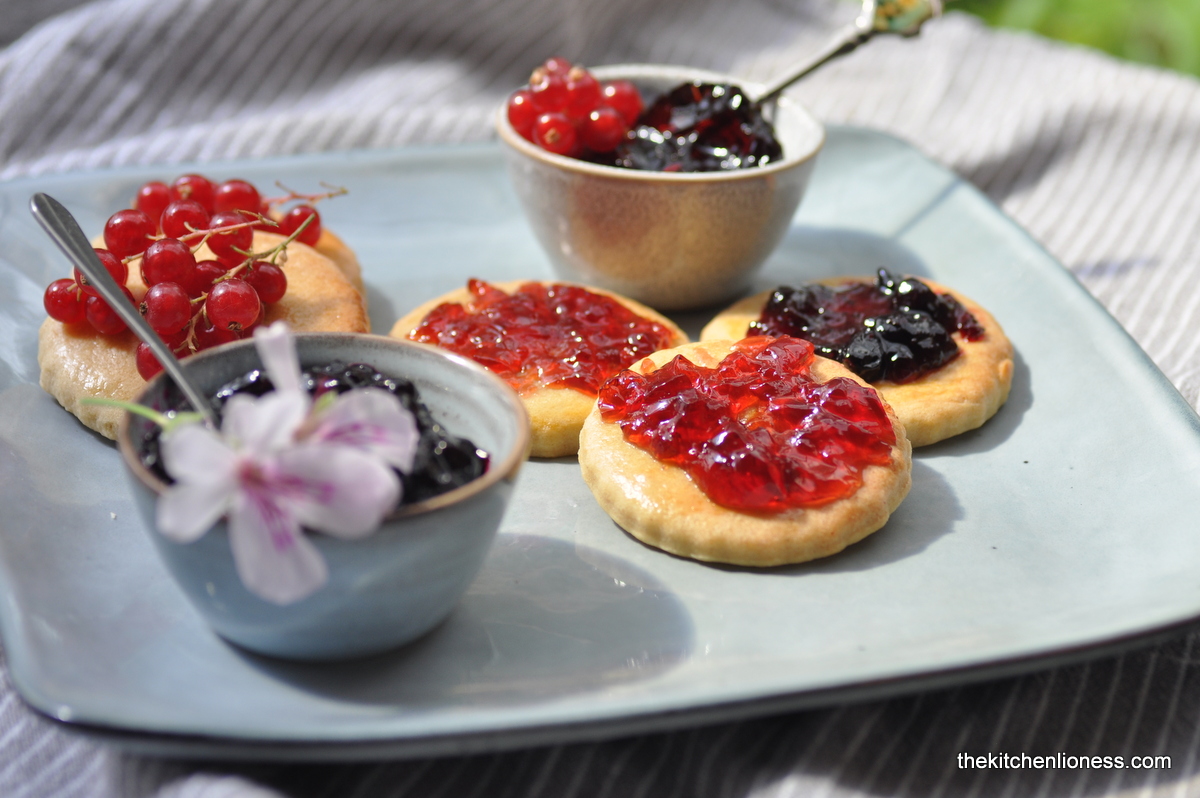
This lovely recipe is meant to celebrate St John’s feast day in a sweet way. You can ask your kids to help you with this recipe. Maybe they could peel the eggs for you, or scrape the eggs through the sieve, knead the dough, cut out the dough rounds and place them on the baking sheets. The recipe is quite easy and the results are sweet.


St John’s Cakelettes
(these small cakes are traditionally baked for St John’s feast day on June 24th – the recipe yields between 15 to 20 cakelettes)

Ingredients
  • 250g white spelt flour (you can substitute AP/plain flour here), plus some for the work surface
  • 125g, unsalted butter, room temperature
  • 50g raw cane sugar (OR natural light brown sugar)
  • 8g pure vanilla sugar (OR use vanilla extract)
  • 5 eggs (M), hard-boiled, cooled, peeled, forced through a sieve
  • 1 pinch of fine sea salt
  • 1 tbsp freshly squeezed lemon juice
  • eggwash (1 egg yolk mixed with a bit of cold water or milk)

For Serving
  • Red and black currant jelly or jam (preferably homemade)

Preparation
  1. Pre-heat your oven to 170°C (335°F).
  2. Mix all the ingredients together until you have an elastic dough.
  3. Lightly flour your work surface and roll out the dough to a thickness of about 1cm (0.4in).
  4. Using a round shape cookie cutter or a glass (about 3 in Ø), cut out about 15 to 20 cookies and place them on parchment lined baking sheets. Gather any dough scraps and re-roll them. Since the cakelettes do not expand much, you can place them realtively close together.
  5. Brush each cakelette with some egg wash.
  6. Bake each batch about 15 to 20 minutes or until golden.
  7. Transfer to a cooling rack.
  8. Liberally spread red and/or black currant jelly or jam on each cakelette and serve.


Johannisküchlein
(werden traditionell zum Mittsommertag bzw. Johannisfest am 24. Juni gebacken, ergibt ca. 15 bis 20 Stück, je nach Größe des Ausstechers)

Zutaten
  • 250g Dinkelmehl (Type 630), plus etwas Mehl für die Arbeitsfläche
  • 125g Butter, Zimmertemperatur
  • 50g Rohrohrzucker
  • 8g Bourbon Vanillezucker
  • 5 Eier (M), hart gekocht, abgekühlt und dann durch ein feines Sieb gestrichen
  • 1 Prise feines Salz
  • ein TL Zitronensaft, frisch gepresst
  • Eistreiche (eine Eigelb, vermischt mit etwas Wasser oder Milch)

Zum Servieren
  • roten und schwarzen Johannisbeergelee oder Johannisbeermarmelade

Zubereitung
  1. Den Ofen auf 170°C (150°C Heißluft vorheizen).
  2. Alle Zutaten zu einem homogenen Teig verarbeiten.
  3. Den Teig mit einem Nudelholz auf einer mehlierten Arbeitsfläche 1 cm dick ausrollen.
  4. Entweder mit einem Keksausstecher oder einem Glas (7 bis 8 cm Ø) runde Küchlein ausstechen.
  5. Teigreste wieder zusammenkneten und neu ausrollen.
  6. Die Küchlein auf zwei mit Backpapier ausgelegte Backbleche geben. Da die Küchlein nicht viel aufgehen, kann man sie ruhig mit relativ wenig Abstand auf das Backblech legen.
  7. Dünn mit Eistreiche bepinseln.
  8. Dann die Bleche nacheinander im Ofen bei 170 °C (150 °C Heißluft) goldgelb backen. Das dauert ca. 15 bis 20 Minuten.
  9. Auf einem Kuchenrost abkühlen lassen.
  10. Dann wahlweise mit rotem und/oder schwarzem Johannisbeergelee odeer Marmelade bestreichen und am besten noch am selben Tage servieren.


Please note that this blog post is part of my series for a local radio station, where, throughout the years, I present festive bakes that are closely tied to various holidays and seasons. If you are interested, have a LOOK & LISTEN (in German) HERE.

The various recipes of my series can be found here:
  • in January, for Three Kings Day (Dreikönigstag) two kinds of Galette des Rois (Dreikönigskuchen) (HERE)
  • for Lent (Fastenzeit) Lenten Soup with Lenten Beugel (Fastenbeugel) (HERE)
  • for Good Friday (Karfreitag) the delicious Hot Cross Buns (HERE)
  • for Pentecost /Whitsun (Pfingsten) the fun Allgäu Bread Birds (Allgäuer Brotvögel) (HERE)
  • for the beginning of the summer vacation, the lovely Sacristains (Almond & Sugar Puff Pastry Sticks) (HERE)
  • for St Christopher's Day (St Christophorus), the energy-packed Müsli Power Bars (Müsli Energieriegel) (HERE)
  • for Mary's Assumption Day (Mariä Himmelfahrt) my Tear & Share Herb Bread (Kräuterbrot) (HERE)
  • for Mary’s Birthday (Mariä Geburt) some very pretty Mary’s Sweet Rolls (Süße Marienküchlein) (HERE)
  • for Thanksgiving (Erntedankfest) a delicious and seasonal Thanksgiving Apple Tart with Frangipane (Erntedank Apfeltarte mit Mandelcreme) (HERE)
  • for Halloween a Pumpkin Spice Bundt Cake (Kürbis-Gewürzkuchen)
  • for St Martin's Day (Martinsfest) the cheerful Sweet Dough Men (Weckmänner) (HERE)
  • for St Andrew's Day (Andreastag) a classic Petticoat Tails Shortbread (HERE)
  • for Christmas Day (Weihnachten) these Traditional German Gingerbread (Elisenlebkuchen) (HERE
  • for New Year's Eve New Year's Eve Pretzel (Neujahrsbretzel)
  • for Candelmas Day (Mariä Lichtmess) some delightful Navettes de Saint Victor (HERE)
  • for Carnival Season (Karneval) these lovely Carnival Doughnuts (Karnevals-Krapfen) (HERE
  • for St Patrick's Day a traditional Irish Brown Soda Bread (Irisches Sodabrot)(HERE
  • for St Joseph's Day a long-forgotten but thankfully re-discovered Sweet Cotton Bread (Baumwollbrot)(HERE
  • for Palm Sunday (Palmsonntag) these very pretty Palm Pretzels (Palmbrezel) (HERE)
  • for Easter Sunday (Ostersonntag) an Easter Brunch at Home with Tarte Flambée (Flammkuchen) (HERE)
  • for the Month of May (Marienmonat Mai) these elegant Visitandines de Nancy (HERE
  • for Pentecost/Whitsun (Pfingsten) festive Beignets (Heiliggeistkrapfen) (HERE
  • for St John's Day (Johannistag) these sweet St John Cakelettes (Johannisküchlein) (HERE) - more delicious treats to come very soon.


Friday, June 19, 2020

Red Rhubarb & Wild Strawberry Tart l Rote Rhabarbertarte mit Walderdbeeren


This tart is meant to celebrate the humble rhubarb and the delectable wild strawberry (aka the wood strawberry) that happily grows in our garden. The tart has a buttery crust and a custardy filling with plenty of summery flavors.


Serve it for tea or, as I often do, for breakfast, rhubarb is a vegetable, after all. The rhubarb stalks can be used raw, when they have a crisp texture - one of my fondest childhood food memories involves eating a stalk of fresh rhubarb that we picked in my grandmother's garden and dipped in white sugar - but stalks of rhubarb are most commonly cooked with sugar and used in pies, crumbles and other desserts. Or, if you prefer your food to be on the savory side, use rhubarb to make a chutney, or a BBQ sauce, salad dressing or ketchup. Cooked or raw, rhubarb stalks have a strong, tart taste. But if you can, choose the brightest red stalks that you can find over the green ones, as the red ones tend to be a bit sweeter and have a more complex flavor - some people around here call the red stalks 'strawberry rhubarb' (Erdbeer-Rhabarber) because of the vivid color and relative sweet taste.

When I make this tart, I always add a few tiny yet amazingly flavorful wild strawberries but if they are not in season while the rhubarb already is, I go with all rhubarb. Not so much that the strawberries are a dominant flavor, but they add a little extra something to this tart. Plus they are very pretty in a cake.


Around here, the growing season for rhubarb officially ends next week, on June 24th to be exact, so it is high time to be baking this tart. Before that date, the plant has lower levels of oxalic acid and less sourness and the stalks tend to be less coarse.

Remember to wash and trim the rhubarb stems before you intend to use them and make sure to discard the leaves as they are poisonous. If you cook with outdoor-grown rhubarb, remove any stringy outer layers. And, as a general rule, you should cut it into equal-sized pieces to ensure even cooking.


This is also a great tart to make ahead of time, it tastes just as good the day after making. If you wanted to serve it with whipped cream or a good vanilla ice cream, by all means do so, but I think it is fine as is, maybe with just a slight dusting of powdered sugar.


Whether you take the time to make a geometric pattern or simply scatter your stalks, it’s your choice, any way you bake it, this tart is easy and utterly delicious.


Rhubarb and Wild Strawberry Tart

Ingredients

For the Pastry
  • 225g plain (AP) flour, plus extra for rolling
  • 25g ground almonds (almond flour)
  • 2 tbsp icing sugar
  • 140g cold butter, unsalted, cubed
  • 1 egg yolk (L), organic or free range
  • 1 to 2 tbsps cold water
For the Filling
  • 50g pistachios, unsalted, ground
  • 500g red rhubarb, trimmed and peeled
  • a small handful of wild strawberris (you can omit these and substitute with regular small strawberries or more rhubarb)
  • 2 eggs (M), organic of free range
  • 125ml milk (I like to use 3.5%)
  • 125ml cooking cream (or use all milk, for a 250ml total)
  • 2 tbsps superfine (caster) sugar
  • 8g pure vanilla sugar (or use 1 tbsp vanilla extract)
  • a pinch of fine sea salt

Preparation
  1. To make the pastry, put the flour, almonds, icing sugar and butter in a food processor.
  2. Blitz until the mixture resembles breadcrumbs. While the motor is running, add the egg yolk and dribble in 1 to 2 tbsp cold water.
  3. Tip onto your lightly floured work surface and knead briefly to bring the mixture together to form a dough.
  4. Wrap in kitchne wrap and chill for about 30 to 60 minutes.
  5. Pre-heat your oven to 190°C.
  6. Remove the pastry from the fridge. If it is a little hard, leave it at room temperature to soften for 10 mins or so.
  7. Roll out to on a lightly floured surface and use it to line a 23cm fluted tart pan. Cut a round of baking paper bigger than the pan and place in the pan with baking beans on top.
  8. Bake blind for 15 to 20 mins, then remove the beans and bake for a further 5 to 10 mins until lightly golden.
  9. Remove the tart from the oven and turn the oven down to 160°C.
  10. While the tart is in the oven, prepare the filling. Whisk together the eggs, milk, cream, vanilla sugar and salt.
  11. Sprinkle ground pistachios over the bottom of the case, arrange rhubarb pieces on top, scatter wild strawberrie in bewteen and pour the cream mixture over the fuit.
  12. Place the tart on a parchment-lined baking sheet in the oven and bake for 30 to 35 minutes until it is just set.
  13. Remove from the oven and leave to cool completely before cutting into slices.


Rhabarber und Walderdbeertarte

Zutaten

Für den Teig
  • 225g Weizenmehl, Type 405, plus etwas zum Ausrollen
  • 25g gemahlene Mandeln (Mandelmehl)
  • 2TL Puderzucker
  • 140g kalte Butter, gewürfelt
  • 1 Eigelb (L), Bio-oder Freilandhaltung
  • 1 bis 2 EL kaltes Wasser
Für den Guss
  • 50g gemahlene Pistazien (ungesalzen)
  • 500g Rhabarber, rot, geputzt
  • eine kleine Handvoll Walderbeeren (man kann auch kleine reguläre Erdbeeren nehmen oder mehr Rhababer
  • 2 Eier (M), Bio- oder Freilandhaltung
  • 125ml Milch (3.5%)
  • 125ml Sahne (zum Kochen geeignet)
  • 2 EL feinster Zucker
  • 8g Bourbon Vanillezucker
  • eine Prise Meersalz

Zubereitung

  1. Alle Zutaten zu einem glatten Teig  verkneten, zur Kugel formen, in Klarsichtfolie wickeln und 30 bis 60 Minuten in den Kühlschrank legen. 
  2. Den Backofen auf 190°C vorheizen. 
  3. Den Teig aus dem Kühlschrank nehmen. Teig auf der bemehlten Arbeitsfläche ausrollen (23 cm Durchmesser). Falls der Teig sich noch nicht so gut ausrollen läßt, gute 10 Minuten bei Zimmertemperatur liegen lassen. Tarteform einfetten, mit Teig auslegen. Teig mehrmals mit der Gabel einstechen. Mit Backpapier auslegen und mit Backbohnen beschweren und für 15 bis 20 Minuten blind backen, dann das Backpapier entfernen und weitere 5 bis 10 Minuten backen.
  4. Die Ofentemperatur auf 160° C herunterschalten.
  5. Die gemahlenen Pistazien über dem Boden verteilen, dann die Rhababerstücke und die Walderdbeeren darauf verteilen.
  6. Für den Guss die Eier, Milch, Sahne, Zucker, Vanillezucker und Salz verrühren. Eierguß auf den Rhabarber und die Walderdbeeren gießen.
  7. Tarte auf der 1. Einschubleiste von unten 30 bis 35 Minuten zu Ende backen.
  8. Nach dem Backen auf einem Kuchenrost auskühlen lassen.


For more rhubarb inspiration, take a look at some of my other recipes:

  • Springtime Baking: Yogurt Rhubarb Bundt Frühlingsgugelhupf mit Jogurt und Rhabarber (HERE)
  • Old Viennese Topfen Cake & Oven-Baked Rhubarb - Altwiener Topfentorte & Ofen-Gebackener Rhabarber (HERE)
  • Rhubarb Cordial and Rhubarb Almond Bundt - Rhabarber Sirup und Rhabarber-Mandel Kuchen (HERE)
  • Spring Rhubarb Tart - Frühlings-Rhabarbertarte (HERE)
  • Nigel Slater´s Rhubarb Cinnamon Polenta Cake (HERE)
  • Fresh Rhubarb Upside-Down Baby Cakes (HERE)
  • Hungarian Shortbread with Homemade Rhubarb Jam (HERE)


Friday, June 12, 2020

Filo Tart with White Asparagus, Goat Cheese & Meadowsweet Blossoms l Filotarte mit weißem Spargel, Ziegenkäse & Mädesüßblüten


Asparagus season is said to last only until June 24th in these parts, so before the season for the most tender white asparagus comes to an end, here is one more recipe for a dish with white asparagus. This is a delicate, pretty tart that easily serves four as an appetizer or two for lunch if served with a seasonal side salad or lovely summertime soup.


White asparagus has a mild, delicate flavor, with a hint of nuttiness. It is grown under mounds of soil to protect it from the light that would turn it green, and the spears are usually harvested early in the morning and, as mentioned above, asparagus season is short, running only from mid-April until early June, much to the dismay of many white asparagus enthusiasts.


The spears range from very thin to very fat and no matter their size, you have to peel the tough outer layers of the stalks, leaving the tips. After carefully peeling the spears, you need to snap the tough root end from the spears, as these can be stringy when cooked. White asparagus takes about twice as long to cook as green, and requires about 10 to 15 minutes of cooking, depending, of course, on the thickness of the spears.


White asparagus is traditionally served with boiled potatoes and topped with Hollandaise sauce around here. Or with chopped boiled egg and melted butter in Belgium (asperges à la flamande). After having eaten my share of white asparagus prepared the traditional way, I really enjoyed it paired with a fresh local goat cheesemeadowsweet blossoms and fresh dill from my garden on a crunchy filo base. 


The meadowsweet, or filipendula ulmaria, is a herb which has some fascinating medicinal uses including its ability to reduce pain, it is also known as a traditional hangover remedy. It is a perennial herb from the rosaceae family and can be found growing wild all over Europe and Western Asia. The most likely place you will find them growing are damp meadows where they often cover vast areas with their fluffy plumes of off-white flower heads. Meadowsweet is sweetly scented (a bit like almonds) and when you pass a large area of them, the scent is almost intoxicating.

It is no wonder then that meadowsweet has been long used as a 'strewing herb', meaning that this fragrant herb was strewn on floors to scent a room, dwelling places or buildings. It is said that meadowsweet was the favorite chamber flower of Queen Elizabeth I, as she was particularly fond of meadowsweet, it was regularly strewn (scattered) over the floor of her chamber where it gave off a pleasant smell.

The most interesting thing about this plant though is its use in the culinary world. The plant itself is edible and has many uses in the kitchen from making beer, wine and vinegars as well as adding the flowers to jam.

The Tudor herbalist and botanist John Gerard called this wild flower the 'Queene of the medowes' and described how it was used to scent people's houses and 'delighteth the senses'.(John Gerard, Gerard's Herbal)


Filo Tart with White Asparagus, Goat Cheese and Meadowsweet Blossoms
(serves 4 as an appetizer or side dish or 2 as a main dish when served with a side dish)

Ingredients
  • 5 layers of filo pastry dough (stack them up and cut out a circle that will fit your baking sheet, this is best done using kitchen scissors)
  • unsalted butter, melted (if you prefer, you can use olive oil)
  • 100g fresh goat cheese (preferably locally sourced), or use more if your tart is larger
  • about 14-18 white asparagus spears, depending on the size of the tart and the asparagus, you might need more or less
  • sea salt and freshly ground black pepper (you can also use white pepper if you prefer)
  • mild olive oil (suitable for cooking)
  • a few meadowsweet blossoms or other edible flowers
  • fresh dill or other fresh herbs
Preparation
  1. Boil in salted water and cook the peeled white asparagus until they are soft yet retain a bite, about 10 to 15 minutes. Drain and let cool for a few minutes.
  2. In the meantime, pre-heat your oven to 180°C (365°F).
  3. Lay out the first layer of filo pastry on your baking sheet lined with baking parchment, brush with some melted butter, add the second layer of filo pastry, brush with more melted butter and do the same with the remaining filo pastry, until all 5 layers are brushed and stacked.
  4. Firts, spread the goat cheese evenly over the top layer, leaving a 1.5cm (0.5in) border around the edges (an offset spatula will come in handy for this).
  5. Then top the filo tart with the cooked and cooled white asparagus.
  6. Season to taste with sea salt and freshly ground pepper.
  7. Drip a little olive oil over the entire tart.
  8. Bake the tart for about 15 to 20 minutes in your pre-heated oven, remove from the oven, place the baking sheet on a cooling rack and let the tart settle and cool for a few minutes. Then transfer to a serving platter and just before serving, sprinkle fresh dill (or other fresh, soft herbs) and meadowsweet blossoms (and/or other edible flowers) on top.
  9. Serve right away.


Filotarte mit weißem Spargel, Ziegenkäse & Mädesüßblüten

Zutaten
  • 5 Filoteigblätter (aufeinander legen mit einer Küchenschere in der Größe des Backblechs zuschneiden)
  • etwas geschmolzene Butter (wer möchte nimmt Olivenöl)
  • 100g Ziegenfrischkäse (wenn möglich regional), oder mehr falls die Tarte größer ausfällt
  • zirka 14-18 Spargelstangen, oder mehr, je nach Größe und Dicke
  • Meersalz, frisch gemahlener Pfeffer
  • Olivenöl (mild)
  • einige Mädesüssblüten oder andere essbare Blüten
  • frischer Dill oder andere frische Kräuter
Zubereitung
  1. Den Spargel schälen, kochen und etwas abkühlen lassen.
  2. In der Zwischenzeit den Ofen auf 180°C vorheizen.
  3. Für die Tarte ein Teigblatt dünn mit etwas Butter bepinseln, zweites Blatt darauflegen und dünn mit Butter bepinseln, dann das dritte, vierte und fünfte Blatt darauflegen, jeweils dünn mit Butter bepinseln. Teigblattstapel vorsichtig auf ein mit Backpapier belegtes Blech legen, dabei darauf achten, dass der Teig nicht reißt.
  4. Den Ziegenkäse auf den Teigstapel streichen (dabei einen 1.5 cm Rand aussparen).
  5. Den Spargel auf den Ziegenkäse legen.
  6. Pfeffern und salzen.
  7. Ein wenig mildes Olivenöl über die Tarte tröpfeln.
  8. Die Tarte zirka 15 bis 20 Minuten im vorgeheizten Ofen backen. Aus dem Ofen nehmen, etwas abkühlen lassen und dann auf einer Platte anrichten, dabei kurz vor dem Servieren mit Mädesüßblüten (und/oder anderen essbaren Blüten) und etwas Dill (oder anderen frischen Kräutern) bestreuen und sofort servieren.


A little fresh white asparagus, herbs and edible flowers/blossoms go a long way in this seasonal dish.


For more Filo Tart inspiration on my blog, have a look at:

  • December Filo Tart with Mini Brussels Sprouts (Winterliche Filotarte mit Rosenkohlröschen) (HERE)
  • Filo Tart with fresh Figs & Prosciutto (Filotarte mit frischen Feigen & Prosciutto) (HERE)
  • Crispy, Crackly Apple-Almond Tart (HERE)
  • River Cottage "Veg Everyday" Courgette and Filo Rice Pie (HERE)
  • Red Swiss Chard & Mushroom Filo Tart (Filotarte mit rotem Mangold & braunen Champignons) (HERE)


Monday, June 8, 2020

Grissini (Italian Breadsticks) with Red Onion Skins & Leaf-to-Root Eating Part 2 - Grissini mit roten Zwiebelschalen


Grissini are semi or fully crisp breadsticks, originally from the region of Piedmont (Piemonte), the City of Turin (Torino) in Northern Italy, to be exact. They are said to have been invented by the Italian baker Antonio Brunero for Vittòrio Amedèo II di Savoia, the Count of Savoy (1666-1732).

Grissini come in a variety of sizes, from pencil-thin grissini to baguettes or Stirato (the Italian version of the French Baguette). Grissini make a simple, tasty snack and are often served as an easy appetizer with pre-dinner drinks or as part of a wonderful antipasti spread. They are wonderful when served with an assortment of olives, Prosciutto di Parma, Italian salami, summer tomatoes and melons (like a melone di pane).

Grissini are one of my favorite savory things to bake and I enjoy experimenting with different flavors and textures, this time I decided to make them part of my Leaf-to-Root Eating series and add dried and ground up red onion skins to the dough, the same way I added them to my Quiche Crust recipe HERE.


Typical ingredients include wheat flour (so-called 'strong baking flour' or Italian '00' works best) but you can also bake them with whole wheat or rye flour, then water, salt, either olive oil or other fat and yeast or another raising agents - remember that if you chose to use whole wheat flour, you might need to add more liquid to your dough.

You can enjoy Grissini plain, with coarse sea salt, or add a few pulverized red onion skins to them which will add a nice oniony flavor and pretty flecks of color. But there are really no limits to what you can add to them, use flavorings such grated Grana Padano or Parmesan, finely chopped herbs such as rosemary or thyme, or add chopped green and black olives to the dough, or sprinkle them with black and white sesame seeds, poppy seeds, or black onion seeds (nigella seeds) just before baking. You can also add some Italian tomato paste to the dough, which will not only add color but also tomato flavor. Whichever way you make them, in general, Grissini will keep well if kept in an airtight container and they can be crisped in the oven for a couple of minutes if they become a little soft.


"You can never have too many grissini in life." Dan Lepard, The Guardian (18.06.2010)


Grissini with Red Onion Skins

Ingredients
  • 10g fresh yeast (alternatively use 1 tbsp dried yeast)
  • 125ml tepid water
  • 250g strong white bread flour (I used Italian flour marked 00), plus extra for dusting
  • a handful of red onions skins, washed, dried and ground up* (from organic onions, if possible)
  • ½ tsp fine sea salt
  • 1 tbsp mild olive oil (suitable for baking)
  • a bit of fresh water (for brushing)
  • coarse sea salt (for sprinkling)
Preparation
  1. In a small bowl combine the yeast with the tepid water and set aside until foamy.
  2. In another bowl whisk together the flour with the ground onion skins and the salt, then add the olive oil and the yeast-water mixture. Knead with the dough hook or your hands until the dough comes together and is smooth and elastic (this will take close to 5 minutes).
  3. Cover and set aside for 30 minutes.
  4. Line two baking sheets with baking parchment and pre-heat the oven to 350°F (180°C).
  5. Dust the work surface with flour and roll the dough out to a rectangular shape.
  6. Cut the dough into 25 to 30 strips. Use your hands to roll each strip into a thin log (each roughly 25cm long), starting at the center and moving outwards, stretching the dough slightly as you roll. Press each end lightly with your thumb, to make an 'ear' shape or, alternatively, you can twist the dough logs for a bit of different look.
  7. Place on the prepared baking sheets, brush with a bit of water, sprinkle with some coarse sea salt and bake for about 10 to 15 minutes until crisp and golden.
  8. Transfer to wire racks to cool. They will keep for about a week in an airtight container.
* NOTE about the onion skins: inorder to 'pulverize' them, they have to be totally dry. If you find it difficult to grind them, add a bit of flour to your kitchen blender and blend them as finely or as coarsely as you whish, before adding them to the remaining flour.


Grissini mit roten Zwiebelschalen

Zutaten
  • 10g frische Hefe
  • 125ml lauwarmes Wasser
  • 250g Mehl (entweder italienisches Mehl '00' ODER Type 550)
  • einige rote Zwiebelschalen (gewaschen, getrocknet und gemahlen) - Bio-Qualität wenn möglich
  • ½ TL feines Meersalz
  • 1 EL mildes Olivenöl (zum Backen geeignet)
  • etwas frisches Wasser (zum Bestreichen)
  • grobes Meersalz (zum Bestreuen)
Zubereitung
  1. Die Hefe mit 125ml lauwarmen Wasser verrühren.
  2. Das Mehl in einer Schüssel mit den Zwiebelschalen und dem Salz mischen, Olivenöl und Hefewasser dazugeben und alles von Hand oder mit dem Knethaken verkneten, bis der Teig geschmeidig ist (das dauert zirka 5 Minuten). Den Teig zu einer Kugel formen, abdecken und zirka 30 Minuten an einem warmen Ort gehen lassen.
  3. Den Backofen auf 180°C vorheizen, zwei Backblecke mit Backpapier auslegen. Teig rechteckig ausrollen (1/2 cm dick) und mit einem Messer zu dünnen Streifen schneiden und diese jeweils zu dünnen Strängen rollen.
  4. Die Teigstränge auf das Backblech legen, mit ein wenig Wasser bepinseln und etwas grobem Meersalz bestreuen.
  5. In der Mitte des Ofens etwa 10 bis 15 Minuten backen, am Rande dürfen die Grissini etwas Farbe annehmen, ansonsten sollten sie relativ hell sein. Herausnehmen und auf einem Gitter auskühlen lassen. Gut verpackt sind die Grissini ein paar Tage haltbar.


For more Leaf-to-Root Eating inspiration, have a look at my recipes for:

  • Wild Garlic Quiche with Onion Skins in the Crust (HERE)
  • Red Beet Top & Goat’s Cheese Bruschetta (HERE)


For more Grissini inspiration on my blog, have a look at:

  • Grissini with Garden Herbs, Parmesan & Tomato (Grissinis mit Rosmarin, Parmesan & Tomatenpüree) (HERE)


Wednesday, June 3, 2020

Elderflower Fritters l Ausgebackene Holunderblüten


Elderflowers are by far the most delicious edible flowers, in my opinion. Their smell and taste is intoxicating. When it’s elderflower season, I enjoy making homemade elderflower cordial. I also love to bake cookies and cakes like my Elderflower Cake with Strawberry-Elderflower Filling (HERE) or breads like my Elderflower Bread (HERE) with homemade elderfower cordial and freshly picked elderflower blossoms.

I pick my elderflowers in our garden but if you do not have a garden, then you have to go out and look for elderflowers. They are quite common at the side of roads, but for the best flowers, you need to head off into a forest or some other wild spot to find pretty, fresh blossoms. If you find some, pick a few but make sure that they grow far away from traffic. For any recipe that calls for fresh elderflowers, you have to make sure to pick them on the same day that you like to use them as they do not keep well once you have gathered them.


As far as the batter for my recipe is concerned, you need a really light batter or the lacy effect of the flowers is lost. The batter should barely cover them and cook particularly quickly, leaving the fritters to come out light and crisp, the batter clinging to them gently. For a more robust batter, you will have to increase the amount of flour. But I recommend that you do a test fry first, if the batter is too thick, the fritters will puff up into a single mass. Then it’s time to try again with a thinner batter (add a bit more liquid).

Just make sure the flowers are well-coated, but allow a lot of the batter to drip off and shake the flowerhead lightly to get rid of any drips. Then drop it into the hot oil, and, like magic, it will open up and you will be left with the much-anticipated lacy, fluffy looking result, with the batter forming little 'pearls' around the flowers.


Once cooked, I do not like to dredge them in sugar but like to dust them with powdered sugar just before serving – otherwise the powdered sugar might just soak up oil and become mush. But if you prefer to use regular fine sugar, by all means, go for it and then your fritters will have a certain crunch and might sparkle in the summer sun.


Elderflower fritters are quite unusual. You need to like the elderflower flavor (a bit like a muscat grape taste), and you need to be in a position to serve them promptly – you want them to be warm and absolutely crisp. A nice, fun way to finish off an informal lunch or summer supper perhaps. When you bite in, there is a combination of clean, crisp batter with the sweetness of the sugar, and then the aroma and flavor of the elderflowers comes through.


As I mentiones, there are a few elder bushes in our garden. And I like to use elderflowers and, later in fall elderberries, for baking and cooking. Elderflowers are blooming in May and June, only for a couple of weeks and one of my favorite recipes at this time of year is the one for Elderflower Fritters or Ausgebackene Holunderblüten as we like to refer to them. Their season is short and the flowers are elusive, so make them while you can.


Elderflower Fritters

Ingredients
  • 50g unsalted butter
  • 200g AP (plain) flour
  • a pinch of fine sea salt
  • 250ml mineral water (sparkling water)
  • 2 eggs (L), free range or organic
  • 8g pure vanilla sugar (or use homemade)
  • 1 tbsp superfine (caster) sugar
  • 14 to 16 freshly picked heads of elderflower blossoms
  • neutral tasting oil for frying
  • powdered sugar for dusting

Preparation
  1. Melt the butter. In a bowl, whisk together the flour with the salt and the mineral water.
  2. Separate the eggs. Add the egg yolks and the melted butter to the flour mixture. 
  3. Beat the egg whites in a grease free bowl with the vanilla sugar and the sugar until stiff peaks form. Fold the egg whites into the batter and mix gently until you have a thick batter.
  4. Gently shake any dirt or insects off your elderflower heads and do not wash them as they will loose a lot of their flavor.
  5. Heat the oil in a pan over medium heat.
  6. Holding the elderflowers by their stems, dip each elderflower into the batter, then drop them into the pan with the hot oil, flower side down.
  7. Fry until lightly golden. Remove from the oil and place them on paper kitchen towel.
  8. Dust the elderflower fritters with powdered sugar and serve straight away – if you would like to keep them warm while preparing the remaining flower heads, place them in a warm oven for a few minutes (about 125°F will do).
  9. You can serve them simply dusted with powdered sugar.


Ausgebackene Holunderblüten (Hollerküchle)

Zutaten
  • 50g Butter
  • 200g Mehl (Type 405)
  • eine Prise feines Salz
  • 250ml Mineralwasser
  • 2 Eier (L), Freilandhaltung oder Bio
  • 8g Bourbon Vanillezucker
  • 1 EL feinster Zucker
  • 14 bis 16 frisch gepflückte Holunderblüten mit Stiel
  • Öl oder Butterschmalz oder neutrales Öl zum Ausbacken
  • Puderzucker zum Bestäuben

Zubereitung
  1. Für den Ausbackteig die Butter schmelzen. 
  2. Das Mehl mit einer Prise Salz und dem Mineralwasser zu einem Teig glatt rühren
  3. Die Eier trennen. Die Eigelbe und die geschmolzene Butter unter den Teig rühren. 
  4. Die Eiweiße mit dem Vanillezucker und Zucker steif schlagen und unterheben (dickflüssiger Teig).
  5. Die Holunderblüten verlesen (über einem Küchentuch ausschütteln, nicht waschen).
  6. Öl oder Butterschmalz in einem flachen Topf erhitzen. Es ist heiß genug, wenn an einem ins Fett getauchten Holzlöffel Bläschen aufsteigen.
  7. Die Holunderblüten am Stiel anfassen, in den Teig tauchen, gut abtropfen lassen und mit dem Stiel nach oben in das heiße Fett tauchen und goldgelb ausbacken.
  8. Ausgebackene Holunderblüten auf Küchenpapier abtropfen lassen und mit Puderzucker bestreut frisch servieren (die fertigen Holunderblüten können bei 52 °C im Backofen warmgehalten werden, ganz frisch aus der Pfanne schmecken sie aber am besten).


For more recipe ideas with elderflowers, have a look at my recipes for:

  • Elderflower Bread (Holunderblüten Brot) (HERE)
  • Elderflower Cake with Strawberry-Elderflower Filling (Holunderblütenkuchen mit Erdbeer-Holunderblütenmarmelade) (HERE)
  • Elderflower Shortbread (Holunderblüten Shortbread) (HERE)